Canon CanoScan 9000F 9000F Quick Start Guide - Page 12
Using the Scanner Buttons, AUTO SCAN Button, PDF Buttons, COLOR Button, CUSTOM Button - manual pdf
 |
View all Canon CanoScan 9000F manuals
Add to My Manuals
Save this manual to your list of manuals |
Page 12 highlights
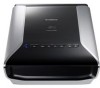
Using the Scanner Buttons Using the Scanner Buttons Scanner buttons allow you to copy, scan, e-mail, and save scanned images in PDF format with a press of a button. Simply place your document on the scanner, and then press the scanner button for the required function. For more information, see "On-Screen Manual". AUTO SCAN Button Discriminates the document type automatically, then scans and saves it with appropriate settings. PDF Buttons PDF buttons allow you to easily create PDF files according to your needs. Note that these buttons are not labeled on the scanner. COLOR Button BLACK & WHITE Button Scans color images in A4 or Letter size* at Scans black & white images in A4 or Letter 300 dpi by default. size* at 300 dpi by default. CUSTOM Button FINISH Button Scans images in user-specified settings. Ends the operation and saves the scanned image in a PDF file. *The size may differ depending on your system environment. COPY Button Prints (copies) the scanned image with a printer. E-MAIL Button Attaches the scanned image to a new e-mail message. • Before using scanner buttons, make sure that the required software programs for each function are installed on your computer using the supplied CD-ROM. See "Setup CD-ROM" on page 3. If the scanner buttons do not work properly, see "Troubleshooting" in "On-Screen Manual". • For Macintosh: If you have not restarted the computer since installing the software, you need to restart the computer before using the scanner buttons first. • When you press the scanner buttons, the POWER lamp gets blinking. 10
-
 1
1 -
2
-
3
-
4
-
5
-
6
-
 7
7 -
 8
8 -
 9
9 -
 10
10 -
 11
11 -
 12
12 -
 13
13 -
 14
14 -
 15
15 -
 16
16 -
 17
17 -
18
-
19
 |
 |
