Canon Color imageCLASS 8180c imageCLASS MF8180c Quick Start Guide - Page 8
Load paper, calibrate itself.
 |
View all Canon Color imageCLASS 8180c manuals
Add to My Manuals
Save this manual to your list of manuals |
Page 8 highlights
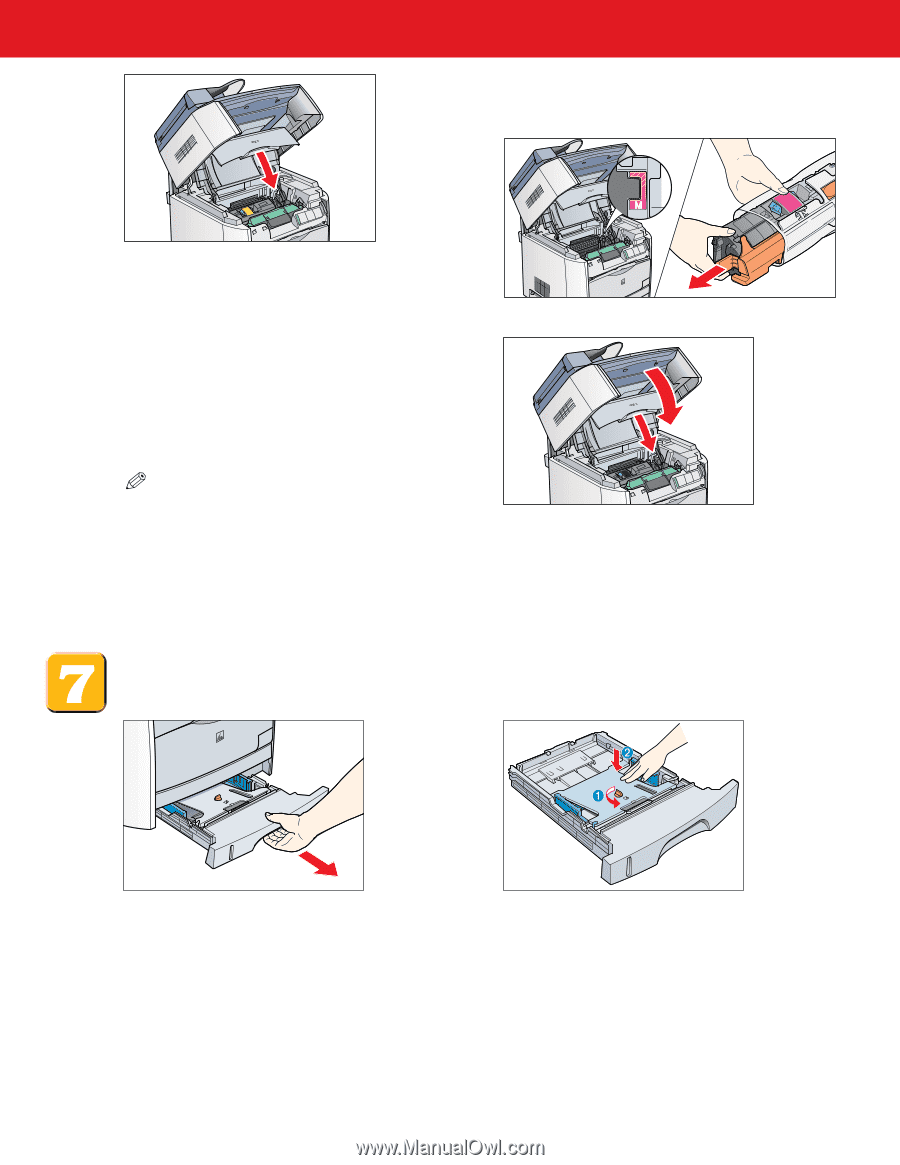
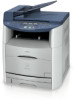
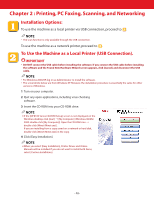
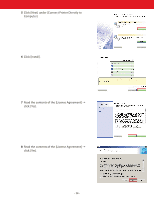
● For each cartridge, match the color marking on the cartridge receptacle in the machine to the color marking on the cartridge itself. 13Close the cartridge cover and wait for the cartridge cradle to rotate and stop, and then open the cover again. Allow approximately two seconds for the cartridge cradle to rotate to the next receptacle. The receptacles appear in this order: Yellow > Magenta > Cyan > BlacK. 14Repeat steps 8 to 13 until all four toner cartridges are installed. NOTE ● If the cartridge cover is closed during those steps or the spent toner cartridge is not in the replacement position, close the cover, then open it again when the whirring sound stops. Repeat this process until the cartridge you want to replace is in the correct position. 15Close the cartridge cover and lower the scanning platform. The LCD flashes PLEASE WAIT until calibration is complete. Please allow a few minutes for the machine to calibrate itself. Load paper. 1 Grasp paper cassette, pull it out completely, and set it aside. 2 Turn and pull out the shipping material, and press the inner plate to set it on the bottom. -8-
-
 1
1 -
2
-
 3
3 -
 4
4 -
 5
5 -
 6
6 -
 7
7 -
 8
8 -
 9
9 -
 10
10 -
 11
11 -
 12
12 -
 13
13 -
14
-
15
-
16
-
17
-
18
-
19
-
20
-
21
-
22
-
23
-
24
 |
 |