Canon Color imageCLASS MF726Cdw Getting Started Guide - Page 9
Specifying the Initial Settings, Choosing the Method to Connect the, Machine to the Computer - wireless setup
 |
View all Canon Color imageCLASS MF726Cdw manuals
Add to My Manuals
Save this manual to your list of manuals |
Page 9 highlights
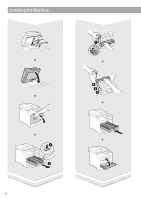
Specifying the Initial Settings The first time you turn on the power, follow the instructions on the screen.For details on navigating the menu and how to input the numbers, see "Navigating the Menu and Text Input Method" ( P.8). ● Complete settings starting with language and through to date and time Follow the instructions on the screen, set the language,region,time zone, and date and time. Language English Japanese French Spanish German Italian Current Date/Time Settings 10/10 2015 10:26AM (0:00-12:59) Apply ● Specify settings for USB connection It is recommended that settings be specified correctly even when not using a USB connection. An incorrect setting may prevent the machine from functioning properly. Configure the settings for connecting to PC using USB. Select the OS of the PC to connect in next screen for appropriate configuration of USB connection settings. Previous Next Select OS for USB Connected PC Mac OS Windows Other Do not connect the USB cable at this time. To specify settings later, please refer to "Setting Menu List" in the e-Manual. e-Manual "Setting Menu List" ▶ "System Management Settings" ● Correcting the gradation When color correction is performed, you can make copies and prints that more closely reproduce the colors and density of the original document. For details on how to perform color correction, see the e-Manual. e-Manual "Maintenance" ▶ "Maintaining and Improving Print Quality" ▶ "Correcting the Gradation" Do you want to correct the color for a more accurate reproduction of the original? Steps 1. Print Image for Adjust. 2. Scan Image for Adjustment Yes No \ Start NOTE • Even if you select on the last screen shown above, you can start the color correction at your convenience. Please refer the "Correcting the Gradation" in the e-manual. Choosing the Method to Connect the Machine to the Computer ● Connecting via a Wired LAN You can connect the machine to the computer through a wired router. Use the LAN cables to connect the machine to the wired router (access point). Connect the computer to the router by cable or wirelessly. Make sure that there is an available port in the router to connect the machine and the computer. Have a LAN Cable of Category 5 twisted-pair cable or higher ready. ● Connecting via a USB cable You can connect the machine to the computer using a USB cable. Make sure that the USB cable you use has the following mark. ● Connecting via a Wireless LAN You can connect the machine to the computer through a wireless router*. Since it is connected to wireless, no LAN cables are needed. * A wireless router (access point), which supports IEEE802.11b/g/n, is required. Connect the computer to the router by cable or wirelessly. Check if your router has a button Select from the following two methods depending on the router (access point) that you are using. ● There is a button. En You can easily setup if your router (access point) has a button, and if the mark is on the router. ● There is no button. If there is no button on your router (access point), you may manually select SSID and complete the settings. NOTE • If you are looking to install your new device via a Wireless Network connection, you can find a video and written guides with step-by-step instruction to assist you through the process from the following URL: www.usa.canon.com/WirelessHelp Viewing these guides will ensure a smooth setup of the device into your existing wireless environment. ● Direct Connection Connect a mobile device to the machine wirelessly and directly without routing through a wireless LAN router (or access point) e-Manual "Network" ▶ "Configuring the Settings for Direct Connection (Access Point Mode)" 9
-
 1
1 -
2
-
3
-
 4
4 -
 5
5 -
 6
6 -
 7
7 -
 8
8 -
 9
9 -
 10
10 -
 11
11 -
 12
12 -
 13
13 -
 14
14 -
15
-
16
-
17
-
18
-
19
-
20
-
21
-
22
-
23
-
24
-
25
-
26
-
27
-
28
-
29
-
30
-
31
-
32
-
33
-
34
-
35
-
36
-
37
-
38
-
39
-
40
-
41
-
42
-
43
-
44
-
45
-
46
-
47
-
48
-
49
-
50
-
51
-
52
-
53
-
54
-
55
-
56
-
57
-
58
-
59
-
60
-
61
-
62
-
63
-
64
 |
 |
