Canon DR 7550C Reference Guide - Page 45
Cleaning the Scanning Glass and Rollers, Maintenance - replacement rollers
 |
UPC - 013803109962
View all Canon DR 7550C manuals
Add to My Manuals
Save this manual to your list of manuals |
Page 45 highlights
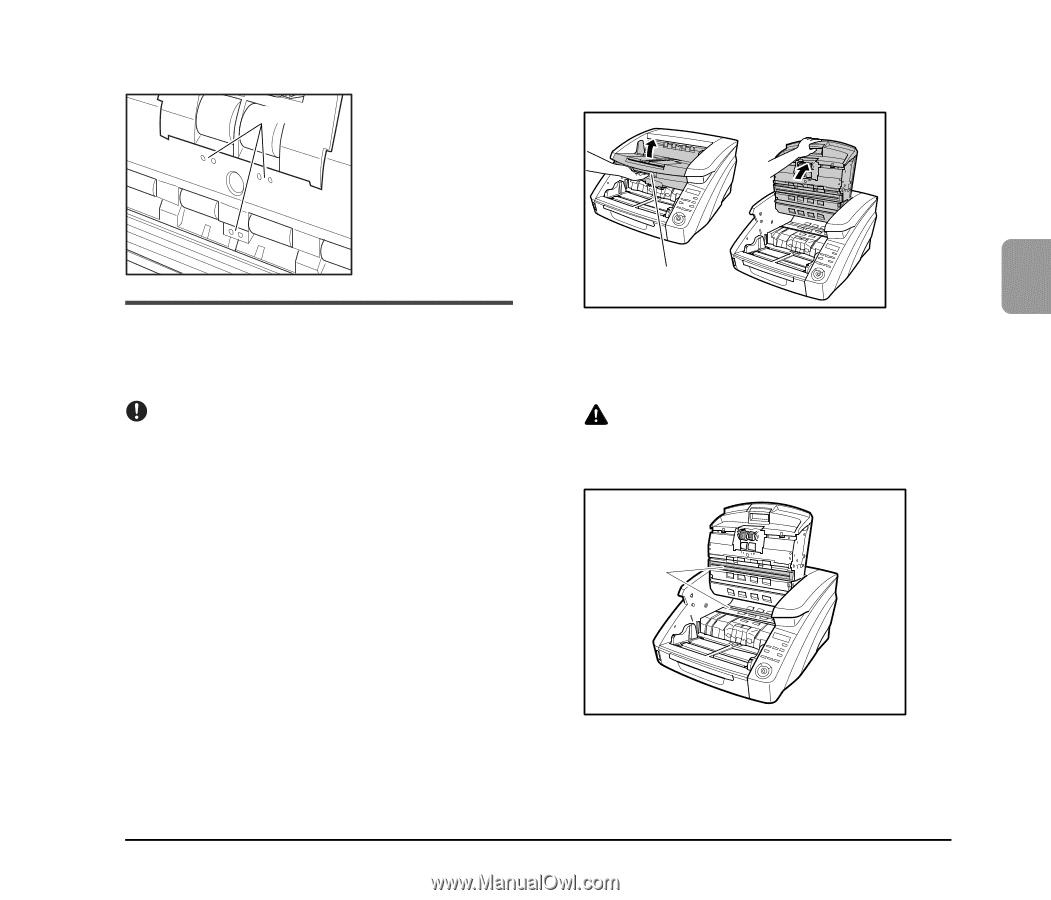
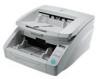
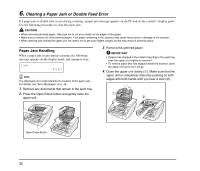
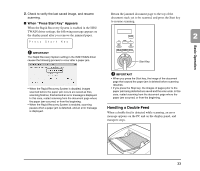
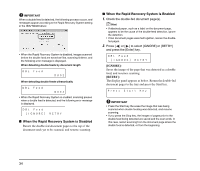
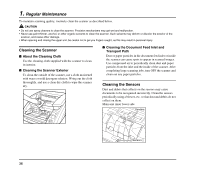
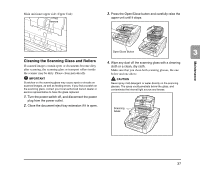
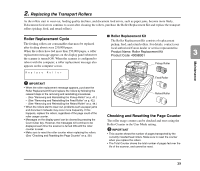
Main unit inner upper side (Upper Unit) Sensors 3. Press the Open/Close button and carefully raise the upper unit until it stops. Open/Close Button 3 Maintenance Cleaning the Scanning Glass and Rollers If scanned images contain spots or documents become dirty after scanning, the scanning glass or transport rollers inside the scanner may be dirty. Please clean periodically. IMPORTANT Scratches on the scanning glass may cause spots or streaks on scanned images, as well as feeding errors. If you find a scratch on the scanning glass, contact your local authorized Canon dealer or service representative to have the glass replaced. 1. Turn the power switch off, and disconnect the power plug from the power outlet. 2. Close the document eject tray extension if it is open. 4. Wipe any dust off the scanning glass with a cleaning cloth or a clean, dry cloth. Make sure that you clean both scanning glasses, the one below and one above. CAUTION Never spray mild detergent or water directly on the scanning glasses. The spray could penetrate below the glass, and contaminate the internal light source and lenses. Scanning Glass 37
-
 1
1 -
2
-
3
-
4
-
5
-
6
-
7
-
8
-
9
-
10
-
11
-
12
-
13
-
14
-
15
-
16
-
17
-
18
-
19
-
20
-
21
-
22
-
23
-
24
-
25
-
26
-
27
-
28
-
29
-
30
-
31
-
32
-
33
-
34
-
35
-
36
-
37
-
38
-
39
-
 40
40 -
 41
41 -
 42
42 -
 43
43 -
 44
44 -
 45
45 -
 46
46 -
 47
47 -
 48
48 -
 49
49 -
 50
50 -
51
-
52
-
53
-
54
-
55
-
56
-
57
-
58
-
59
-
60
-
61
-
62
-
63
-
64
-
65
-
66
-
67
-
68
 |
 |