Canon EOS-1Ds Mark III EOS-1Ds Mark III Instruction Manual - Page 36
Basic Operation
 |
UPC - 013803079265
View all Canon EOS-1Ds Mark III manuals
Add to My Manuals
Save this manual to your list of manuals |
Page 36 highlights
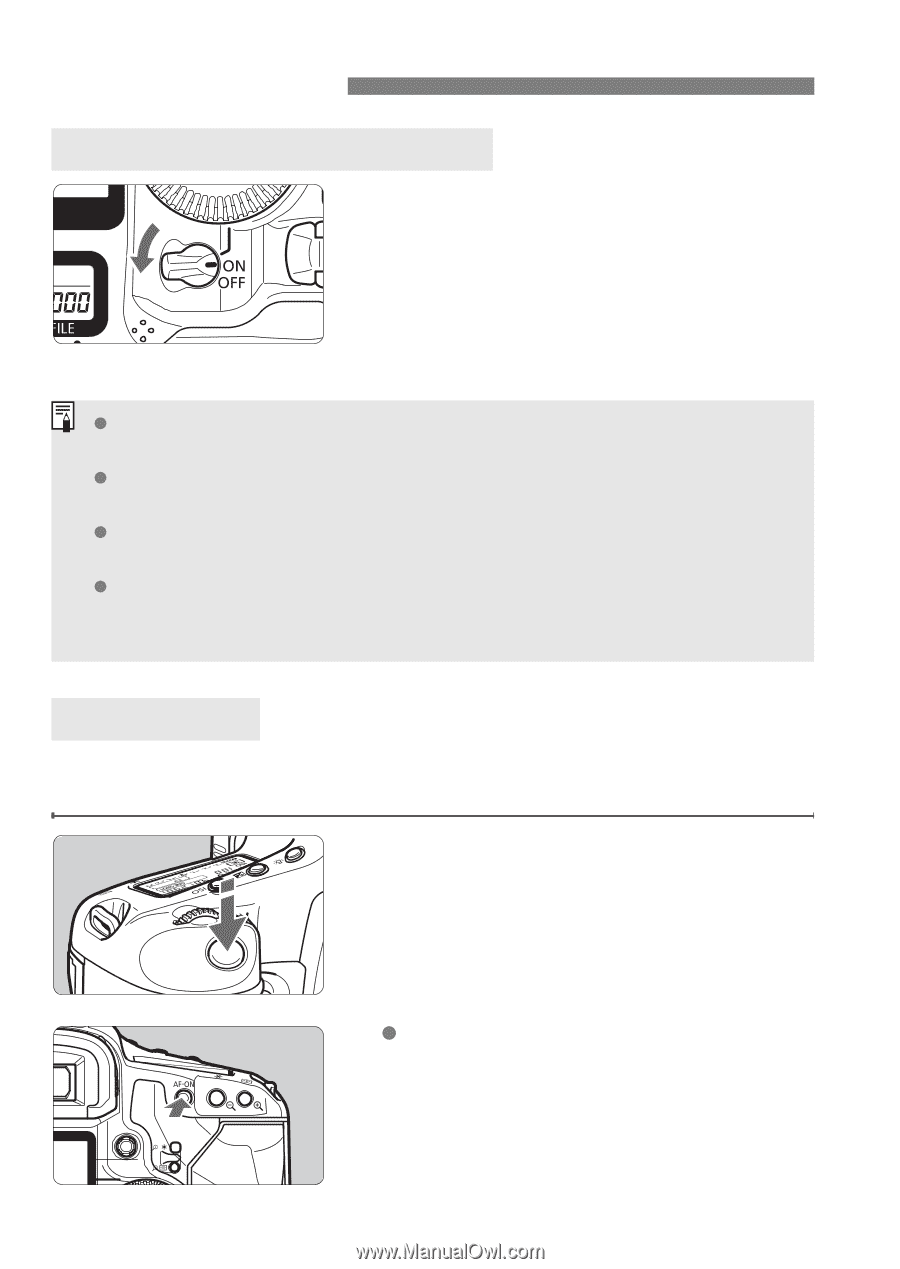
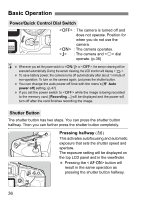
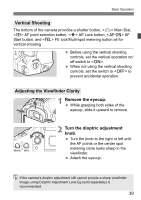
Basic Operation Power/Quick Control Dial Switch : The camera is turned off and does not operate. Position for when you do not use the camera. : The camera operates. : The camera and dial operate. (p.38) Whenever you set the power switch to or , the sensor cleaning will be executed automatically. During the sensor cleaning, the LCD monitor will display . To save battery power, the camera turns off automatically after about 1 minute of non-operation. To turn on the camera again, just press the shutter button. You can change the auto power-off time with the menu's [5 Auto power off] setting. (p.47) If you set the power switch to while the image is being recorded to the memory card, [Recording ...] will be displayed and the power will turn off after the card finishes recording the image. Shutter Button The shutter button has two steps. You can press the shutter button halfway. Then you can further press the shutter button completely. Pressing halfway (9) This activates autofocusing and automatic exposure that sets the shutter speed and aperture. The exposure setting will be displayed on the top LCD panel and in the viewfinder. Pressing the button will result in the same operation as pressing the shutter button halfway. 36
-
 1
1 -
2
-
3
-
4
-
5
-
6
-
7
-
8
-
9
-
10
-
11
-
12
-
13
-
14
-
15
-
16
-
17
-
18
-
19
-
20
-
21
-
22
-
23
-
24
-
25
-
26
-
27
-
28
-
29
-
30
-
 31
31 -
 32
32 -
 33
33 -
 34
34 -
 35
35 -
 36
36 -
 37
37 -
 38
38 -
 39
39 -
 40
40 -
 41
41 -
42
-
43
-
44
-
45
-
46
-
47
-
48
-
49
-
50
-
51
-
52
-
53
-
54
-
55
-
56
-
57
-
58
-
59
-
60
-
61
-
62
-
63
-
64
-
65
-
66
-
67
-
68
-
69
-
70
-
71
-
72
-
73
-
74
-
75
-
76
-
77
-
78
-
79
-
80
-
81
-
82
-
83
-
84
-
85
-
86
-
87
-
88
-
89
-
90
-
91
-
92
-
93
-
94
-
95
-
96
-
97
-
98
-
99
-
100
-
101
-
102
-
103
-
104
-
105
-
106
-
107
-
108
-
109
-
110
-
111
-
112
-
113
-
114
-
115
-
116
-
117
-
118
-
119
-
120
-
121
-
122
-
123
-
124
-
125
-
126
-
127
-
128
-
129
-
130
-
131
-
132
-
133
-
134
-
135
-
136
-
137
-
138
-
139
-
140
-
141
-
142
-
143
-
144
-
145
-
146
-
147
-
148
-
149
-
150
-
151
-
152
-
153
-
154
-
155
-
156
-
157
-
158
-
159
-
160
-
161
-
162
-
163
-
164
-
165
-
166
-
167
-
168
-
169
-
170
-
171
-
172
-
173
-
174
-
175
-
176
-
177
-
178
-
179
-
180
-
181
-
182
-
183
-
184
-
185
-
186
-
187
-
188
-
189
-
190
-
191
-
192
-
193
-
194
-
195
-
196
-
197
-
198
-
199
-
200
-
201
-
202
-
203
-
204
-
205
-
206
-
207
-
208
-
209
-
210
-
211
-
212
 |
 |