Canon EOS-1Ds Mark III Digital Photo Professional 3.2 Instruction Manual Macin - Page 32
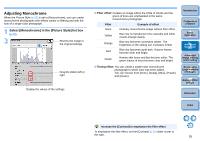
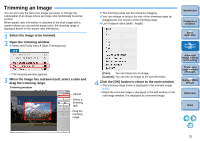
Trimming an Image, drag the trimming range.
 |
UPC - 013803079265
View all Canon EOS-1Ds Mark III manuals
Add to My Manuals
Save this manual to your list of manuals |
Page 32 highlights
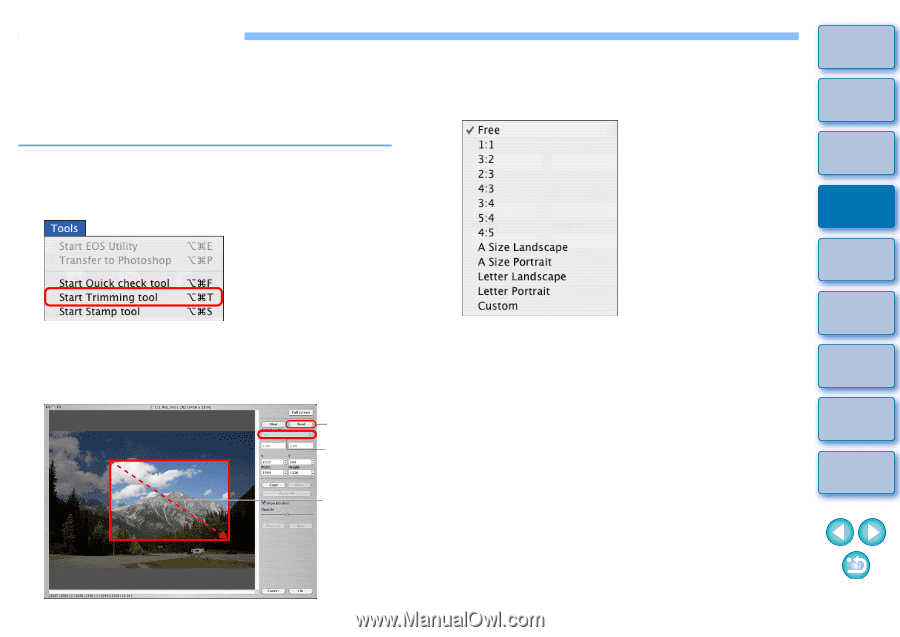
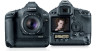
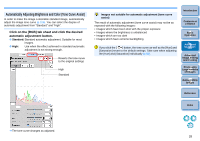
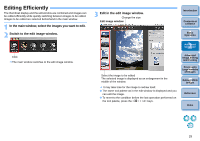
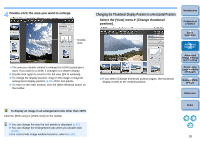
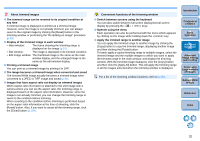
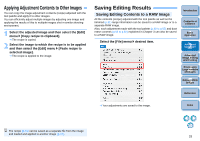
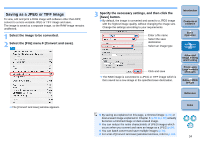
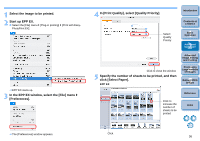
Trimming an Image You can trim only the part of an image you need, or change the composition of an image where an image shot horizontally becomes vertical. When aspect ratio information is attached to the shot image with a camera where you can set the aspect ratio, the trimming range is displayed based on the aspect ratio information. 1 Select the image to be trimmed. 2 Open the trimming window. O Select the [Tools] menu [Start Trimming tool]. ¿ The trimming window appears. 3 When the image has redrawn itself, select a ratio and drag the trimming range. Trimming window Cancel Select a trimming ratio Drag the trimming range O The trimming range can be moved by dragging. O You can enlarge or reduce the size of the trimming range by dragging the four corners of the trimming range. O List of aspect ratios (width : height) [Free]: You can freely trim an image. [Custom]: You can trim an image at the specified ratio. 4 Click the [OK] button to return to the main window. ¿ The trimming range frame is displayed in the trimmed image (p.97). ¿ When the trimmed image is displayed in the edit window or the edit image window, it is displayed as a trimmed image. Introduction Contents at a Glance 1Basic Operation 2Advanced Operation 3Advanced Image Editing and Printing 4 Processing Large Numbers of Images 5 Editing JPEG Images Reference Index 31
-
 1
1 -
2
-
3
-
4
-
5
-
6
-
7
-
8
-
9
-
10
-
11
-
12
-
13
-
14
-
15
-
16
-
17
-
18
-
19
-
20
-
21
-
22
-
23
-
24
-
25
-
26
-
 27
27 -
 28
28 -
 29
29 -
 30
30 -
 31
31 -
 32
32 -
 33
33 -
 34
34 -
 35
35 -
 36
36 -
 37
37 -
38
-
39
-
40
-
41
-
42
-
43
-
44
-
45
-
46
-
47
-
48
-
49
-
50
-
51
-
52
-
53
-
54
-
55
-
56
-
57
-
58
-
59
-
60
-
61
-
62
-
63
-
64
-
65
-
66
-
67
-
68
-
69
-
70
-
71
-
72
-
73
-
74
-
75
-
76
-
77
-
78
-
79
-
80
-
81
-
82
-
83
-
84
-
85
-
86
-
87
-
88
-
89
-
90
-
91
-
92
-
93
-
94
-
95
-
96
-
97
-
98
-
99
-
100
-
101
-
102
-
103
-
104
-
105
-
106
-
107
-
108
-
109
-
110
-
111
-
112
-
113
-
114
-
115
-
116
 |
 |