Canon EOS 5D Mark III Quick Start Guide - Page 1
Canon EOS 5D Mark III Manual
 |
View all Canon EOS 5D Mark III manuals
Add to My Manuals
Save this manual to your list of manuals |
Page 1 highlights
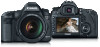
This quick guide explains basic function settings and how to shoot and play back images. You can take this guide with you for shooting. For detailed instructions, refer to the EOS 5D Mark III Instruction Manual. E CPQ-E002-000 English Edition © CANON INC. 2012 Quick Start Guide 1 Insert the battery. 6 2 3 Insert a card.* The camera-front side slot is for a CF card, and the camera-back side slot is for an SD card. 7 Attach the lens. Align it with the red dot. 8 While holding down the center of the Mode Dial, set it to (Scene Intelligent Auto). Focus the subject. Aim the viewfinder center over the subject and press the shutter button halfway to autofocus. Take the picture. Press the shutter button completely to take the picture. 4 Set the lens focus mode switch to . 9 View the image. The captured image will be displayed for 2 sec. on the LCD monitor. 5 Set the power switch to . * Shooting is possible with either a CF card or an SD card in the camera. The M on the right of the function indicates that the function is available only when the Mode Dial is set to d,s,f,a, or F. Battery Life with viewfinder shooting Temperature At 23°C / 73°F At 0°C / 32°F Possible shots Approx. 950 shots Approx. 850 shots Image Playback Index 6 Magnify 6 0 u x Playback L Erase 9 56 Select image BShooting information Preparation Menu Operations button LCD monitor Main Dial button Quick Control Dial button 1. Press the button to display the menu. 2. Each time you press the button, the main tab will switch. 3. Turn the dial to select a secondary tab, then turn the dial to select the desired item. 4. Press to display the setting. 5. Turn the dial to set the item, then press . A Mode Image-recording Quality Select [z1: Image quality], then press . Turn the or dial to select the image-recording quality, then press . Image-recording quality Pixels Possible shots RAW: Turn the dial to select the quality. JPEG: Turn the dial to select the quality. A Picture StyleN Press the button. Select [A], then press . Turn the dial to select the Picture Style, then press . d/s/f/a/F Main Modes Secondary tabs tabs Menu items Menu settings Style Description D Auto Color tones optimized for the particular scene. P Standard Vivid colors and sharp images. Q Portrait Nice skin tones and slightly sharp images. R Landscape Vivid blue skies and greenery and very sharp images. V Monochrome Black-and-white images. For (Neutral) and (Faithful), refer to the camera's instruction manual. Q Quick Control Press the button. The Quick Control screen will appear. White balance correction Aperture Shutter speed Shooting mode Highlight tone priority ISO speed Exposure compensation/ AEB setting Flash exposure compensation Custom Controls Picture Style Image-recording AF mode quality White balance Recording function/ Metering mode Drive mode Card selection Auto Lighting Optimizer Tilt the to select the function, then turn the or dial to set it. In the mode, you can only select or set the recording function, card, image-recording quality, and drive mode. Electronic Level Each time you press the button, the screen display will change. Display the electronic level. Custom Functions 81: Exposure Exposure level increments ISO speed setting increments Bracketing auto cancel Bracketing sequence Number of bracketed shots Safety shift 82: Display/Operation Warnings z in viewfinder LV shooting area display Dial direction during Tv/Av Multi function lock Custom Controls 83: Others Add cropping information Default Erase option 84: Clear Clear all Custom Func. (C.Fn)
-
 1
1 -
 2
2
 |
 |
