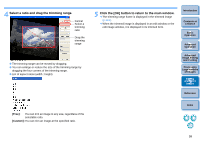
Canon EOS 60D Digital Photo Professional 3.9 for Windows Instruction Manual - Page 102
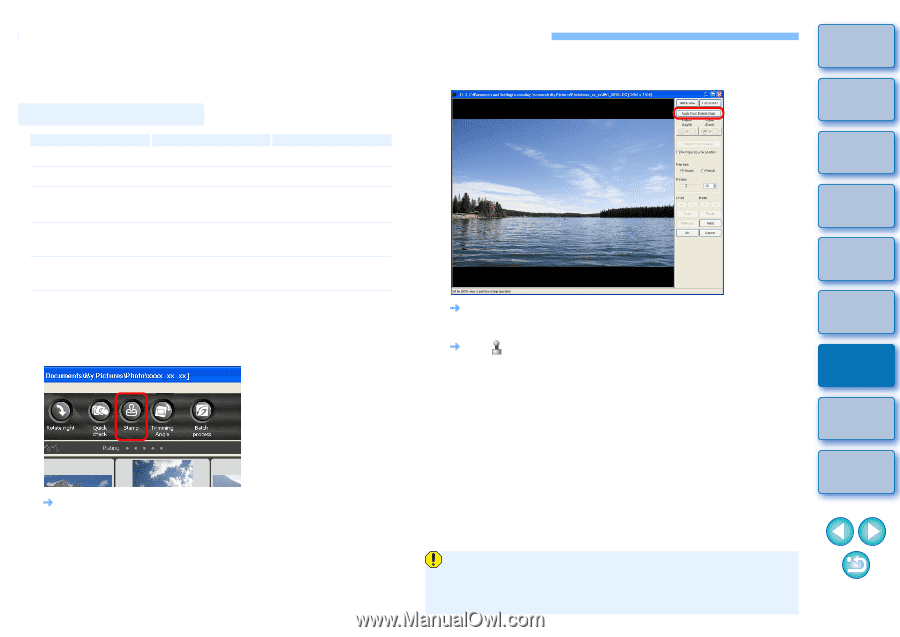
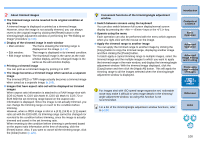
Performing Automatic Dust Erasure Processing, Dust Delete Data] button.
 |
UPC - 013803129113
View all Canon EOS 60D manuals
Add to My Manuals
Save this manual to your list of manuals |
Page 102 highlights
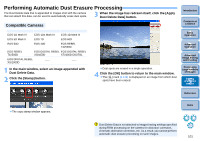
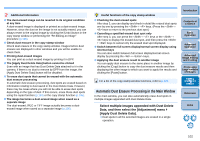
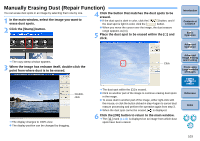
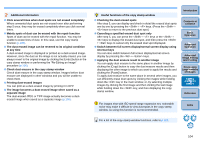
Performing Automatic Dust Erasure Processing The Dust Delete Data that is appended to images shot with the camera that can attach this data, can be used to automatically erase dust spots. 3 When the image has redrawn itself, click the [Apply Dust Delete Data] button. Compatible Cameras EOS-1D Mark IV EOS-1Ds Mark III EOS-1D Mark III EOS 5D Mark II EOS 7D EOS 60D EOS 50D EOS 40D EOS REBEL T2i/550D EOS REBEL T1i/500D EOS DIGITAL REBEL EOS DIGITAL REBEL XSi/450D XTi/400D DIGITAL EOS DIGITAL REBEL _ _ XS/1000D 1 In the main window, select an image appended with Dust Delete Data. 2 Click the [Stamp] button. ¿ Dust spots are erased in a single operation. 4 Click the [OK] button to return to the main window. ¿ The [ ] mark (p.112) is displayed on an image from which dust spots have been erased. Introduction Contents at a Glance 1Basic Operation 2Advanced Operation 3Advanced Image Editing and Printing 4 Processing Large Numbers of Images 5Editing JPEG/TIFF Images Reference ¿ The copy stamp window appears. Index Dust Delete Data is not attached to images having settings specified during RAW processing on the camera for distortion correction, chromatic aberration correction, etc. As a result, you cannot perform automatic dust erasure processing on such images. 101
-
 1
1 -
2
-
3
-
4
-
5
-
6
-
7
-
8
-
9
-
10
-
11
-
12
-
13
-
14
-
15
-
16
-
17
-
18
-
19
-
20
-
21
-
22
-
23
-
24
-
25
-
26
-
27
-
28
-
29
-
30
-
31
-
32
-
33
-
34
-
35
-
36
-
37
-
38
-
39
-
40
-
41
-
42
-
43
-
44
-
45
-
46
-
47
-
48
-
49
-
50
-
51
-
52
-
53
-
54
-
55
-
56
-
57
-
58
-
59
-
60
-
61
-
62
-
63
-
64
-
65
-
66
-
67
-
68
-
69
-
70
-
71
-
72
-
73
-
74
-
75
-
76
-
77
-
78
-
79
-
80
-
81
-
82
-
83
-
84
-
85
-
86
-
87
-
88
-
89
-
90
-
91
-
92
-
93
-
94
-
95
-
96
-
 97
97 -
 98
98 -
 99
99 -
 100
100 -
 101
101 -
 102
102 -
 103
103 -
 104
104 -
 105
105 -
 106
106 -
 107
107 -
108
-
109
-
110
-
111
-
112
-
113
-
114
-
115
-
116
-
117
-
118
-
119
-
120
-
121
-
122
-
123
-
124
-
125
-
126
-
127
-
128
-
129
-
130
-
131
-
132
 |
 |