Canon EOS Rebel T3i 18-135mm IS Lens Kit EOS REBEL T3i / EOS 600D Instruction - Page 260
Using a Household Power Outlet
 |
View all Canon EOS Rebel T3i 18-135mm IS Lens Kit manuals
Add to My Manuals
Save this manual to your list of manuals |
Page 260 highlights
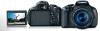
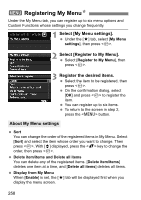
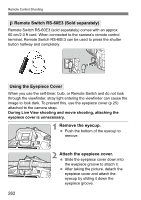
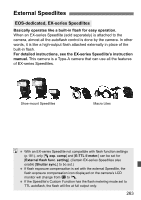
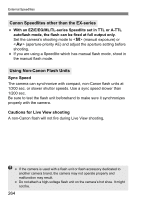
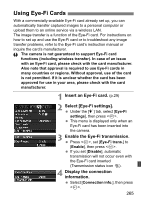
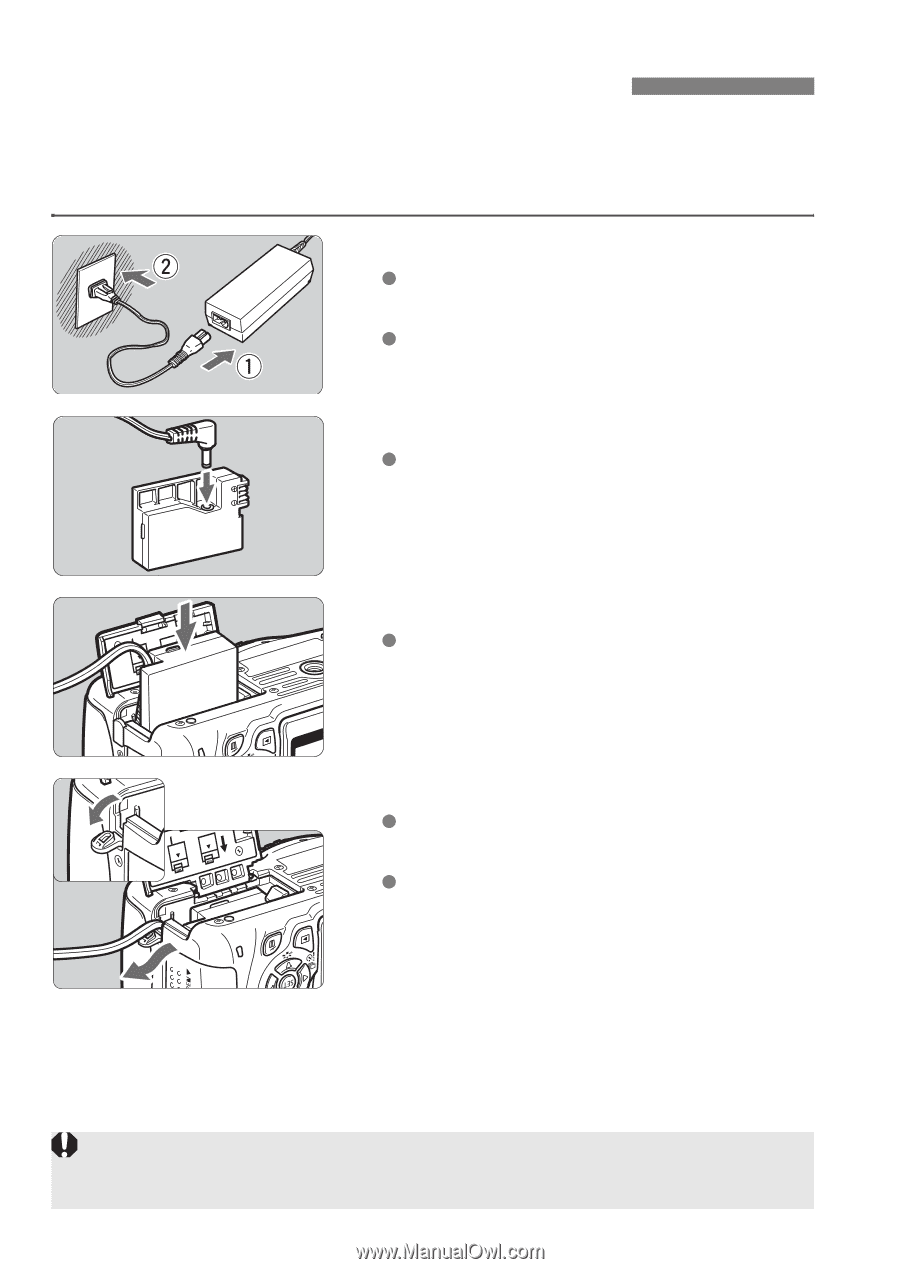
Using a Household Power Outlet With AC Adapter Kit ACK-E8 (sold separately), you can connect the camera to a household power outlet and not worry about the remaining battery level. 1 Connect the power cord. Connect the power cord as shown in the illustration. After using the camera, unplug the power plug from the power outlet. 2 Connect the DC Coupler. Connect the cord's plug to the DC Coupler. 3 Insert the DC Coupler. Open the cover and insert the DC Coupler until it locks in place. 4 Push in the DC cord. Open the DC cord hole cover and install the cord as shown. Close the cover. Do not connect or disconnect the power cord while the camera's power switch is set to . 260
-
 1
1 -
2
-
3
-
4
-
5
-
6
-
7
-
8
-
9
-
10
-
11
-
12
-
13
-
14
-
15
-
16
-
17
-
18
-
19
-
20
-
21
-
22
-
23
-
24
-
25
-
26
-
27
-
28
-
29
-
30
-
31
-
32
-
33
-
34
-
35
-
36
-
37
-
38
-
39
-
40
-
41
-
42
-
43
-
44
-
45
-
46
-
47
-
48
-
49
-
50
-
51
-
52
-
53
-
54
-
55
-
56
-
57
-
58
-
59
-
60
-
61
-
62
-
63
-
64
-
65
-
66
-
67
-
68
-
69
-
70
-
71
-
72
-
73
-
74
-
75
-
76
-
77
-
78
-
79
-
80
-
81
-
82
-
83
-
84
-
85
-
86
-
87
-
88
-
89
-
90
-
91
-
92
-
93
-
94
-
95
-
96
-
97
-
98
-
99
-
100
-
101
-
102
-
103
-
104
-
105
-
106
-
107
-
108
-
109
-
110
-
111
-
112
-
113
-
114
-
115
-
116
-
117
-
118
-
119
-
120
-
121
-
122
-
123
-
124
-
125
-
126
-
127
-
128
-
129
-
130
-
131
-
132
-
133
-
134
-
135
-
136
-
137
-
138
-
139
-
140
-
141
-
142
-
143
-
144
-
145
-
146
-
147
-
148
-
149
-
150
-
151
-
152
-
153
-
154
-
155
-
156
-
157
-
158
-
159
-
160
-
161
-
162
-
163
-
164
-
165
-
166
-
167
-
168
-
169
-
170
-
171
-
172
-
173
-
174
-
175
-
176
-
177
-
178
-
179
-
180
-
181
-
182
-
183
-
184
-
185
-
186
-
187
-
188
-
189
-
190
-
191
-
192
-
193
-
194
-
195
-
196
-
197
-
198
-
199
-
200
-
201
-
202
-
203
-
204
-
205
-
206
-
207
-
208
-
209
-
210
-
211
-
212
-
213
-
214
-
215
-
216
-
217
-
218
-
219
-
220
-
221
-
222
-
223
-
224
-
225
-
226
-
227
-
228
-
229
-
230
-
231
-
232
-
233
-
234
-
235
-
236
-
237
-
238
-
239
-
240
-
241
-
242
-
243
-
244
-
245
-
246
-
247
-
248
-
249
-
250
-
251
-
252
-
253
-
254
-
 255
255 -
 256
256 -
 257
257 -
 258
258 -
 259
259 -
 260
260 -
 261
261 -
 262
262 -
 263
263 -
 264
264 -
 265
265 -
266
-
267
-
268
-
269
-
270
-
271
-
272
-
273
-
274
-
275
-
276
-
277
-
278
-
279
-
280
-
281
-
282
-
283
-
284
-
285
-
286
-
287
-
288
-
289
-
290
-
291
-
292
-
293
-
294
-
295
-
296
-
297
-
298
-
299
-
300
-
301
-
302
-
303
-
304
-
305
-
306
-
307
-
308
-
309
-
310
-
311
-
312
-
313
-
314
-
315
-
316
-
317
-
318
-
319
-
320
-
321
-
322
-
323
-
324
 |
 |
260
With AC Adapter Kit ACK-E8 (sold separately), you can connect the
camera to a household power outlet and not worry about the remaining
battery level.
1
Connect the power cord.
Connect the power cord as shown in
the illustration.
After using the camera, unplug the
power plug from the power outlet.
2
Connect the DC Coupler.
Connect the cord’s plug to the DC
Coupler.
3
Insert the DC Coupler.
Open the cover and insert the DC
Coupler until it locks in place.
4
Push in the DC cord.
Open the DC cord hole cover and
install the cord as shown.
Close the cover.
Using a Household Power Outlet
Do not connect or disconnect the power cord while the camera’s power
switch is set to <
1
>.