Canon EOS Rebel T3i EOS Utility 2.10 for Windows Instruction Manual (EOS REBE - Page 23
Adjusting White Balance and Applying to the Camera, Registering Lens Aberration Correction/Peripheral - lenses
 |
View all Canon EOS Rebel T3i manuals
Add to My Manuals
Save this manual to your list of manuals |
Page 23 highlights
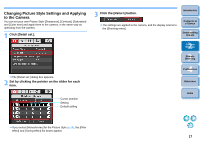
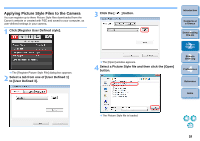
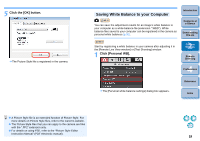
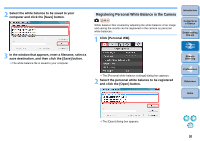
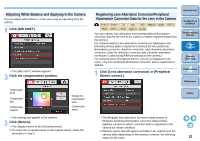
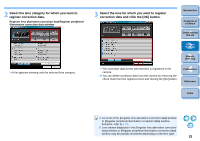
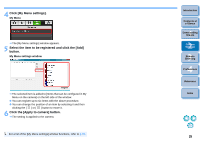
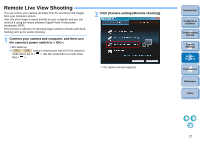
Adjusting White Balance and Applying to the Camera You can adjust white balance, in the same way as operating from the camera. 1 Click [WB SHIFT]. ¿ The [WB SHIFT] window appears. 2 Click the compensation position. Compensates green Compensates blue Compensates magenta Displays the compensation value Compensates amber ¿ The settings are applied to the camera. 3 Click [Return]. ¿ The display returns to the [Shooting menu]. O To revert the corrected values to the original values, follow the procedure in step 2. Registering Lens Aberration Correction/Peripheral Illumination Correction Data for the Lens in the Camera 1D Mk IV 5D Mk II 7D 60D 50D REBELT3i 600D REBELT2i 550D REBELT1i 500D REBELT3 1100D You can register lens aberration correction/peripheral illumination correction data for the lens to the camera or delete registered data from the camera. For cameras where [Lens aberration correction] is displayed in the [Shooting menu], data is registered or deleted for lens peripheral illumination correction, distortion correction, and chromatic aberration correction. (Data for distortion correction and chromatic aberration correction is used during RAW processing on the camera.) For cameras where [Peripheral illumin. correct.] is displayed in the menu, only lens peripheral illumination correction data is registered or deleted. 1 Click [Lens aberration correction] or [Peripheral illumin. correct.]. Introduction Contents at a Glance 1 Downloading Images 2Camera Settings 3Remote Shooting 4 Preferences Reference Index ¿ The [Register lens aberration correction data] window or [Register peripheral illumination correction data] window appears. Lenses for which correction data is registered in the camera are shown checked. O Window names that will appear and data to be registered in the camera differ depending on the camera, however, the following steps are the same. 22
-
 1
1 -
2
-
3
-
4
-
5
-
6
-
7
-
8
-
9
-
10
-
11
-
12
-
13
-
14
-
15
-
16
-
17
-
 18
18 -
 19
19 -
 20
20 -
 21
21 -
 22
22 -
 23
23 -
 24
24 -
 25
25 -
 26
26 -
 27
27 -
 28
28 -
29
-
30
-
31
-
32
-
33
-
34
-
35
-
36
-
37
-
38
-
39
-
40
-
41
-
42
-
43
-
44
-
45
-
46
-
47
-
48
-
49
-
50
-
51
-
52
-
53
-
54
-
55
-
56
-
57
-
58
-
59
-
60
-
61
-
62
-
63
-
64
-
65
-
66
-
67
-
68
-
69
-
70
-
71
-
72
-
73
-
74
-
75
-
76
-
77
-
78
-
79
-
80
-
81
-
82
-
83
-
84
-
85
 |
 |
