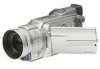
Canon OPTURA XI OPTURA Xi Instruction Manual - Page 106
Press the PAUSE
 |
UPC - 013803032581
View all Canon OPTURA XI manuals
Add to My Manuals
Save this manual to your list of manuals |
Page 106 highlights
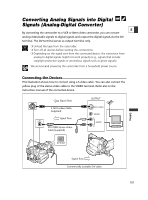
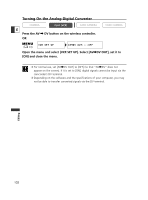
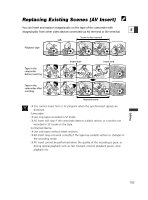
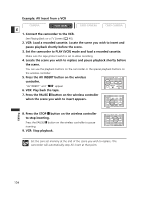
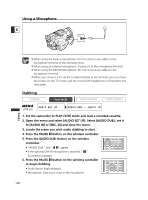
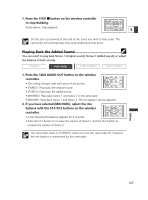
Using a Microphone E Editing ❍ When using the built-in microphone: Do not connect any cables to the microphone terminal or the accessory shoe. ❍ When using an external microphone: Connect it to the microphone terminal. ❍ When using the DM-50 Microphone: Do not connect any cables to the microphone terminal. ❍ When you connect a TV via the S-video terminal or AV terminal, you can check the picture on the TV screen and the sound with headphones connected to the camcorder. Dubbing CAMERA PLAY (VCR) CARD CAMERA CARD CAMERA ( 43) AUDIO SET UP AUDIO DUB.•••AUDIO IN 1. Set the camcorder to PLAY (VCR) mode and load a recorded cassette. 2. Open the menu and select [AUDIO SET UP]. Select [AUDIO DUB.], set it to [AUDIO IN] or [MIC. IN] and close the menu. 3. Locate the scene you wish audio dubbing to start. 4. Press the PAUSE a button on the wireless controller. 5. Press the AUDIO DUB. button on the wireless controller. • "AUDIO DUB." and " a" appear. • If the optional DM-50 microphone is attached, " " ZERO SET MEMORY / STOP / AUDIO DUB. PAUSE SLOW ×2 AV INSERT AV DV MENU SET REMOTE SET (Connection) appears. 6. Press the PAUSE a button on the wireless controller to begin dubbing. • Audio device: Begin playback. • Microphone: Direct your voice to the microphone. ZERO SET MEMORY / STOP / AUDIO DUB. PAUSE SLOW ×2 AV INSERT AV DV MENU SET 106
-
 1
1 -
2
-
3
-
4
-
5
-
6
-
7
-
8
-
9
-
10
-
11
-
12
-
13
-
14
-
15
-
16
-
17
-
18
-
19
-
20
-
21
-
22
-
23
-
24
-
25
-
26
-
27
-
28
-
29
-
30
-
31
-
32
-
33
-
34
-
35
-
36
-
37
-
38
-
39
-
40
-
41
-
42
-
43
-
44
-
45
-
46
-
47
-
48
-
49
-
50
-
51
-
52
-
53
-
54
-
55
-
56
-
57
-
58
-
59
-
60
-
61
-
62
-
63
-
64
-
65
-
66
-
67
-
68
-
69
-
70
-
71
-
72
-
73
-
74
-
75
-
76
-
77
-
78
-
79
-
80
-
81
-
82
-
83
-
84
-
85
-
86
-
87
-
88
-
89
-
90
-
91
-
92
-
93
-
94
-
95
-
96
-
97
-
98
-
99
-
100
-
 101
101 -
 102
102 -
 103
103 -
 104
104 -
 105
105 -
 106
106 -
 107
107 -
 108
108 -
 109
109 -
 110
110 -
 111
111 -
112
-
113
-
114
-
115
-
116
-
117
-
118
-
119
-
120
-
121
-
122
-
123
-
124
-
125
-
126
-
127
-
128
-
129
-
130
-
131
-
132
-
133
-
134
-
135
-
136
-
137
-
138
-
139
-
140
-
141
-
142
-
143
-
144
-
145
-
146
-
147
-
148
-
149
-
150
-
151
-
152
-
153
-
154
-
155
-
156
-
157
-
158
-
159
-
160
-
161
-
162
-
163
-
164
-
165
-
166
-
167
-
168
-
169
-
170
-
171
-
172
-
173
-
174
-
175
-
176
-
177
 |
 |
