Canon PIXMA PRO-100 Setup Guide - Page 6
Printer Setup
 |
View all Canon PIXMA PRO-100 manuals
Add to My Manuals
Save this manual to your list of manuals |
Page 6 highlights
2. Connect the printer and a network device (router, etc.) with an Ethernet cable (A). Please make sure to use the correct port on the back of the printer. Do not connect it to the USB port. c Printer Setup 1. Hold down the RESUME/CANCEL button (A) on the printer until the POWER lamp flashes 11 times, then release the RESUME/CANCEL button after the eleventh flash. The wired connection setup is complete. The network connection setup is now complete.
-
 1
1 -
 2
2 -
 3
3 -
 4
4 -
 5
5 -
 6
6 -
 7
7
 |
 |
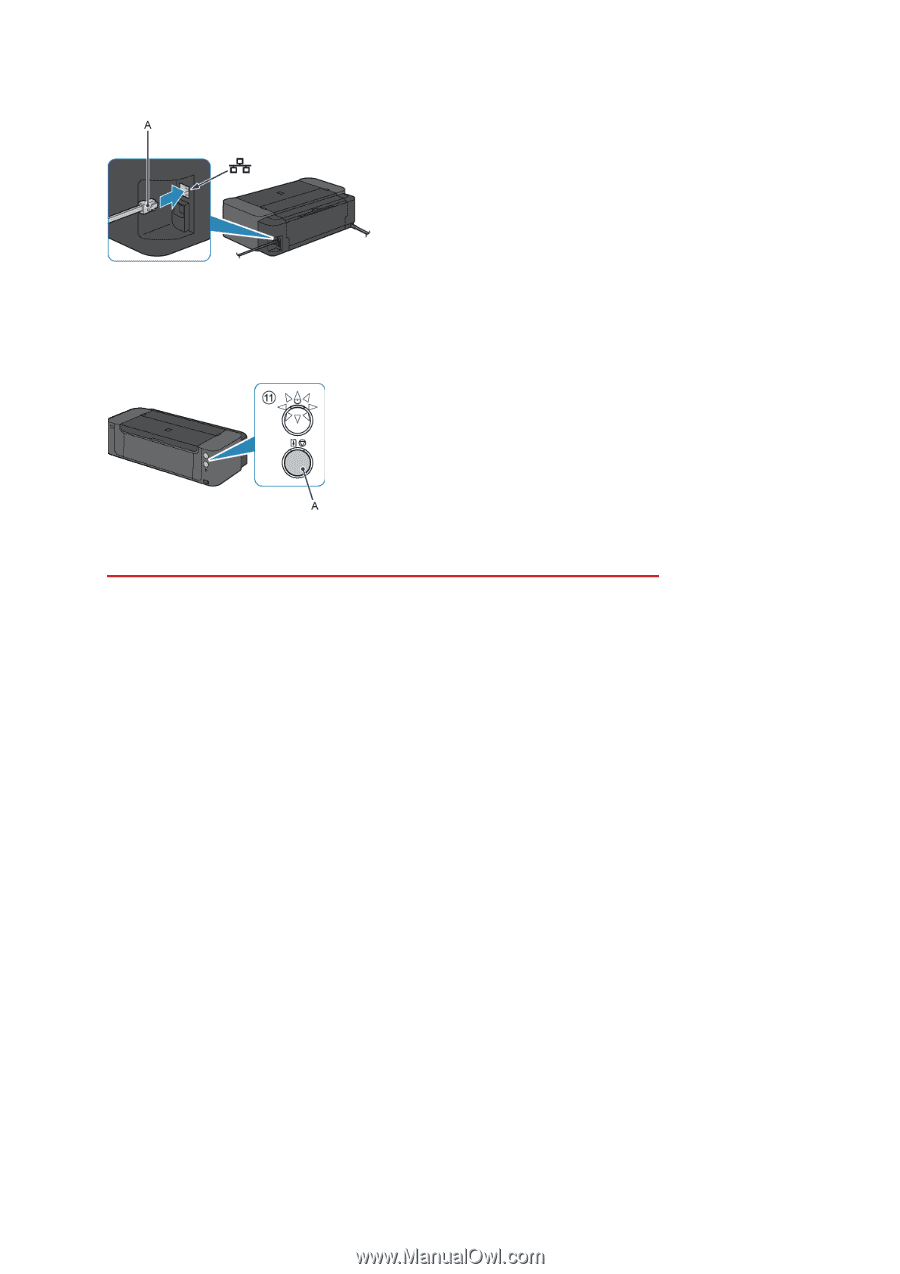
2. Connect the printer and a network device (router, etc.) with an Ethernet cable (A).
Please make sure to use the correct port on the back of the printer. Do not connect it to the USB port.
c
Printer Setup
1. Hold down the RESUME/CANCEL button (A) on the printer until the POWER lamp flashes 11 times,
then release the RESUME/CANCEL button after the eleventh flash.
The wired connection setup is complete.
The network connection setup is now complete.