Canon PowerShot A2600 Pink User Guide - Page 23
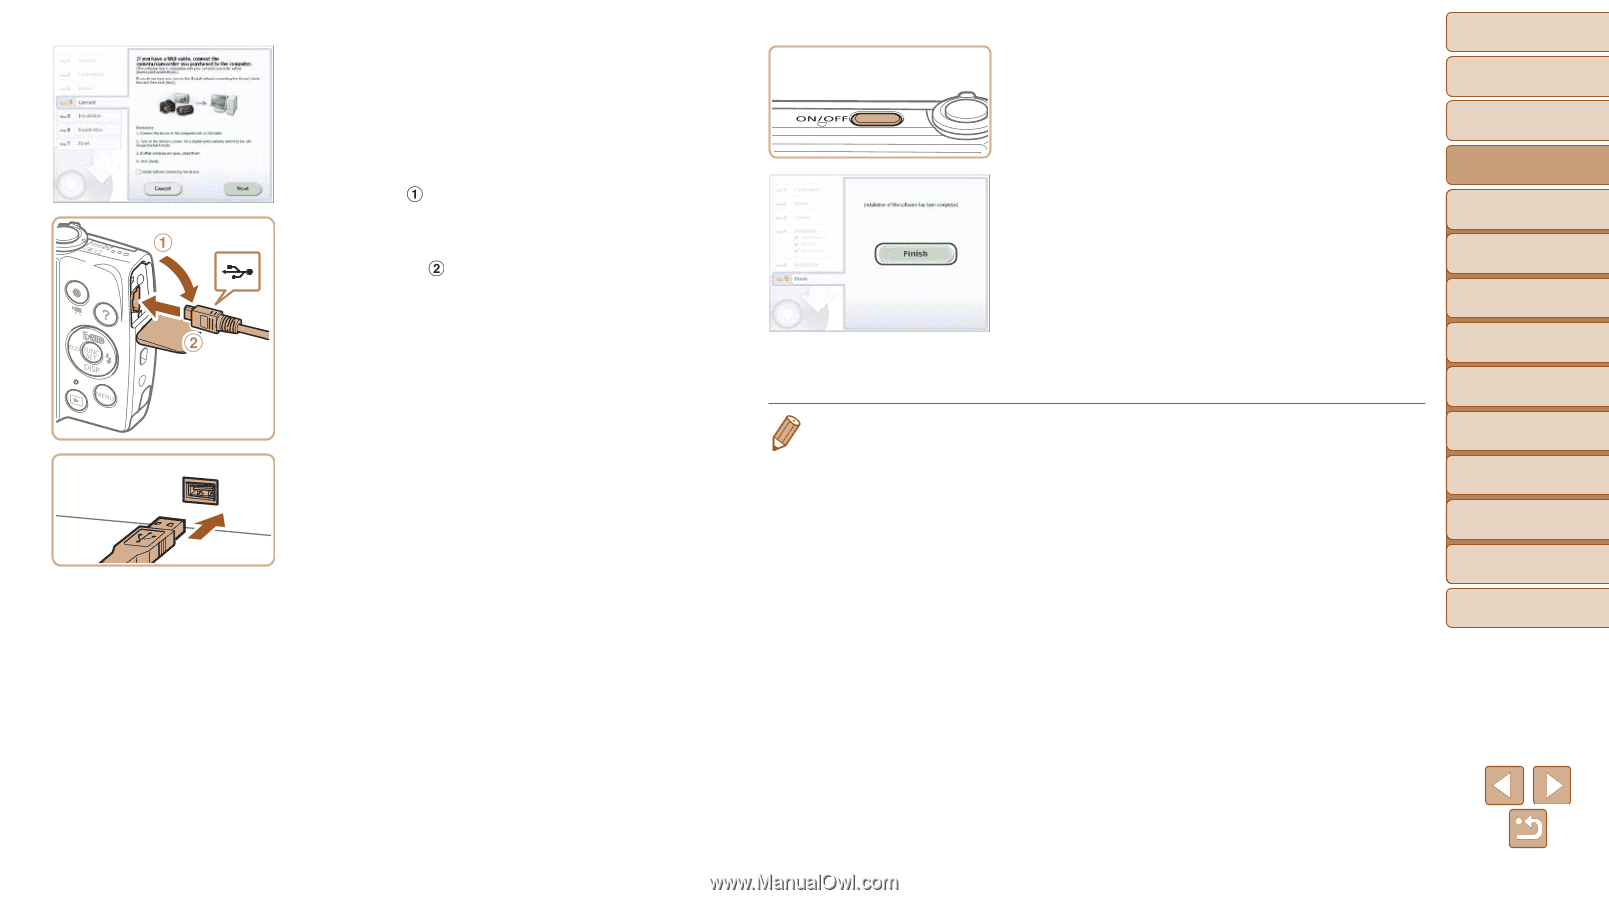
When a message is displayed, prompting you to connect, the camera, connect it to a, computer.
 |
View all Canon PowerShot A2600 Pink manuals
Add to My Manuals
Save this manual to your list of manuals |
Page 23 highlights
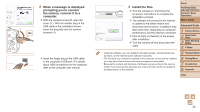
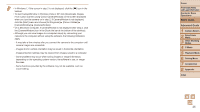
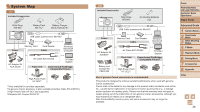
3 When a message is displayed prompting you to connect the camera, connect it to a computer. zzWith the camera turned off, open the cover ( ). With the smaller plug of the USB cable in the orientation shown, insert the plug fully into the camera terminal ( ). zzInsert the larger plug of the USB cable in the computer's USB port. For details about USB connections on the computer, refer to the computer user manual. 4 Install the files. zzTurn the camera on, and follow the on-screen instructions to complete the installation process. XXThe software will connect to the Internet to update to the latest version and download new functions. Installation may take some time, depending on computer performance and the Internet connection. zzClick [Finish] or [Restart] on the screen after installation. zzTurn the camera off and disconnect the cable. • Using the software, you can update to the latest version, and download new functions via the Internet (some software excluded). • The first time you connect the camera to the computer, drivers will be installed, so it may take a few minutes until camera images are accessible. • Because the content and functions of software vary according to the camera model, if you have several cameras, you must use each camera to update to its latest version of the software. Cover Preliminary Notes and Legal Information Contents: Basic Operations Basic Guide Advanced Guide 1 Camera Basics 2 Smart Auto Mode 3 Other Shooting Modes 4 P Mode 5 Playback Mode 6 Setting Menu 7 Accessories 8 Appendix Index 23
-
 1
1 -
2
-
3
-
4
-
5
-
6
-
7
-
8
-
9
-
10
-
11
-
12
-
13
-
14
-
15
-
16
-
17
-
 18
18 -
 19
19 -
 20
20 -
 21
21 -
 22
22 -
 23
23 -
 24
24 -
 25
25 -
 26
26 -
 27
27 -
 28
28 -
29
-
30
-
31
-
32
-
33
-
34
-
35
-
36
-
37
-
38
-
39
-
40
-
41
-
42
-
43
-
44
-
45
-
46
-
47
-
48
-
49
-
50
-
51
-
52
-
53
-
54
-
55
-
56
-
57
-
58
-
59
-
60
-
61
-
62
-
63
-
64
-
65
-
66
-
67
-
68
-
69
-
70
-
71
-
72
-
73
-
74
-
75
-
76
-
77
-
78
-
79
-
80
-
81
-
82
-
83
-
84
-
85
-
86
-
87
-
88
-
89
-
90
-
91
-
92
-
93
-
94
-
95
-
96
-
97
-
98
-
99
-
100
-
101
-
102
-
103
-
104
-
105
-
106
-
107
-
108
-
109
-
110
-
111
-
112
-
113
-
114
-
115
-
116
-
117
-
118
-
119
-
120
-
121
-
122
-
123
-
124
 |
 |