Canon PowerShot A3000 IS Personal Printing Guide - Page 4
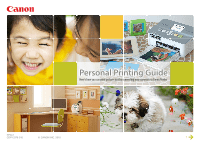
Personal Printing Guide - photo taken from
 |
View all Canon PowerShot A3000 IS manuals
Add to My Manuals
Save this manual to your list of manuals |
Page 4 highlights
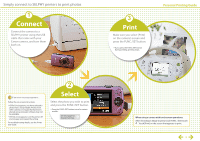
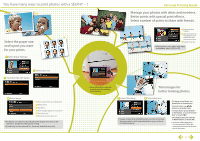
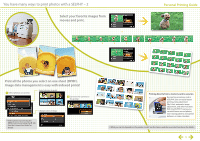
You have many ways to print photos with a SELPHY - 1 B , C E Select the paper size and layout you want for your prints. 1 Select [Paper Settings] 07/15/08 101-2015 G Personal Printing Guide Manage your photos with dates and numbers. Better prints with special print effects. Select number of prints to share with friends. G Date and photo number H H Optimized printing through the use of camera info and red-eye correction I Number of prints * When photos were taken with dates embedded, select [Off] for . 2 Select paper size 3 Press the FUNC./SET button 4 Select layout A Print using the set-up on the printer B With borders C Borderless D Print multiple photos on one sheet E Print ID photos F [Fixed Size] Select print size * [ID Photo] can only be selected when the images were shot in the camera's L (Large) recording pixel setting. * [Fixed Size] can be selected in L, Postcard, and Wide size only. * When [Default] is selected, printing uses the settings on the printer. Trim images for better looking photos. 1 Select [Trimming] 2 Set printing area * Images smaller than 640X480 pixels cannot be trimmed. * Trimming photos with embedded dates may not show the dates properly. • To change size of frame: use Zoom lever or Zoom button • To move frame: use buttons or drag the frame • To rotate frame: press the DISP. or SET button, or turn the Control Dial* or touch [ ] • Set trimming area: press the SET or MENU button*, or touch [OK] * Operation differs depending on camera models. Follow the instructions shown on the bottom part of the screen. 4
-
 1
1 -
 2
2 -
 3
3 -
 4
4 -
 5
5 -
 6
6
 |
 |
