Canon PowerShot A75 Direct Print Guide - Page 7
Camera/Printer Connection
 |
View all Canon PowerShot A75 manuals
Add to My Manuals
Save this manual to your list of manuals |
Page 7 highlights
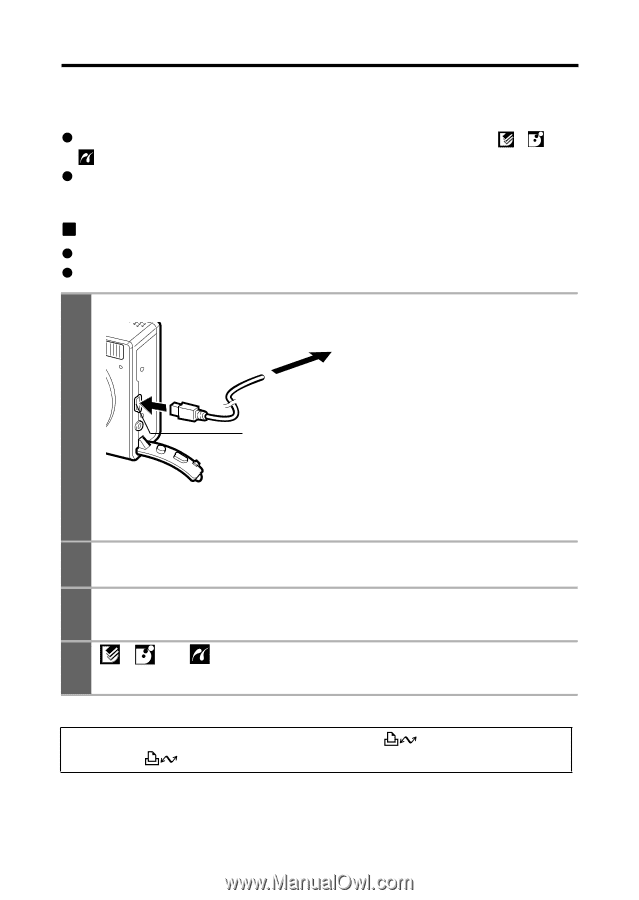
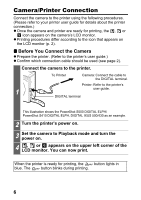
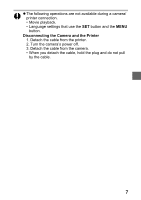
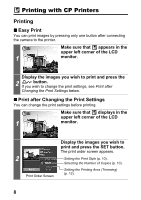
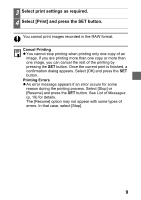
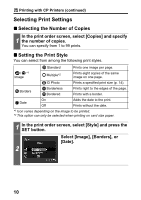
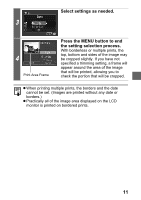
Camera/Printer Connection Connect the camera to the printer using the following procedures. (Please refer to your printer user guide for details about the printer connection.) z Once the camera and printer are ready for printing, the , or icon appears on the camera's LCD monitor. z Printing procedures differ according to the icon that appears on the LCD monitor (p. 2). „ Before You Connect the Camera z Prepare the printer. (Refer to the printer's user guide.) z Confirm which connection cable should be used (see page 2). Connect the camera to the printer. To Printer Camera: Connect the cable to the DIGITAL terminal. Printer: Refer to the printer's 1 user guide. DIGITAL terminal This illustration shows the PowerShot S500 DIGITAL ELPH/ PowerShot S410 DIGITAL ELPH, DIGITAL IXUS 500/430 as an example. 2 Turn the printer's power on. 3 Set the camera to Playback mode and turn the power on. 4 , or appears on the upper left corner of the LCD monitor. You can now print. When the printer is ready for printing, the button lights in blue. The button blinks during printing. 6
-
 1
1 -
 2
2 -
 3
3 -
 4
4 -
 5
5 -
 6
6 -
 7
7 -
 8
8 -
 9
9 -
 10
10 -
 11
11 -
 12
12 -
13
-
14
-
15
-
16
-
17
-
18
-
19
-
20
-
21
-
22
-
23
-
24
-
25
-
26
-
27
-
28
-
29
-
30
-
31
-
32
-
33
-
34
-
35
-
36
-
37
-
38
-
39
-
40
-
41
-
42
-
43
-
44
-
45
-
46
-
47
-
48
-
49
-
50
-
51
-
52
-
53
-
54
-
55
-
56
-
57
-
58
-
59
-
60
-
61
-
62
-
63
-
64
-
65
-
66
-
67
-
68
-
69
-
70
-
71
-
72
-
73
-
74
-
75
-
76
-
77
-
78
-
79
-
80
-
81
-
82
-
83
-
84
-
85
-
86
-
87
-
88
-
89
-
90
-
91
-
92
-
93
-
94
-
95
-
96
-
97
-
98
-
99
-
100
-
101
-
102
-
103
-
104
-
105
-
106
-
107
-
108
-
109
 |
 |