Canon PowerShot SD940 IS Software User Guide for Windows - Page 9
Mastering the Basics, Transferring Images, Transferring Images by Connecting the Camera to a Computer - case
 |
View all Canon PowerShot SD940 IS manuals
Add to My Manuals
Save this manual to your list of manuals |
Page 9 highlights
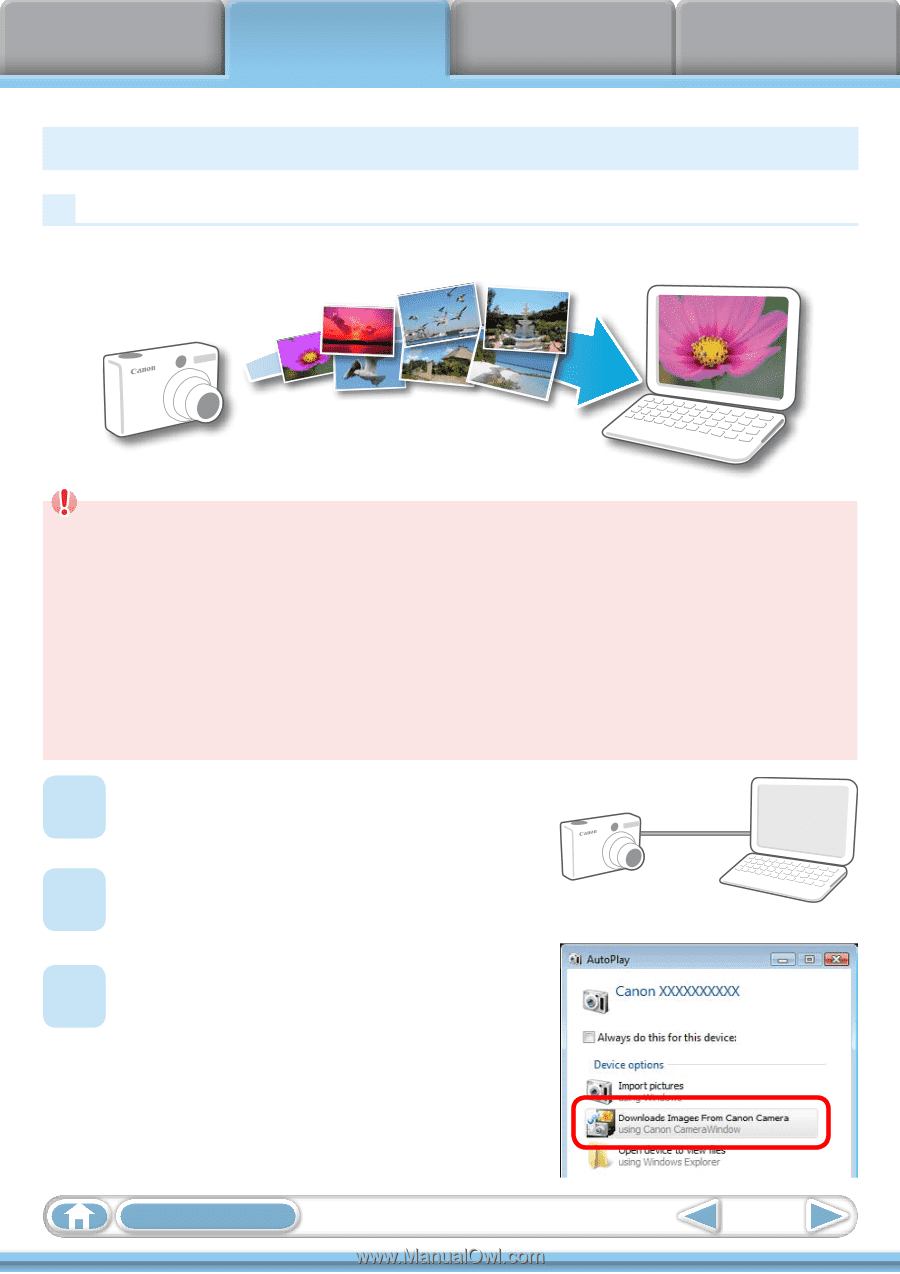
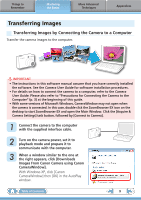
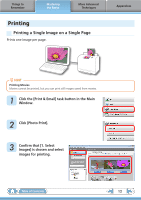
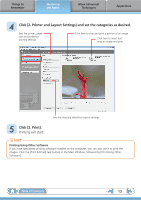
Things to Remember Mastering the Basics More Advanced Techniques Appendices Transferring Images Transferring Images by Connecting the Camera to a Computer Transfer the camera images to the computer. IMPORTANT • The instructions in this software manual assume that you have correctly installed the software. See the Camera User Guide for software installation procedures. • For details on how to connect the camera to a computer, refer to the Camera User Guide. Please also refer to "Precautions for Connecting the Camera to the Computer" (p. 3) at the beginning of this guide. • With some versions of Microsoft Windows, CameraWindow may not open when the camera is connected. In this case, double-click the ZoomBrowser EX icon on the desktop to start ZoomBrowser EX and open the Main Window. Click the [Acquire & Camera Settings] task button, followed by [Connect to Camera]. 1 Connect the camera to the computer with the supplied interface cable. 2 Turn on the camera power, set it to playback mode and prepare it to communicate with the computer. 3 When a window similar to the one at the right appears, click [Downloads Images From Canon Camera using Canon CameraWindow]. With Windows XP, click [Canon CameraWindow] then [OK] in the AutoPlay window. Table of Contents 9
-
 1
1 -
2
-
3
-
 4
4 -
 5
5 -
 6
6 -
 7
7 -
 8
8 -
 9
9 -
 10
10 -
 11
11 -
 12
12 -
 13
13 -
 14
14 -
15
-
16
-
17
-
18
-
19
-
20
-
21
-
22
-
23
-
24
-
25
-
26
-
27
-
28
-
29
-
30
-
31
-
32
-
33
-
34
-
35
-
36
-
37
-
38
-
39
-
40
-
41
-
42
-
43
-
44
-
45
-
46
-
47
-
48
-
49
-
50
-
51
-
52
-
53
-
54
-
55
-
56
-
57
-
58
-
59
 |
 |