Canon RF 50mm F1.2 L USM RF50mm F1.2 L USM Instructions - Page 7
Attaching and Detaching the Lens
 |
View all Canon RF 50mm F1.2 L USM manuals
Add to My Manuals
Save this manual to your list of manuals |
Page 7 highlights
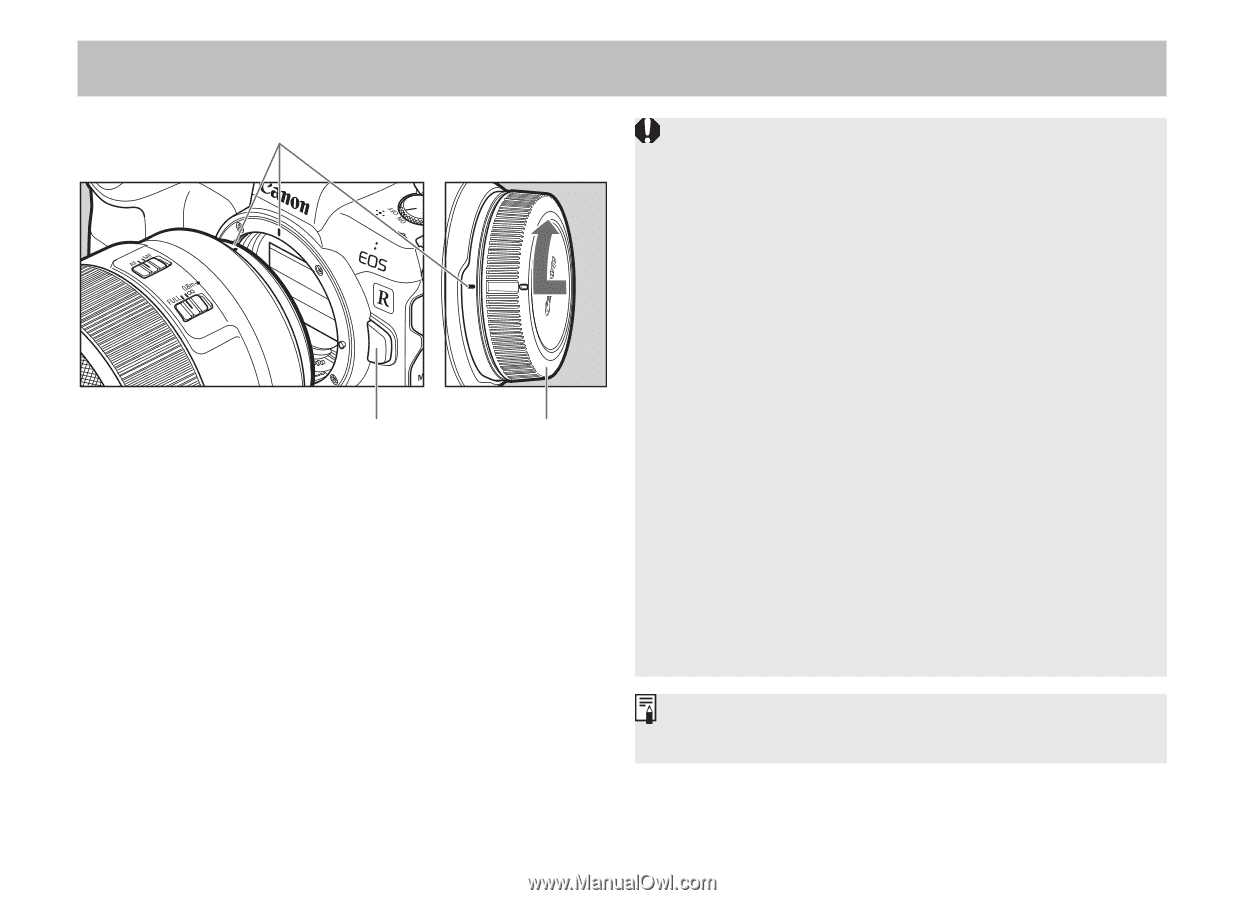
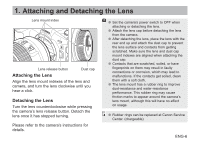
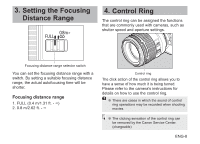
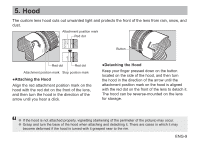
1. Attaching and Detaching the Lens Lens mount index Lens release button Dust cap Attaching the Lens Align the lens mount indexes of the lens and camera, and turn the lens clockwise until you hear a click. Detaching the Lens Turn the lens counterclockwise while pressing the camera's lens release button. Detach the lens once it has stopped turning. Please refer to the camera's instructions for details. ●● Set the camera's power switch to OFF when attaching or detaching the lens. ●● Attach the lens cap before detaching the lens from the camera. ●● After detaching the lens, place the lens with the rear end up and attach the dust cap to prevent the lens surface and contacts from getting scratched. Make sure the lens and dust cap mount indexes are aligned when attaching the dust cap. ●● Contacts that are scratched, soiled, or have fingerprints on them may result in faulty connections or corrosion, which may lead to malfunctions. If the contacts get soiled, clean them with a soft cloth. ●● The lens mount has a rubber ring to improve dust-resistance and water-resistance performance. This rubber ring may cause friction marks to appear around the camera's lens mount, although this will have no effect on usage. ●● Rubber rings can be replaced at Canon Service Center. (chargeable) ENG-6
-
 1
1 -
 2
2 -
 3
3 -
 4
4 -
 5
5 -
 6
6 -
 7
7 -
 8
8 -
 9
9 -
 10
10 -
 11
11 -
 12
12 -
13
 |
 |