Canon RM-64 V1.0 Network Video Recording Software RM Series Viewer Operation G - Page 2
Playing Back Recordings, Controlling a Camera
 |
View all Canon RM-64 V1.0 manuals
Add to My Manuals
Save this manual to your list of manuals |
Page 2 highlights
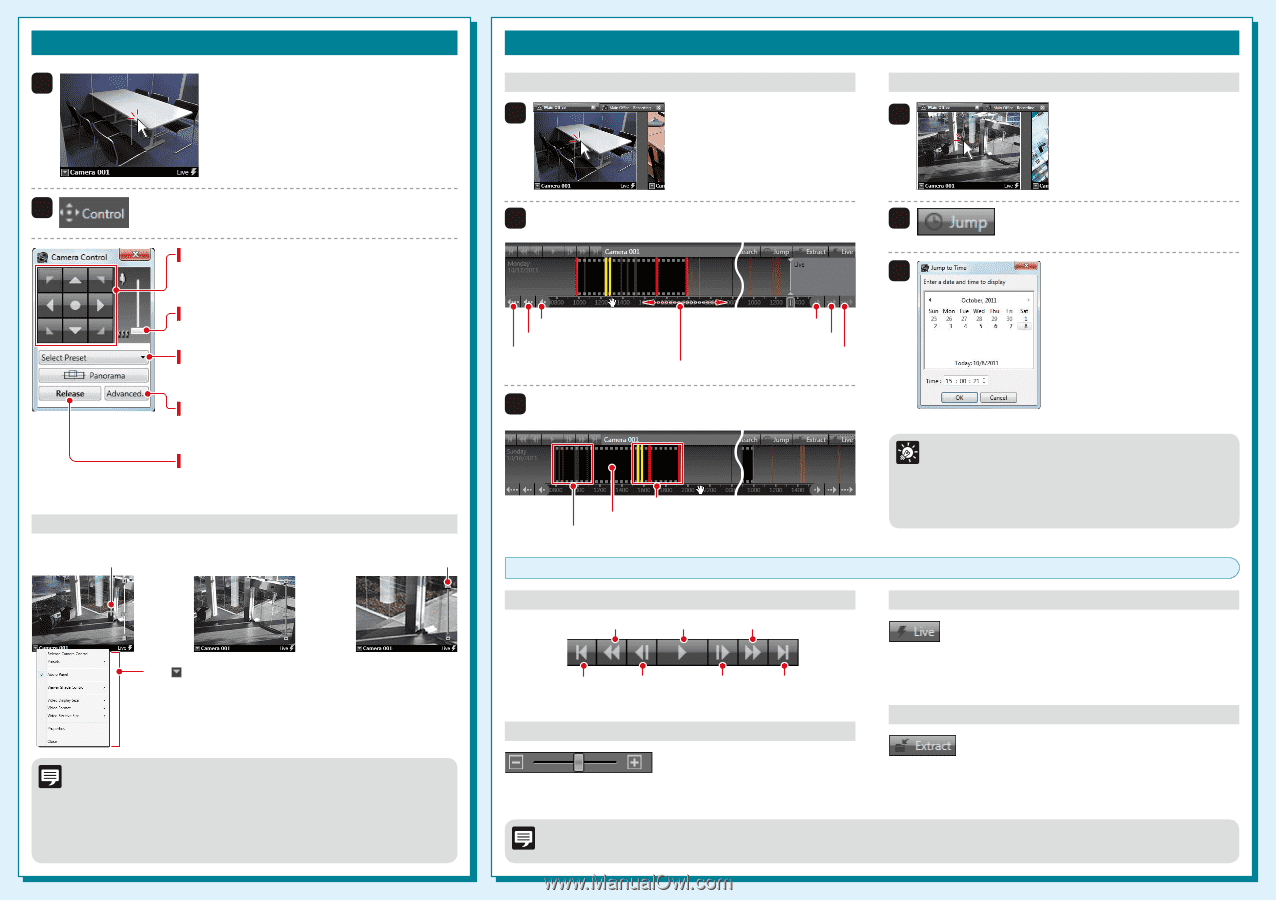
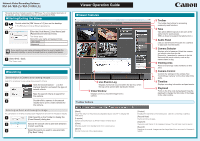
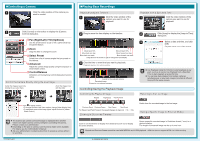
Controlling a Camera 1 Click the video window of the camera you want to control. Playing Back Recordings Playback Using the Timeline 1 Click the video window of the camera you want to use for playback. Playback from a Specified Time 1 Click the video window of the camera you want to use for playback. 2 Click [Control] on the toolbar to display the [Camera Control] dialog box. Pan (Right/Left) / Tilt (Up/Down) Use the arrow buttons to pan or tilt a camera that has the pan/tilt feature. Zoom Drag the slider to change the zoom. Select Preset Select from a list of camera angles that you preset on the camera. Advanced Adjust the camera image quality using the exposure or smart shade control. Control/Release All buttons on the [Camera Control] dialog box become active. Control the Camera Directly Using the Live Image Center the image at a point by clicking the [+] cursor there Zoom the image in/out with the slider Click to display a menu. • To change the size of the video window, change [Video Display Size]. • To make dark areas of the image lighter, adjust the level of [Viewer Shade Control]. The [Cannot get camera control] message is displayed when another Viewer with higher camera control privileges is controlling the camera. Note Please contact your administrator. Depending on the type of camera, some functions might not be available. For details, see the "Administrator's Manual". Ask your administrator in advance about how to operate a camera while it is recording. YT1-1611-001 2 Drag to move the time display on the timeline. Move back 10% Move forward 10% Move back one day Move forward one day Move back one week Move forward one week Drag this area to the left or right to change the time display 3 Click the time or event that you want to play back. Playback starts in the video window. Events for the selected camera Recorded image Events for non-selected cameras Controlling/Saving the Playback Image Controlling the Playback Image Rewind Play/Pause Fast Forward Previous Event Previous Frame Next Frame Next Event For Rewind and Fast Forward, the speed changes in steps: 2x 5x 10x. Zooming In/Out on the Timeline 2 Click [Jump] to display the [Jump to Time] dialog box. 3 Select a date and time, and click [OK]. Playback starts in the video window. Use Playback Using the Timeline to start playback at any point, such as at events. Use Playback from a Specified Hint Time to start playback at a specific time. You can play back images from multiple cameras simultaneously, or play back images recorded at different times with the same camera. Returning to the Live Image Switch from the recorded image to the live image. Saving a Specific Image (to External Media) Zoom in on the timeline to display more detail and zoom out to display the entire timeline. Saves a specific recorded image in Quicktime format (*.mov) to a desired location. The length of the saved image can be up to one hour. Rewind and Previous Frame cannot be used with MPEG-4 and H.264 playback. RM-Lite does not support MPEG-4 or H.264 recording. Note © CANON INC. 2012
-
 1
1 -
 2
2
 |
 |