Canon SELPHY CP720 SELPHY CP730/CP720 Printer User Guide Windows - Page 28
Macintosh, Photo Printer Solution Disk - windows 7 driver
 |
View all Canon SELPHY CP720 manuals
Add to My Manuals
Save this manual to your list of manuals |
Page 28 highlights
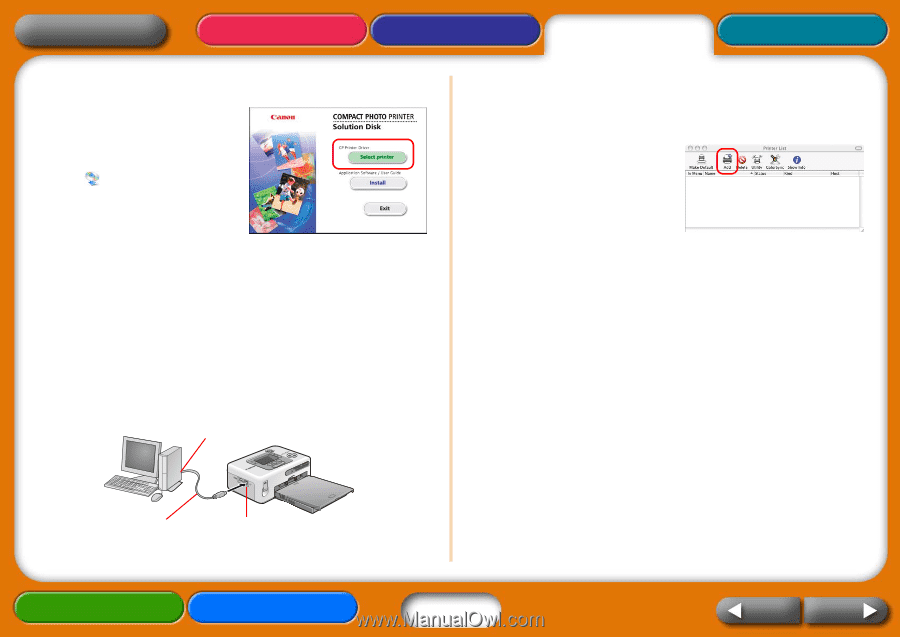
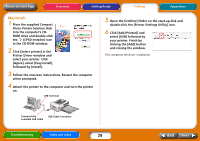
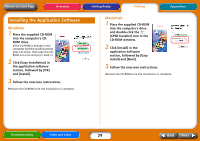
Return to Cover Page Overview Getting Ready Printing Appendices Macintosh 1 Place the supplied Compact Photo Printer Solution Disk into the computer's CDROM drive and double-click the (CPSD Installer) icon in the CD-ROM window. 2 Click [Select printer] in the Printer Driver window and select your printer. Click [Agree], select [Easy Install], followed by [Install]. 3 Follow the onscreen instructions. Restart the computer when prompted. 4 Attach the printer to the computer and turn the printer on. USB Terminal 5 Open the [Utilities] folder on the start-up disk and double-click the [Printer Settings Utility] icon. 6 Click [Add (Printer)] and select [USB] followed by your printer. Finish by clicking the [Add] button and closing the window. This completes the driver installation. Commercially available USB Cable USB Cable Connector Troubleshooting Tasks and Index 28 Back Next
-
 1
1 -
2
-
3
-
4
-
5
-
6
-
7
-
8
-
9
-
10
-
11
-
12
-
13
-
14
-
15
-
16
-
17
-
18
-
19
-
20
-
21
-
22
-
 23
23 -
 24
24 -
 25
25 -
 26
26 -
 27
27 -
 28
28 -
 29
29 -
 30
30 -
 31
31 -
 32
32 -
 33
33 -
34
-
35
-
36
-
37
-
38
-
39
-
40
-
41
-
42
-
43
-
44
-
45
-
46
-
47
-
48
-
49
-
50
-
51
 |
 |