Canon VB-H43 Network Camera VB-H43/VB-H630VE/VB-H630D/VB-H730F/VB-M42/VB-M620V - Page 28
Making Initial Camera Settings, Launch the Camera Management Tool - default password
 |
View all Canon VB-H43 manuals
Add to My Manuals
Save this manual to your list of manuals |
Page 28 highlights
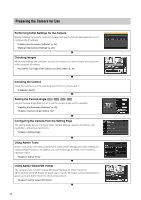
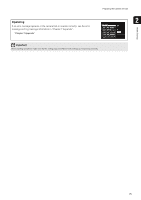
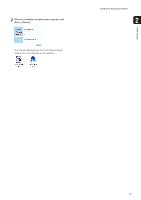
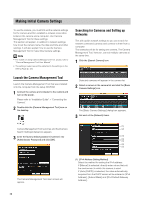
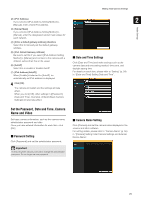
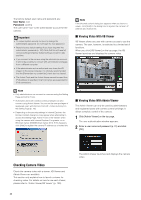
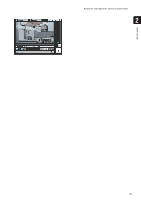
Making Initial Camera Settings To use the camera, you must first set the network settings for the camera and then establish a network connection between the camera and a computer. Use Camera Management Tool for these settings. This section will explain, in addition to network settings, how to set the camera name, the date and time and other settings. It will also explain how to use the Camera Management Tool to make initial camera settings. Note • For details on using Camera Management Tool, please refer to "Camera Management Tool User Manual". • The settings made here will be reflected in the settings on the Setting Page (p. 45). Searching for Cameras and Setting up Networks This will explain network settings so you can search for network connected cameras and connect to them from a computer. The examples will be for setting one camera. The Camera Management Tool, however, can set multiple cameras at the same time. 1 Click the [Search Camera] icon. Launch the Camera Management Tool Launch the Camera Management Tool that was installed onto the computer from the setup CD-ROM. 1 Connect the camera and computer to the network and turn on the power. Please refer to "Installation Guide" > "Connecting the Camera". 2 Double-click the [Camera Management Tool] icon on the desktop. Detected cameras will appear in the camera list. 2 Select a camera in the camera list and click the [Basic Camera Settings] icon. The [Basic Camera Settings] dialog box appears. 3 Set each of the [Network] items. (1) Camera Management Tool launches and the [Camera (2) Search Settings] dialog box appears. 3 Enter the factory default password ("camera") into [Administrator Password] and click [OK]. (3) (4) (5) (6) (7) The Camera Management Tool main screen will appear. 28 (1) [IPv4 Address Setting Method] Select the method for setting the IPv4 address. If [Manual] is selected, directly enter values that suit the environment in which the camera is used. If [Auto (DHCP)] is selected, the value automatically acquired from the DHCP server will be entered in [IPv4 Address], [Subnet Mask] and [IPv4 Default Gateway Address].
-
 1
1 -
2
-
3
-
4
-
5
-
6
-
7
-
8
-
9
-
10
-
11
-
12
-
13
-
14
-
15
-
16
-
17
-
18
-
19
-
20
-
21
-
22
-
 23
23 -
 24
24 -
 25
25 -
 26
26 -
 27
27 -
 28
28 -
 29
29 -
 30
30 -
 31
31 -
 32
32 -
 33
33 -
34
-
35
-
36
-
37
-
38
-
39
-
40
-
41
-
42
-
43
-
44
-
45
-
46
-
47
-
48
-
49
-
50
-
51
-
52
-
53
-
54
-
55
-
56
-
57
-
58
-
59
-
60
-
61
-
62
-
63
-
64
-
65
-
66
-
67
-
68
-
69
-
70
-
71
-
72
-
73
-
74
-
75
-
76
-
77
-
78
-
79
-
80
-
81
-
82
-
83
-
84
-
85
-
86
-
87
-
88
-
89
-
90
-
91
-
92
-
93
-
94
-
95
-
96
-
97
-
98
-
99
-
100
-
101
-
102
-
103
-
104
-
105
-
106
-
107
-
108
-
109
-
110
-
111
-
112
-
113
-
114
-
115
-
116
-
117
-
118
-
119
-
120
-
121
-
122
-
123
-
124
-
125
-
126
-
127
-
128
-
129
-
130
-
131
-
132
-
133
-
134
-
135
-
136
-
137
-
138
-
139
-
140
-
141
-
142
-
143
-
144
-
145
-
146
-
147
-
148
-
149
-
150
-
151
-
152
-
153
-
154
-
155
-
156
-
157
-
158
-
159
-
160
-
161
-
162
-
163
-
164
-
165
-
166
-
167
-
168
-
169
-
170
-
171
-
172
-
173
-
174
-
175
-
176
-
177
-
178
-
179
-
180
-
181
-
182
-
183
-
184
-
185
-
186
-
187
-
188
-
189
-
190
-
191
-
192
-
193
-
194
-
195
 |
 |
