Canon VB-S800D Mark II Network Camera VB-S30D MK II/VB-S31D Mk II/VB-S800D MkI - Page 1
Canon VB-S800D Mark II Manual
 |
View all Canon VB-S800D Mark II manuals
Add to My Manuals
Save this manual to your list of manuals |
Page 1 highlights
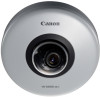
Network Camera / / Installation Guide BIE-7202-000 ENGLISH / Installing the Camera 1 a Please be sure to read the "Safety Precautions" section for correct use. After reading this Installation Guide, keep it in a readily accessible location for future reference. This camera is for indoor use only. * Some cameras are not available in certain countries or regions. WARNING To reduce a risk of fire or electric shock, do not expose this product to rain or moisture. Caution Request a professional installer for all installation work. Never try to install the camera yourself. Doing so may result in unforeseen accidents such as dropping the camera or electric shock. Check Included Items Camera Template Installation Guide (This document) Safety Wire, Screws (M4) x 1 Warranty Card Symbols Indicating Camera Model : VB-S30D Mk II : VB-S31D Mk II : VB-S800D Mk II/VB-S805D Mk II © CANON INC. 2017 Printed in Taiwan Ceiling Installation FRONT a Wall Installation a. Template 2 41 x 50 mm (1.61 x 1.97 in.) Part Names 1 2 3 4 5 6 If Using a Memory Card FRONT 7 9 8 Serial MAC 1. Camera Head / 2. Top Cover / 3. Memory Card Slot Cover / 4. Audio Input Terminal / 5. External Device I/O Terminal / 6. 100Base-TX LAN Connector / 7. Safety Wire Attachment / 8. Tripod Mounting Screw Hole (a 1/4-20 UNC tripod mounting screw less than 5.5 mm (0.22 in.) in length will fit the screw hole) / 9. Rotation Dial CANON INC. 30-2, Shimomaruko 3-chome, Ohta-ku, Tokyo 146-8501, Japan CANON EUROPA N.V. Bovenkerkerweg 59, 1185 XB Amstelveen, The Netherlands b c b. Memory Card Slot c. Reset Switch (please refer to the "Operation Guide") To remove the memory card, push it in all the way until the card slightly pops out and remove. Important Insert a memory card before installing the camera. 3 5 e d 6 d. Anchor or Structure / e. Safety Wire 4 f Please refer to the reverse side of this guide for details. 7 Weight: Approx. 270 g (9.6 oz.) Approx. 270 g (9.6 oz.) Approx. 240 g (8.5 oz.) 8 g LED : When powered on, during reboot, during normal use : When [Turn Off] is selected (please refer to the "Operation Guide") f. LAN cable / g. LED Important The camera head will move and make noise when the power is turned on. • Do not touch the camera head. • After the head stops moving, mount the camera. If Using the External Device Terminal or Audio Terminal h i j k Please refer to the reverse side of this guide for details. h. Protective Cover for Audio Input Terminal i. Audio Input Terminal j. Protective Cover for External Device I/O Terminal k. External Device I/O Terminal Accessories The following accessories can be purchased separately as necessary. Some accessories are not available in certain countries or regions. Pendant Mounting Kit PC30-VB Dedicated accessory used to install the camera to the end of pipe that extends from high ceilings, such as in big-box stores. Surface Mounting Spacer SS30-VB Dedicated accessory used to install a camera without having to drill any holes in the wall or ceiling for cables. Junction Box Mounting Kit PS30-VB Dedicated accessory used to install a camera using a junction box. Plenum Mounting Kit SR30-P-VB Dedicated accessory used to install the camera recessed into a ceiling. The part projecting out within the ceiling can be covered. The contents of this guide are subject to change without any prior notice.
-
 1
1 -
 2
2
 |
 |