Canon VB-S800D Mark II Pendant Mounting Kit PC30-VB Installation Guide - Page 1
Canon VB-S800D Mark II Manual
 |
View all Canon VB-S800D Mark II manuals
Add to My Manuals
Save this manual to your list of manuals |
Page 1 highlights
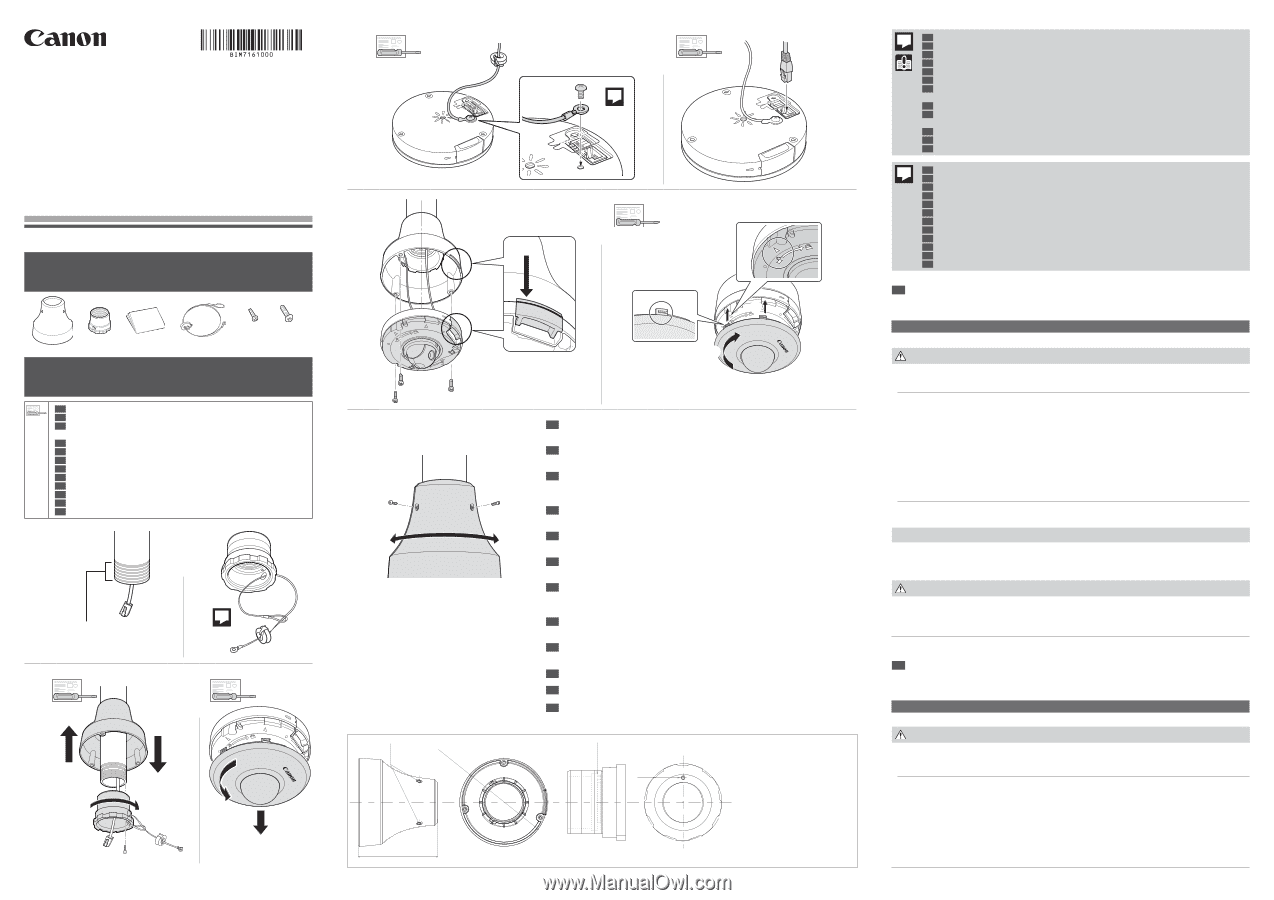
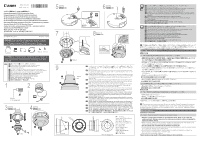
BIM-7161-000 初版 :2019.4.1 PC30-VB Pendant Mounting Kit PC30-VB Installation Guide Hängemontagesatz für PC30-VB Installationshandbuch Kit de montaje de colgante PC30-VB Guía de instalación Kit de montage de suspension PC30-VB Manuel d'installation Kit di montaggio per telecamera sospesa PC30-VB Guida all'installazione PC30-VB Sarkıtma Montaj Kiti PC30-VB Kurulum Kılavuzu Zestaw do montażu podwieszanego PC30-VB - instrukcja instalacji PC30-VB PC30-VB PC30-VB © CANON INC. 2019 Printed in Taiwan Check Included Items / Überprüfen des Lieferinhalts / Compruebe los artículos incluidos / Vérification des éléments fournis / Verifica dei componenti inclusi Dahili Parçaların Kontrolü / Sprawdź kompletność zestawu M3×3 M4×3 Installing the Camera / Installieren der Kamera / Instalación de la cámara / Installation de la caméra / Installazione della telecamera Kamerayı kurma / Instalowanie kamery JA EN Please refer to the "Installation Guide" for each camera. DE Informationen zur jeweiligen Kamera finden Sie im „Installationshandbuch". ES Por favor, consulte la "Guía de instalación" para cada cámara. FR Veuillez vous référer au « Manuel d'installation » de chaque caméra. IT Fare riferimento alla "Guida all'installazione" di ogni telecamera. RU TR Lütfen her kamera için "Kurulum Kılavuzu"na bakın. PL Należy zapoznać się z „Instrukcją instalacji" kamery. TH KO ZH 1 2 1 25 mm (1 in./pulg./po) 3 4 ❹ ❶ ❷ ❸ M3 ❶❷ 5 6 2 7 8 ❶ ❷ M4×3 9 ❷ ❶ M3×2 2-M3 φ120 (4.72/4,72) 109 (4.29/4,29) JA M3 180 EN Turn the pendant cap so the front of the camera faces in the desired direction then secure the cap with the pipe fixing screws (M3). To avoid twisting the cables, do not turn the cap more than 180°. DE Drehen Sie die obere Abdeckung, bis die Kamera in die gewünschte Richtung zeigt, und fixieren Sie sie anschließend mit den Befestigungsschrauben für das Rohr (M3). Um ein Verdrehen der Kabel zu verhindern, drehen Sie die Abdeckung nicht um mehr als 180°. ES Gire la tapa del colgante de modo que la parte delantera de la cámara se encuentre en la dirección deseada, luego asegure la tapa con los tornillos para fijación del tubo (M3). Para evitar la torsión de los cables, no gire la tapa más de 180°. FR Faites pivoter la garniture afin de positionner l'avant de la caméra dans la direction souhaitée, puis fixez-le avec les vis de fixation de la bague (M3). Pour éviter de tordre les câbles, ne le faites pas pivoter de plus de 180°. IT Girare la chiusura parte sospesa in modo che la parte anteriore della telecamera sia rivolta nella direzione desiderata, quindi fissarla con le viti di fissaggio del tubo (M3). Per evitare la torsione dei cavi, non effettuare rotazioni superiori ai 180°. RU M3 180°. TR Sarkıtma başlığı, kameranın önü istenen yöne bakacak şekilde döndürün. Ardından boru sabitleme vidaları (M3) ile başlığı sabitleyin. Kabloların bükülmesini önlemek için başlığı 180°'den fazla döndürmeyin. PL Obrócić kołpak do montażu podwieszanego tak, aby przód kamery był skierowany w żądaną stronę, a następnie przymocować kołpak do rurki śrubami mocującymi (M3). Aby uniknąć skręcenia się przewodów, nie należy obracać kołpaka o więcej niż 180°. TH M3 180° KO M3 180 ZH M3 180°。 1-1/2 NPSM M3 mm (in./pulg./po) ࣭ྔɿ 250 g Weight: Approx. 250 g (8.9 oz.) Gewicht: Ca. 250 g Peso: Aprox. 250 g (8,9 oz.) Poids : environ 250 g (8,9 oz.) Peso: circa 250 g 250 г Ağırlık: Yaklaşık 250 g Waga: ok. 250 g 250 250 g 250 g 1 JA EN Use the safety wire included with the pendant mounting kit. DE Verwenden Sie das im Lieferumfang des Hängemontagesatzes enthaltene Sicherungsseil. ES Utilice el cable de seguridad incluido con el kit de montaje de colgante. FR Utilisez le fil de sécurité fourni avec le kit de montage de suspension. IT Utilizzare il cavo di sicurezza in dotazione con il kit di montaggio per telecamera sospesa. RU TR Sarkıtma montaj kiti ile birlikte gelen güvenlik kablosunu kullanın. PL Należy stosować przewód zabezpieczający znajdujący się w zestawie do montażu podwieszanego. TH KO ZH 2 JA EN Use the screw included with the camera's safety wire. DE Verwenden Sie die Schraube, die mit dem Sicherungsseil der Kamera geliefert wurde. ES Utilice el tornillo incluido con el cable de seguridad de la cámara. FR Utilisez la vis fournie avec le fil de sécurité de la caméra. IT Utilizzare la vite fornita con il cavo di sicurezza della telecamera. RU TR Kameranın güvenlik kablosu ile birlikte gelen vidayı kullanın. PL Użyć śruby dołączonej do przewodu zabezpieczającego kamery. TH KO ZH JA EN This product is for indoor use only. Be sure to read the "Safety Precautions" section for correct use. After reading this "Installation Guide", keep it in a readily accessible location for future reference. In addition to this "Installation Guide", also read the "Installation Guide" included with the camera. Safety Precautions Installation Precautions Caution Failure to follow the instructions may result in injury. • Request a professional installer for all installation work. Never try to install the camera yourself. Doing so may result in unforeseen accidents such as dropping the camera or electric shock. • When installing, make sure the surface is capable of withstanding the total weight of the camera and accessories, and sufficiently reinforce if necessary. • Use the safety wire included with the pendant mounting kit. • Periodically check the parts and screws for rust and loosening, in order to prevent injuries and equipment damage due to falling items. • Do not install in unstable places, places subject to significant vibration or impact, or places subject to salt damage or corrosive gas. • Use only with compatible cameras. Failure to do so may result in the camera falling or other accidents.
-
 1
1 -
 2
2
 |
 |