Canon VIXIA HF M32 VIXIA HF M30 / HF M31 / HF M32 / HF M300 Instruction Manua - Page 129
Saving Photos - user manual
 |
UPC - 013803127324
View all Canon VIXIA HF M32 manuals
Add to My Manuals
Save this manual to your list of manuals |
Page 129 highlights
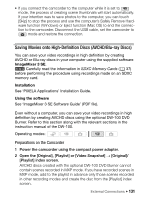
Installation See 'PIXELA Applications' Installation Guide. Using the software See 'ImageMixer 3 SE Software Guide' (PDF file). Saving Photos With the supplied software Photo Application you can save photos to your computer, and easily organize and edit them. Installation Install the software before you connect the camcorder to the computer for the first time. See also the relevant sections in the 'Photo Application' Instruction Manual (r PDF file) in the [MANUALS_ENGLISH] folder on the supplied Camcorder Supplemental Disc. Install the supplied Photo Application software following the instructions in the software's instruction manual. r Refer to Installing Photo Application. First-time connection to a computer running Windows Windows users only: The first time you connect the camcorder to the computer, you also need to select the CameraWindow auto-launch setting. r Refer to Starting CameraWindow. Using the software 1 Power the camcorder using the compact power adapter. 2 Set the camcorder to mode, in single photo view. 3 Connect the camcorder to the computer using the supplied USB cable. • Connection D. Refer to Connection Diagrams (0 124). • If the device type selection screen appears, touch [Computer/ Printer]. External Connections Š 129
-
 1
1 -
2
-
3
-
4
-
5
-
6
-
7
-
8
-
9
-
10
-
11
-
12
-
13
-
14
-
15
-
16
-
17
-
18
-
19
-
20
-
21
-
22
-
23
-
24
-
25
-
26
-
27
-
28
-
29
-
30
-
31
-
32
-
33
-
34
-
35
-
36
-
37
-
38
-
39
-
40
-
41
-
42
-
43
-
44
-
45
-
46
-
47
-
48
-
49
-
50
-
51
-
52
-
53
-
54
-
55
-
56
-
57
-
58
-
59
-
60
-
61
-
62
-
63
-
64
-
65
-
66
-
67
-
68
-
69
-
70
-
71
-
72
-
73
-
74
-
75
-
76
-
77
-
78
-
79
-
80
-
81
-
82
-
83
-
84
-
85
-
86
-
87
-
88
-
89
-
90
-
91
-
92
-
93
-
94
-
95
-
96
-
97
-
98
-
99
-
100
-
101
-
102
-
103
-
104
-
105
-
106
-
107
-
108
-
109
-
110
-
111
-
112
-
113
-
114
-
115
-
116
-
117
-
118
-
119
-
120
-
121
-
122
-
123
-
 124
124 -
 125
125 -
 126
126 -
 127
127 -
 128
128 -
 129
129 -
 130
130 -
 131
131 -
 132
132 -
 133
133 -
 134
134 -
135
-
136
-
137
-
138
-
139
-
140
-
141
-
142
-
143
-
144
-
145
-
146
-
147
-
148
-
149
-
150
-
151
-
152
-
153
-
154
-
155
-
156
-
157
-
158
-
159
-
160
-
161
-
162
-
163
-
164
-
165
-
166
-
167
-
168
-
169
-
170
-
171
-
172
-
173
-
174
-
175
-
176
-
177
-
178
-
179
-
180
-
181
-
182
-
183
-
184
-
185
-
186
-
187
-
188
-
189
-
190
-
191
-
192
-
193
-
194
-
195
-
196
-
197
-
198
-
199
-
200
-
201
-
202
-
203
-
204
-
205
-
206
-
207
-
208
-
209
-
210
 |
 |
