Canon VIXIA HG20 ZoomBrowser EX 6.5 for Windows Instruction Manual - Page 10
Click [Import Images from, Import Untransferred, Images]., Camera], and then click - memory card
 |
View all Canon VIXIA HG20 manuals
Add to My Manuals
Save this manual to your list of manuals |
Page 10 highlights
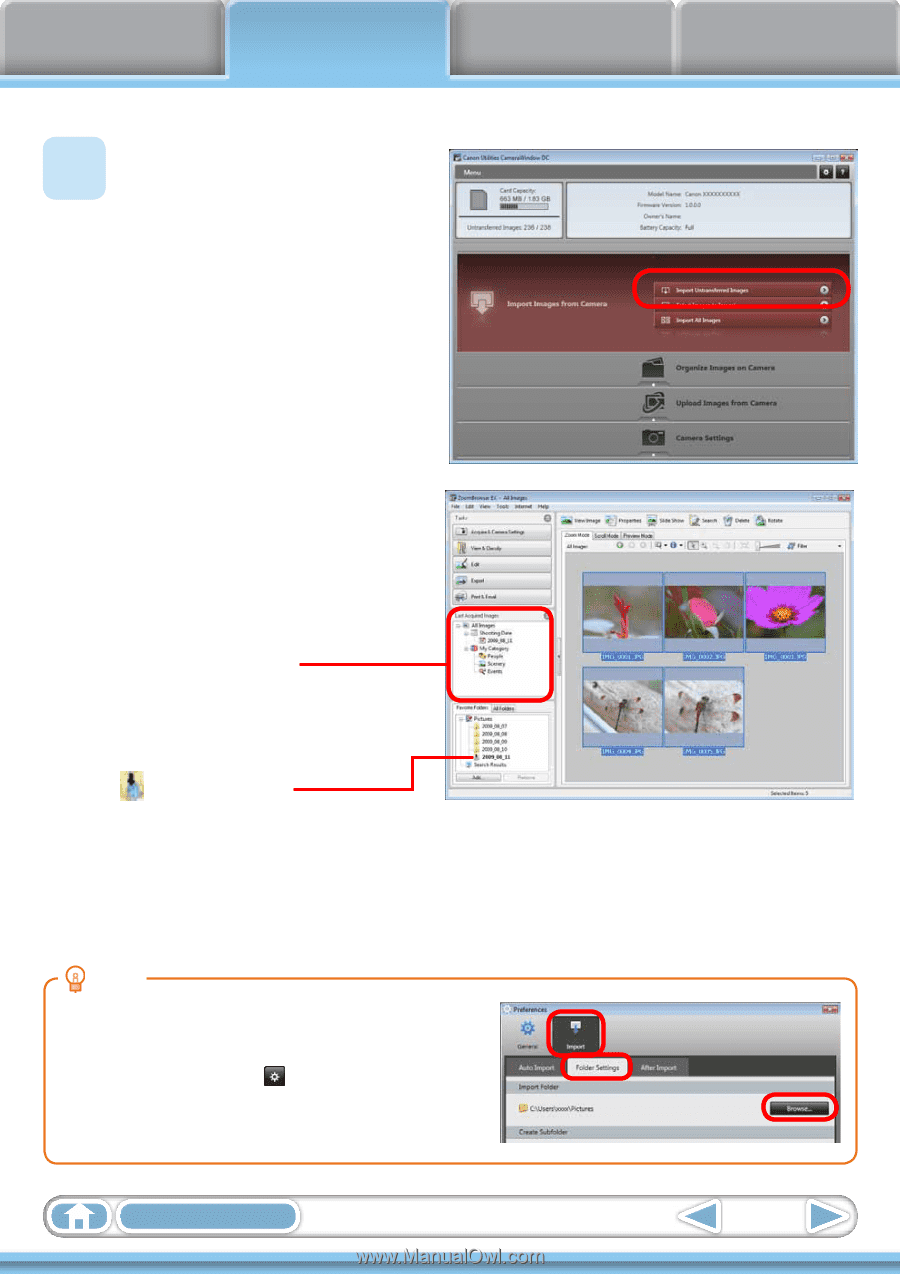
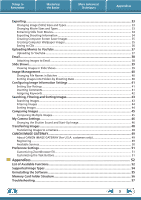
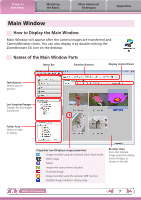
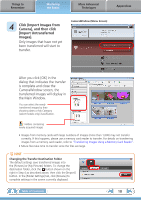
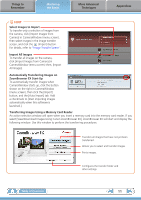
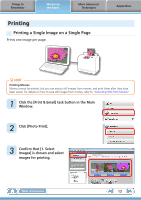
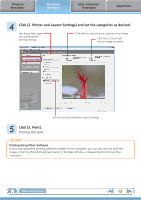
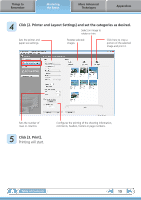
Things to Remember Mastering the Basics More Advanced Techniques Appendices 4 Click [Import Images from Camera], and then click [Import Untransferred Images]. Only images that have not yet been transferred will start to transfer. CameraWindow (Menu Screen) After you click [OK] in the dialog that indicates the transfer is complete and close the CameraWindow screen, the transferred images will display in the Main Window. You can select the newly transferred images by their shooting dates or My Category (select models only) classification. : Folders containing newly acquired images • Images from memory cards with large numbers of images (more than 1,000) may not transfer correctly. If this happens, please use a memory card reader to transfer. For details on transferring images from a memory card reader, refer to "Transferring Images Using a Memory Card Reader". • Movie files take time to transfer since the files are large. HINT Changing the Transfer Destination Folder The default settings save transferred images into the [Pictures] or [My Pictures] folders. To change the destination folder, click the button shown on the right in Step 4 as described above, then click the [Import] button. In the [Folder Settings] tab, click [Browse] to complete settings in the screen currently displayed. Table of Contents 10
-
 1
1 -
2
-
3
-
4
-
 5
5 -
 6
6 -
 7
7 -
 8
8 -
 9
9 -
 10
10 -
 11
11 -
 12
12 -
 13
13 -
 14
14 -
 15
15 -
16
-
17
-
18
-
19
-
20
-
21
-
22
-
23
-
24
-
25
-
26
-
27
-
28
-
29
-
30
-
31
-
32
-
33
-
34
-
35
-
36
-
37
-
38
-
39
-
40
-
41
-
42
-
43
-
44
-
45
-
46
-
47
-
48
-
49
-
50
-
51
-
52
-
53
-
54
-
55
-
56
-
57
-
58
-
59
-
60
 |
 |