Canon VIXIA HR10 Digital Video Software (Windows) Ver.26 Instruction Manual - Page 78
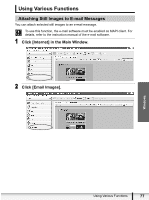
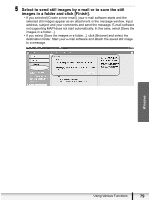
Select the still images you wish to send and click [Change, Image Size]., Select image size
 |
View all Canon VIXIA HR10 manuals
Add to My Manuals
Save this manual to your list of manuals |
Page 78 highlights
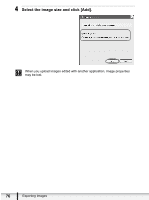
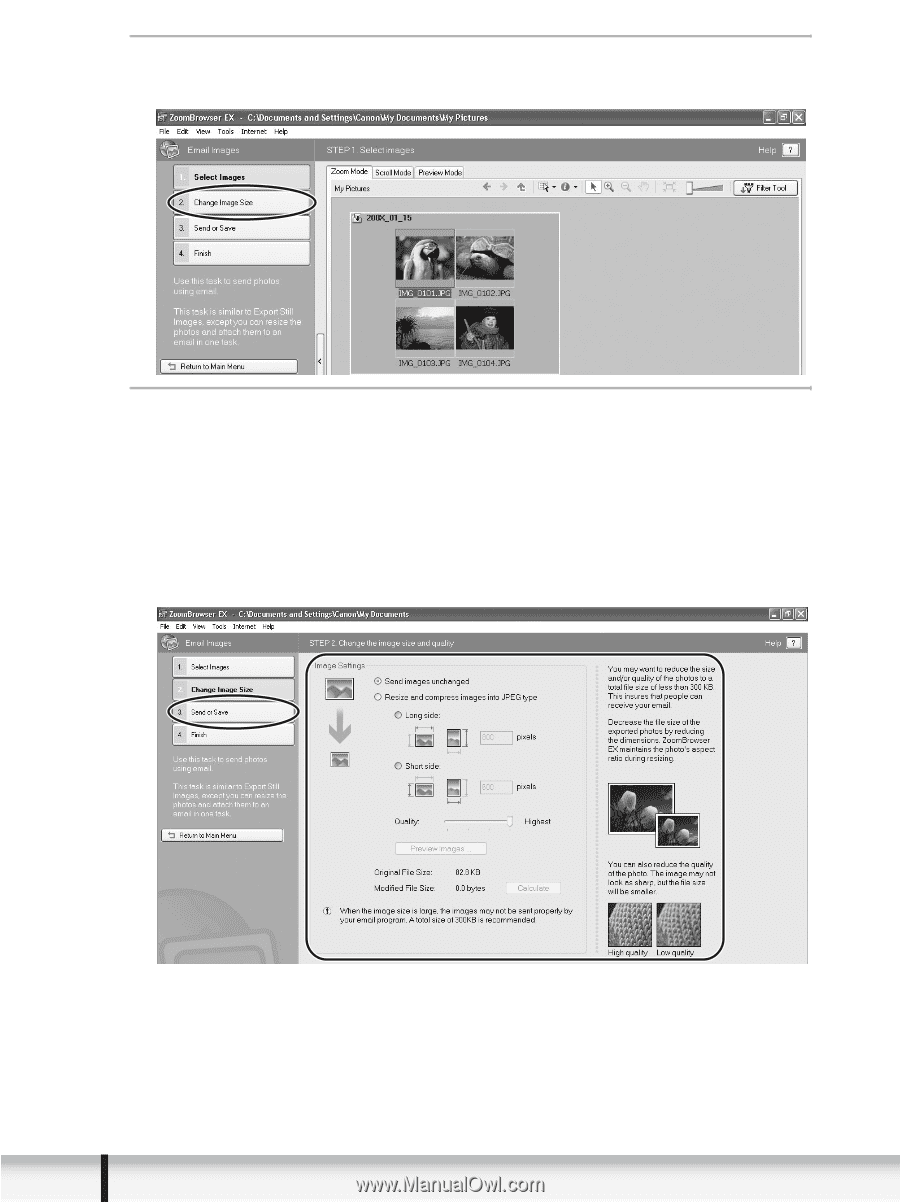
3 Select the still images you wish to send and click [Change Image Size]. 4 Select image size and quality, and click [Send or Save]. If you wish to send the still image without changes, select [Send images unchanged]. Normally select [Resize and compress images into JPEG type]. - [Long side/Short side]: Selects the long or short side and sets the image size in numbers. - [Quality]: Lowering this setting will lower image quality but reduce file size. - You can check the compressed still image by pressing [Preview Images]. - Pressing [Calculate] displays the file size after the compression as [Modified File Size]. 78 Using Various Functions
-
 1
1 -
2
-
3
-
4
-
5
-
6
-
7
-
8
-
9
-
10
-
11
-
12
-
13
-
14
-
15
-
16
-
17
-
18
-
19
-
20
-
21
-
22
-
23
-
24
-
25
-
26
-
27
-
28
-
29
-
30
-
31
-
32
-
33
-
34
-
35
-
36
-
37
-
38
-
39
-
40
-
41
-
42
-
43
-
44
-
45
-
46
-
47
-
48
-
49
-
50
-
51
-
52
-
53
-
54
-
55
-
56
-
57
-
58
-
59
-
60
-
61
-
62
-
63
-
64
-
65
-
66
-
67
-
68
-
69
-
70
-
71
-
72
-
 73
73 -
 74
74 -
 75
75 -
 76
76 -
 77
77 -
 78
78 -
 79
79 -
 80
80 -
 81
81 -
 82
82 -
 83
83 -
84
-
85
-
86
-
87
-
88
-
89
 |
 |
78
Using Various Functions
3
Select the still images you wish to send and click [Change
Image Size].
4
Select image size and quality, and click [Send or Save].
If you wish to send the still image without changes, select [Send images
unchanged]. Normally select [Resize and compress images into JPEG type].
-
[Long side/Short side]: Selects the long or short side and sets the image size
in numbers.
- [Quality]: Lowering this setting will lower image quality but reduce file size.
- You can check the compressed still image by pressing [Preview Images].
-
Pressing [Calculate] displays the file size after the compression as [Modified
File Size].