Canon eos40d EOS Utility Instruction Manual Windows - Page 27
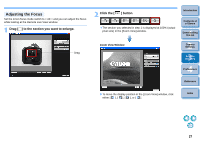
Set the Live View function., Click the, button., button to shoot., Remote Live View window
 |
UPC - 013803086553
View all Canon eos40d manuals
Add to My Manuals
Save this manual to your list of manuals |
Page 27 highlights
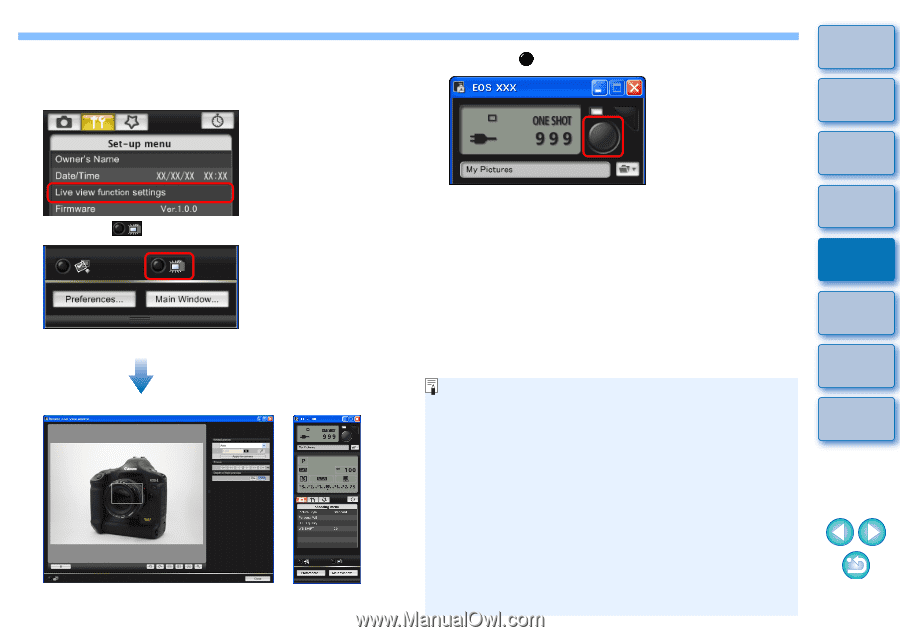
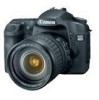
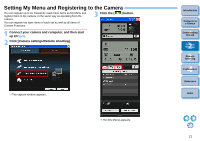
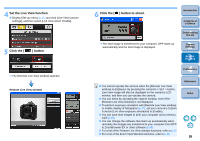
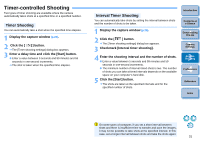
4 Set the Live View function. O Display [Set-up menu] (p.11) and click [Live View function settings], and then select [Live View shoot. Enable]. 5 Click the [ ] button. ¿ The [Remote Live View window] appears. Remote Live View window 6 Click the [ ] button to shoot. ¿ The shot image is transferred to your computer, DPP starts up automatically and the shot image is displayed. Introduction Contents at a Glance 1 Downloading Images 2Camera Settings 3Remote Shooting 4 Preferences O You cannot operate the camera when the [Remote Live View window] is displayed. By pressing the camera's < SET > button, Live View image will also be displayed on the camera's LCD monitor, and then you can operate the camera. O You can shoot by operating the capture window, even if the [Remote Live View window] is not displayed. O To perform exposure simulation with [Remote Live View window] or enable display of histograms (p.47), set your camera's Custom Function [Live View exposure simulation] to [Enable]. O You can save shot images to both your computer and a memory card (p.35). O You can change the software that starts up automatically when remotely shot images are transferred to your computer from DPP to ZoomBrowser EX or other software (p.35). O For a list of the Remote Live View window functions, refer to p.47. O For a list of the Zoom View Window functions, refer to p.48. Reference Index 26
-
 1
1 -
2
-
3
-
4
-
5
-
6
-
7
-
8
-
9
-
10
-
11
-
12
-
13
-
14
-
15
-
16
-
17
-
18
-
19
-
20
-
21
-
 22
22 -
 23
23 -
 24
24 -
 25
25 -
 26
26 -
 27
27 -
 28
28 -
 29
29 -
 30
30 -
 31
31 -
 32
32 -
33
-
34
-
35
-
36
-
37
-
38
-
39
-
40
-
41
-
42
-
43
-
44
-
45
-
46
-
47
-
48
-
49
-
50
-
51
 |
 |