Canon iP8500 iP8500 Quick Start Guide - Page 62
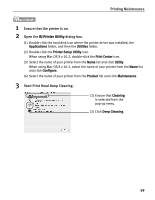
Printing Maintenance, Print the nozzle check pattern to check the Print Head condition.
 |
UPC - 013803037951
View all Canon iP8500 manuals
Add to My Manuals
Save this manual to your list of manuals |
Page 62 highlights
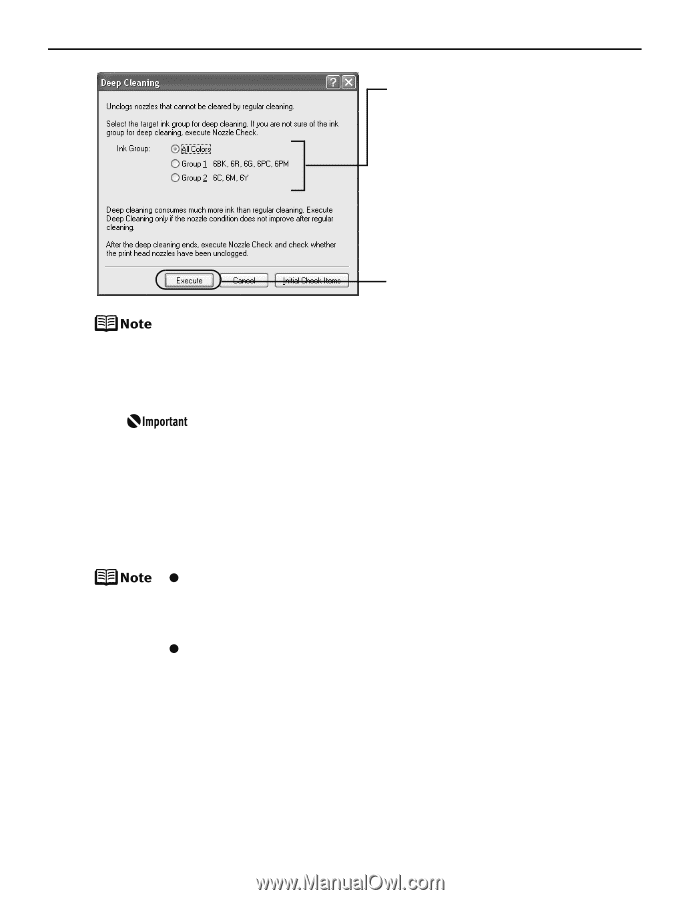
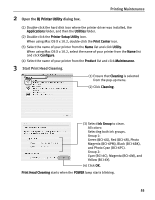
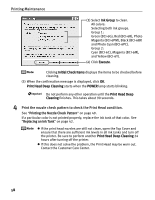
Printing Maintenance (3) Select Ink Group to clean. All colors: Selecting both ink groups. Group 1: Green (BCI-6G), Red (BCI-6R), Photo Magenta (BCI-6PM), Black (BCI-6BK) and Photo Cyan (BCI-6PC). Group 2: Cyan (BCI-6C), Magenta (BCI-6M), and Yellow (BCI-6Y). (4) Click Execute. Clicking Initial Check Items displays the items to be checked before cleaning. (5) When the confirmation message is displayed, click OK. Print Head Deep Cleaning starts when the POWER lamp starts blinking. Do not perform any other operation until the Print Head Deep Cleaning finishes. This takes about 90 seconds. 4 Print the nozzle check pattern to check the Print Head condition. See "Printing the Nozzle Check Pattern" on page 49. If a particular color is not printed properly, replace the ink tank of that color. See "Replacing an Ink Tank" on page 42. z If the print head nozzles are still not clean, open the Top Cover and ensure that there are sufficient ink levels in all ink tanks and turn off the printer. Be sure to perform another Print Head Deep Cleaning 24 hours after turning off the printer. z If this does not solve the problem, the Print Head may be worn out. Contact the Customer Care Center. 58
-
 1
1 -
2
-
3
-
4
-
5
-
6
-
7
-
8
-
9
-
10
-
11
-
12
-
13
-
14
-
15
-
16
-
17
-
18
-
19
-
20
-
21
-
22
-
23
-
24
-
25
-
26
-
27
-
28
-
29
-
30
-
31
-
32
-
33
-
34
-
35
-
36
-
37
-
38
-
39
-
40
-
41
-
42
-
43
-
44
-
45
-
46
-
47
-
48
-
49
-
50
-
51
-
52
-
53
-
54
-
55
-
56
-
 57
57 -
 58
58 -
 59
59 -
 60
60 -
 61
61 -
 62
62 -
 63
63 -
 64
64 -
 65
65 -
 66
66 -
 67
67 -
68
-
69
-
70
-
71
-
72
-
73
-
74
-
75
-
76
-
77
-
78
-
79
-
80
-
81
-
82
-
83
-
84
-
85
-
86
-
87
-
88
-
89
-
90
-
91
-
92
-
93
-
94
-
95
-
96
-
97
-
98
-
99
-
100
-
101
-
102
 |
 |