Carvin 9000 Instruction Manual - Page 7
Wireless, System
 |
View all Carvin 9000 manuals
Add to My Manuals
Save this manual to your list of manuals |
Page 7 highlights
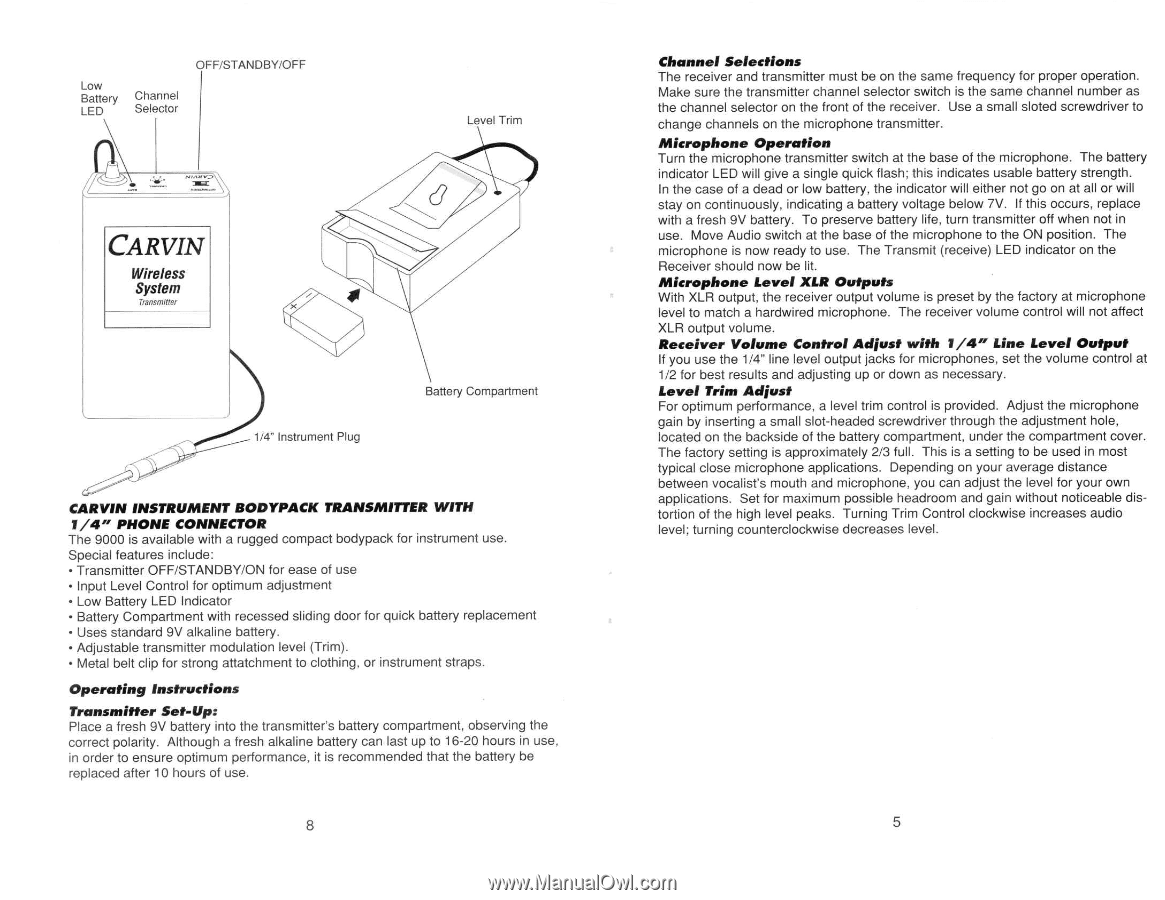
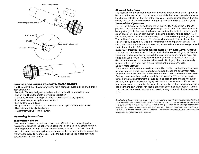
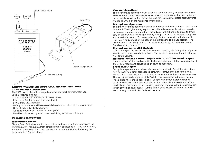
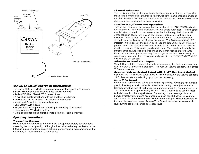
Low Battery LED Channel Selector OFF/STANDBY/OFF • CARVIN Wireless System Transmitter Level Trim 1/4" Instrument Plug Battery Compartment CARVIN INSTRUMENT BODYPACK TRANSMITTER WITH 1/4" PHONE CONNECTOR The 9000 is available with a rugged compact bodypack for instrument use. Special features include: • Transmitter OFF/STANDBY/ON for ease of use • Input Level Control for optimum adjustment • Low Battery LED Indicator - Battery Compartment with recessed sliding door for quick battery replacement • Uses standard 9V alkaline battery. • Adjustable transmitter modulation level (Trim). • Metal belt clip for strong attatchment to clothing, or instrument straps. Operating Instructions Transmitter Set-Up: Place a fresh 9V battery into the transmitter's battery compartment, observing the correct polarity. Although a fresh alkaline battery can last up to 16-20 hours in use, in order to ensure optimum performance, it is recommended that the battery be replaced after 10 hours of use. Channel Selections The receiver and transmitter must be on the same frequency for proper operation. Make sure the transmitter channel selector switch is the same channel number as the channel selector on the front of the receiver. Use a small sloted screwdriver to change channels on the microphone transmitter. Microphone Operation Turn the microphone transmitter switch at the base of the microphone. The battery indicator LED will give a single quick flash; this indicates usable battery strength. In the case of a dead or low battery, the indicator will either not go on at all or will stay on continuously, indicating a battery voltage below 7V. If this occurs, replace with a fresh 9V battery. To preserve battery life, turn transmitter off when not in use. Move Audio switch at the base of the microphone to the ON position. The microphone is now ready to use. The Transmit (receive) LED indicator on the Receiver should now be lit. Microphone Level XLR Outputs With XLR output, the receiver output volume is preset by the factory at microphone level to match a hardwired microphone. The receiver volume control will not affect XLR output volume. Receiver Volume Control Adjust with 1/4" Line Level Output If you use the 1/4" line level output jacks for microphones, set the volume control at 1/2 for best results and adjusting up or down as necessary. Level Trim Adjust For optimum performance, a level trim control is provided. Adjust the microphone gain by inserting a small slot-headed screwdriver through the adjustment hole, located on the backside of the battery compartment, under the compartment cover. The factory setting is approximately 2/3 full. This is a setting to be used in most typical close microphone applications. Depending on your average distance between vocalist's mouth and microphone, you can adjust the level for your own applications. Set for maximum possible headroom and gain without noticeable distortion of the high level peaks. Turning Trim Control clockwise increases audio level; turning counterclockwise decreases level.
-
 1
1 -
 2
2 -
 3
3 -
 4
4 -
 5
5 -
 6
6 -
 7
7 -
 8
8
 |
 |