Casio C731 User Guide - Page 27
Battery Level - wall charger
 |
View all Casio C731 manuals
Add to My Manuals
Save this manual to your list of manuals |
Page 27 highlights
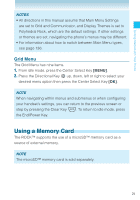
Getting Started with Your Phone 3. After the handset is completely charged, unplug the Wall Charger connector and close the Charging/ Data Port cover. 4. Make sure the port cover is completely closed. Warning! • Do not forcibly insert the Wall Charger power plug into the Charging/Data Port. Hold it horizontally and carefully insert it into the Charging/Data Port. • Failure to completely reseal the Charging/Data Port cover after charging may allow liquids to enter the casing, and damage the handset. Battery Level The battery level icon appears at the top of the main display. When the battery level becomes low, the low battery sensor alerts you in three ways: an audible tone will sound, the battery icon will begin to blink, and BATTERY LOW will appear on the display. If the battery level becomes too low, the phone automatically powers off and any function in progress will not be saved. Fully Charged Fully Depleted NOTE Charging time varies depending upon the battery level. 26
-
 1
1 -
2
-
3
-
4
-
5
-
6
-
7
-
8
-
9
-
10
-
11
-
12
-
13
-
14
-
15
-
16
-
17
-
18
-
19
-
20
-
21
-
 22
22 -
 23
23 -
 24
24 -
 25
25 -
 26
26 -
 27
27 -
 28
28 -
 29
29 -
 30
30 -
 31
31 -
 32
32 -
33
-
34
-
35
-
36
-
37
-
38
-
39
-
40
-
41
-
42
-
43
-
44
-
45
-
46
-
47
-
48
-
49
-
50
-
51
-
52
-
53
-
54
-
55
-
56
-
57
-
58
-
59
-
60
-
61
-
62
-
63
-
64
-
65
-
66
-
67
-
68
-
69
-
70
-
71
-
72
-
73
-
74
-
75
-
76
-
77
-
78
-
79
-
80
-
81
-
82
-
83
-
84
-
85
-
86
-
87
-
88
-
89
-
90
-
91
-
92
-
93
-
94
-
95
-
96
-
97
-
98
-
99
-
100
-
101
-
102
-
103
-
104
-
105
-
106
-
107
-
108
-
109
-
110
-
111
-
112
-
113
-
114
-
115
-
116
-
117
-
118
-
119
-
120
-
121
-
122
-
123
-
124
-
125
-
126
-
127
-
128
-
129
-
130
-
131
-
132
-
133
-
134
-
135
-
136
-
137
-
138
-
139
-
140
-
141
-
142
-
143
-
144
-
145
-
146
-
147
-
148
-
149
-
150
-
151
-
152
-
153
-
154
-
155
-
156
-
157
-
158
-
159
-
160
-
161
-
162
-
163
-
164
-
165
-
166
-
167
-
168
-
169
-
170
-
171
-
172
-
173
-
174
-
175
-
176
-
177
-
178
-
179
-
180
-
181
-
182
-
183
-
184
-
185
-
186
-
187
-
188
-
189
-
190
-
191
-
192
-
193
-
194
-
195
-
196
-
197
-
198
-
199
-
200
-
201
 |
 |
