Casio EX-S10BK User Guide - Page 144
Power Supply, Charging, To replace the battery, Battery Precautions
 |
View all Casio EX-S10BK manuals
Add to My Manuals
Save this manual to your list of manuals |
Page 144 highlights
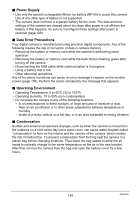
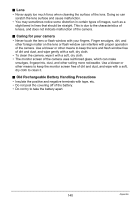
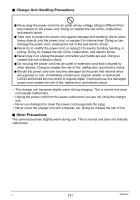
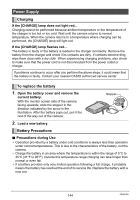
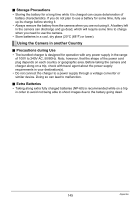
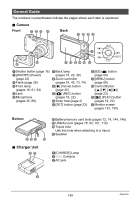
Power Supply Charging If the [CHARGE] lamp does not light red... Charging cannot be performed because ambient temperature or the temperature of the charger is too hot or too cold. Wait until the camera returns to normal temperature. When the camera returns to a temperature where charging can be performed, the [CHARGE] lamp will light red. If the [CHARGE] lamp flashes red... The battery is faulty or the battery is loaded in the charger incorrectly. Remove the battery from the charger and check if its contacts are dirty. If contacts become dirty, wipe them clean with a dry cloth. When experiencing charging problems, also check to make sure that the power cord is not disconnected from the power outlet or charger. If problems continue to occur after you perform the above steps, it could mean that the battery is faulty. Contact your nearest CASIO authorized service center. To replace the battery 1. Open the battery cover and remove the current battery. With the monitor screen side of the camera facing upwards, slide the stopper in the direction indicated by the arrow in the illustration. After the battery pops out, pull it the rest of the way out of the camera. Stopper 2. Load a new battery. Battery Precautions . Precautions during Use • Operation provided by a battery under cold conditions is always less than operation under normal temperatures. This is due to the characteristics of the battery, not the camera. • Charge the battery in an area where the temperature is within the range of 5°C to 35°C (41°F to 95°F). Outside this temperature range charging can take longer than normal or even fail. • If a battery provides only very limited operation following a full charge, it probably means the battery has reached the end of its service life. Replace the battery with a new one. 144 Appendix
-
 1
1 -
2
-
3
-
4
-
5
-
6
-
7
-
8
-
9
-
10
-
11
-
12
-
13
-
14
-
15
-
16
-
17
-
18
-
19
-
20
-
21
-
22
-
23
-
24
-
25
-
26
-
27
-
28
-
29
-
30
-
31
-
32
-
33
-
34
-
35
-
36
-
37
-
38
-
39
-
40
-
41
-
42
-
43
-
44
-
45
-
46
-
47
-
48
-
49
-
50
-
51
-
52
-
53
-
54
-
55
-
56
-
57
-
58
-
59
-
60
-
61
-
62
-
63
-
64
-
65
-
66
-
67
-
68
-
69
-
70
-
71
-
72
-
73
-
74
-
75
-
76
-
77
-
78
-
79
-
80
-
81
-
82
-
83
-
84
-
85
-
86
-
87
-
88
-
89
-
90
-
91
-
92
-
93
-
94
-
95
-
96
-
97
-
98
-
99
-
100
-
101
-
102
-
103
-
104
-
105
-
106
-
107
-
108
-
109
-
110
-
111
-
112
-
113
-
114
-
115
-
116
-
117
-
118
-
119
-
120
-
121
-
122
-
123
-
124
-
125
-
126
-
127
-
128
-
129
-
130
-
131
-
132
-
133
-
134
-
135
-
136
-
137
-
138
-
 139
139 -
 140
140 -
 141
141 -
 142
142 -
 143
143 -
 144
144 -
 145
145 -
 146
146 -
 147
147 -
 148
148 -
 149
149 -
150
-
151
-
152
-
153
-
154
-
155
-
156
-
157
-
158
-
159
-
160
-
161
-
162
-
163
-
164
-
165
-
166
-
167
 |
 |
