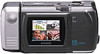
Casio QV-100 Owners Manual - Page 8
Playing Back Images - cable
 |
View all Casio QV-100 manuals
Add to My Manuals
Save this manual to your list of manuals |
Page 8 highlights
Recording Images • The manual exposure adjustment procedure (page 25) cannot be used when an exposure warning indicator is on the LCD. Clear the warning indicator by changing the aperture switch setting. • Pressing the [+] or [-] button to adjust exposure while an exposure warning indicator is on the LCD causes a +/- exposure value to appear. This is an EV value. Low Battery Indicator The low battery indicator ( ) appears on the LCD whenever remaining battery power drops below a certain level. When this indicator appears, replace all four batteries with a fresh set of new ones. Once the low battery indicator appears, you can expect only about 10 more minutes (alkaline batteries) of operation before total power failure. • See page 13 for details on how to replace batteries. Memory Full Message If you are recording images in the Fine Mode and there is not enough memory for further Fine Mode recording, the message "REMAIN" appears on the monitor screen along with a value that shows how many images can still be recorded in the Normal Mode. You can press MODE at this time to change to the Normal Mode and record more image if you want. The message "MEMORY FULL" means that there is not enough memory for further recording in any mode. In this case, you have to use the following procedures make room in memory for further recording. • Delete some images from memory (page 46) • Change the resolution of some of the stored images from FINE to NORMAL (page 50) 29 Operation Using the Self-Timer With the Self-Timer, the shutter is released 10 seconds after you press the /PROTECT button. 1. Enter the Record Mode. • Set the function switch to the REC position. 2. Start the Self-Timer operation. • Place the camera securely on a tripod, desk or other stable surface, with the image to be recorded in the LCD. • After composing the image, press the ton. /PROTECT but- • A 10-second countdown starts on the LCD. The shutter will release automatically when the end of the countdown is reached. • To cancel on ongoing Self-Timer operation, press the / PROTECT button or shutter button. Note • If you use the Self-Timer with the lens body rotate 180° (page 22), you can view the countdown on the LCD while waiting for the shutter to release. Important! • If battery power is low, camera power may turn off while a countdown is in progress. If this happens, replace the batteries with new ones. 30 Playing Back Images Playing Back Images This section describes how to recall and view images stored in camera memory. Displaying Images on the Camera's LCD Camera memory is divided into "pages", and each image is assigned to page that is numbered sequentially from 1 through 192 (NORMAL resolution images). Note that all 192 pages are available only if all images are recorded using the NORMAL Mode (page 24). The following procedure describes how to display images on the camera's built-in LCD. 1. Enter the Playback Mode and turn on the camera. • Slide the function switch to the PLAY position. REC • When power comes on, the page PLAY that was displayed when you last turned power off appears on the LCD. 2. Scroll through the memory pages until the image you want to view is displayed. • Press [+] to display the next memory page or [-] to display the previous memory page. • To jump to the first (lowest numbered) image in memory, press the shutter button and [-] button at the same time. • Holding down [+] or [-] for about two seconds starts highspeed scrolling of images. 31 Operation Notes • If you set the function switch to PLAY after recording an image, that image appears on the LCD first. • The message "MEMORY EMPTY" appears on the LCD if there are no images stored in memory when you enter the Playback Mode. Displaying Images on a TV Screen Use the special video cable that comes with the camera to connect it to a television as illustrated below, and you can then view the images stored in camera memory on the TV's screen. Important! • The camera can be connected only to a TV that is equipped with a VIDEO IN terminal. • Make sure that the power of both the camera and the TV are turned off when making connections. • The signal output through this camera's VIDEO OUT terminal is an NTSC signal. An image output through this terminal will not look normal if the camera is connected to a PAL or other type of TV or video deck. Accessory video cable TV VIDEO OUT terminal DEL ON/OFPFOWER */165 NOMAL - 3 7*%&0 "6%*0 MACRO VIDEO IN terminal After connecting the camera and TV, set the channel of the TV to the channel used for video input. After connecting the camera and TV, use the same procedures as those described under "Displaying Images on the Camera's LCD" on page 31. 32
-
 1
1 -
2
-
 3
3 -
 4
4 -
 5
5 -
 6
6 -
 7
7 -
 8
8 -
 9
9 -
 10
10 -
 11
11 -
 12
12 -
 13
13 -
14
-
15
-
16
-
17
 |
 |
