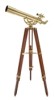
Celestron Ambassador 80 AZ Brass Telescope Ambassador Series Manual (English, - Page 9
Installing the Diagonal & Eyepiece - 80mm model
 |
View all Celestron Ambassador 80 AZ Brass Telescope manuals
Add to My Manuals
Save this manual to your list of manuals |
Page 9 highlights
Figure 2-15 Figure 2-16 Figure 2-17 To align the finderscope with the main telescope: 1. Remove the front lens cap of the telescope and both caps from the finderscope. Locate a distant daytime object (at least ¼ mile/0.4km away) and center it in the main telescope. 2. Look through the finderscope (the eyepiece end of the finderscope which has the smaller diameter lens) and take notice of the position of the same object. 3. Without moving the main telescope, turn the thumbscrews of the finderscope brackets until the crosshairs of the finderscope are centered on the object chosen with the main telescope. This may take a number of attempts to get it properly centered as you loosen one and tighten another of the thumbscrews of each bracket. 4. If the image through the finderscope is not sharp (out of focus), you will need to adjust the finderscope so you can obtain a sharp focus through it. Locate the ring on the finderscope (it is between the objective lens and the finderscope bracket) and turn it counterclockwise to loosen it a few turns. Then turn the front objective piece in or out until a sharp focus is achieved. Lastly, tighten the ring. Installing the Diagonal & Eyepiece - 80mm model The diagonal is a prism that diverts the light at a 45° angle to the light path of the telescope. This allows you to observe in a position that is more comfortable than if you had to look straight through. This diagonal is an erect image model that corrects the image to be right side up and oriented correctly left-to-right which is much easier to use for terrestrial observing. Also, the diagonal can be rotated to any position which is most favorable for you. To install the diagonal and eyepiece: 1. Remove the cap at the rear of the telescope by unthreading it counterclockwise - Figure 2-18. 2. Insert the small barrel of the diagonal into the rear opening of the telescope. Make sure the thumbscrew on the telescope does not protrude into the opening before installation. Once the diagonal is inserted, tighten the thumbscrew to hold it in place - Figure 2-19. 3. Put the barrel of the eyepiece into the diagonal and tighten the thumbscrew of the diagonal to hold the eyepiece in place and tighten the thumbscrew - Figure 2-20. Again, when doing this make sure the thumbscrew is not protruding into the diagonal before inserting the eyepiece. 4. The standard eyepiece can be changed to other optional eyepieces (for lower or higher power) by reversing the procedure in step 3 above. Figure 2-18 Figure 2-19 9 Figure 2-20
-
 1
1 -
2
-
3
-
 4
4 -
 5
5 -
 6
6 -
 7
7 -
 8
8 -
 9
9 -
 10
10 -
 11
11 -
 12
12 -
 13
13 -
 14
14 -
15
-
16
-
17
-
18
-
19
-
20
-
21
-
22
-
23
-
24
-
25
-
26
-
27
-
28
-
29
-
30
-
31
-
32
-
33
-
34
-
35
-
36
-
37
-
38
-
39
-
40
-
41
-
42
-
43
-
44
-
45
-
46
-
47
-
48
-
49
-
50
-
51
-
52
-
53
-
54
-
55
-
56
-
57
-
58
-
59
-
60
-
61
-
62
-
63
-
64
-
65
-
66
 |
 |
