Celestron CGX Equatorial 800 HD Telescopes Whitepaper EdgeHD Optics - Page 9
The Celestron EdgeHD
 |
View all Celestron CGX Equatorial 800 HD Telescopes manuals
Add to My Manuals
Save this manual to your list of manuals |
Page 9 highlights
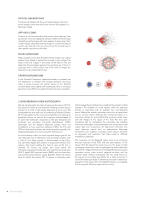
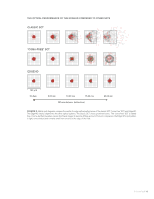
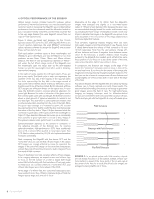
We cut corrector blanks from large sheets of the glass, then run them through a double-sided surfacing machine to grind and polish both surfaces to an optical finish. The blanks are inspected and any with defects are discarded. The Johnson/Celestron method for producing the polynomial aspheric curve is based on precision "master blocks" with the exact inverse of the desired curve. We clean the master block and corrector blank, and then, by applying a vacuum from the center of the block, pull them into intimate optical contact, excluding any lint, dust, or air between them, gently bending the flat corrector blank to match the reverse curve of the block. We then take the combined master block and corrector blank and process the top surface of the corrector to a polished concave spherical surface. With the corrector lens still on the master block, an optician tests the radius and figure of the new surface against a precision reference matchplate (also known as an optical test plate or test glass) using optical interference to read the Newton's rings or interference fringes, as shown in Figure 7. If the surface radius lies within a tolerance of zero to three fringes (about 1.5 wavelengths of light, or 750nm concave), and the surface irregularity is less than half of one fringe (¼- wavelength of light), the corrector is separated from the master block. The thin glass springs back to its original shape, so that the side that was against the master block becomes flat and the polished surface assumes the profile of a Schmidt corrector lens. The corrector is tested again, this time in a double-pass auto collimator. Green laser light at 532nm wavelength (green) enters through an eyepiece, strikes an EdgeHD secondary and primary mirror, passes through the corrector lens under test, reflects from a precision optical flat, goes back through the corrector to reflect again from the mirrors, and finally back to focus. Because the light passes twice through the Schmidt corrector lens, any errors are seen doubled. The double-pass autocollimation test (see Figure 9) ensures that every Schmidt corrector meets the stringent requirements of an EdgeHD optical system. FIGURE 7. Matchplates use interference fringes to check the radius and smoothness of the correction. In this picture, a corrector blank is attached to a master block. The matchplate rests on top; interference fringes appear as green and blue circles. The circular pattern indicates a difference in radius. Primary mirrors begin as precision-annealed molded castings of low-expansion borosilicate glass with a weight-saving conical back surface and a concave front surface. The molded casting is edged round, its central hole is cored, and the radius of the front surface is roughed in. Celestron grinds the front surface of primary mirrors with a succession of progressively finer diamond abrasive pellet tools using high-speed spindle machines, then transfers them to an abrasive free room where they are polished to a precise spherical surface. Each mirror is checked for both radius and optical spherical figure against a convex precision reference matchplate. When the interference fringes indicate the radius is within ±1 fringe from the nominal radius and the surface irregularity is less than one fourth of one fringe, the mirror receives a final check using the classic mirror-maker's null test familiar to every professional optican. Afterwards, every primary mirror is taken to the QA Interferometry Lab-shown in Figure 10-where the surface irregularity of each mirror is verified, via interferometer, to be within specification. The smaller secondary mirrors are also made of low-expansion borosilicate glass. Like the primaries, the secondaries are edged and centered, then ground and polished. The secondary is a convex mirror so during manufacture it is tested against a concave precision reference matchplate to check both its radius of curvature and figure. The secondary mirrors are also brought to the QA Interferometry Lab where the radius and irregularity of each mirror is verified through interferometric measurement to assure that each one lies within specification. When we designed the EdgeHD optical system, we strongly favored spherical surfaces because a sphere can be tested by optical interference to high accuracy in a matter of minutes. If we had specified a hyperboloidal surface for the secondary mirror, we would have been forced to use slower, less accurate testing methods that might miss zonal errors. Furthermore, coma-free SCT designs with hyperboloidal mirrors still suffer from field curvature-an aberration that we specifically wished to avoid in the EdgeHD design. Finally, the sub-aperture corrector lenses are made using the same manufacturing techniques used for high-performance refractor objectives. The EdgeHD design specifies optical glass from Schott AG. The 8-, 9.25-, and 11-inch use N-SK2 and K10 glasses, while the 14-inch uses N-SK2 and N-BALF2 glasses. To ensure homogeneity, optical glass is made in relatively small batches, extruded in boules. The raw glass is then diamondmilled to the correct diameter, thickness, and radius. Each lens blank is blocked, ground, and polished, then the radius and figure are compared to matchplates to ensure they meet EdgeHD's tight tolerances. Our assembly workstations resemble the optical benches used to qualify corrector plates. The primary mirror and corrector plate slip into kinematic support jigs, and we place the secondary mirror in its holder. The sub-aperture corrector lenses meet specifications so reliably that a master set is used in the assembly workstation. Laser light from the focus position passes in reverse through the optics, reflects from a master autocollimation flat, then passes back through the optics. Tested in autocollimation, the optician can see and correct surface errors considerably smaller than a millionth of an inch. If the combined optics set shows any slight residual under-or over-correction, zones, astigmatism, upturned or downturned edges, holes, or bulges, the optician marks the Foucault test shadow transitions on the secondary mirror, then removes the secondary mirror from the test fixture and translates these markings into a paper pattern. The pattern is pressed against a pitch polishing tool, and the optician applies corrective polishing to the secondary mirror-as we show in Figure 11-until the optical system as a whole displays a perfectly uniform illumination (no unwanted zones or shadows) under the double-pass Foucault test and smooth and straight fringes under the doublepass Ronchi test. The in-focus Airy disk pattern is evaluated for roundness, a single uniform diffraction ring, and freedom from scattered light. In addition, the intra- and extra-focal diffraction pattern must display the same structure and central obscuration on both sides of focus, and it must appear round and uniform. The Celestron EdgeHD 9


