Celestron CPC 925 GPS XLT Computerized Telescope Instruction Manual - Page 7
Adjusting the Tripod Height, Attaching the CPC to the Tripod
 |
View all Celestron CPC 925 GPS XLT Computerized Telescope manuals
Add to My Manuals
Save this manual to your list of manuals |
Page 7 highlights
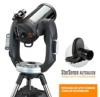
Adjusting the Tripod Height The tripod that comes with your CPC telescope is adjustable. There is a bubble level located on the top of the tripod head to assist you in leveling the tripod. To adjust the height at which the tripod stands: Tripod Head Center Support Bracket / Accessory tray Central Column Tension Knob Extension Leg Clamp Figure 3-1 Figure 3-1 1. Loosen the extension clamp on one of the tripod legs (see figure 3-1). 2. Extend the leg to the desired height. 3. Tighten the extension clamp to hold the leg in place. 4. Repeat this process for each of the remaining legs making sure that the tripod is level when complete. You can do this while the tripod legs are still folded together. Remember that the higher the tripod legs are extended, the less stable it is. For casual observing, this may not pose a problem. However, if you plan on doing photography, the tripod should be set low to ensure stability. A recommended height is to set the tripod in such a manner that you can look directly into the eyepiece on the telescope with a diagonal while seated. Attaching the CPC to the Tripod After the tripod is set up, you are now ready to attach the telescope. The bottom of the CPC base has three threaded holes that mount to the tripod head and one hole in the center that goes over the positioning pin on the tripod head. 1. Place the center hole in the bottom of the telescope base over the positioning pin in the center of the tripod head. Mounting Bolts Positioning Pin Figure 3-2 Mounting the Telescope 7
-
 1
1 -
 2
2 -
 3
3 -
 4
4 -
 5
5 -
 6
6 -
 7
7 -
 8
8 -
 9
9 -
 10
10 -
 11
11 -
 12
12 -
13
-
14
-
15
-
16
-
17
-
18
-
19
-
20
-
21
-
22
-
23
-
24
-
25
-
26
-
27
-
28
-
29
-
30
-
31
-
32
-
33
-
34
-
35
-
36
-
37
-
38
-
39
-
40
-
41
-
42
-
43
-
44
-
45
-
46
-
47
-
48
-
49
-
50
-
51
-
52
-
53
-
54
-
55
-
56
-
57
-
58
-
59
-
60
-
61
-
62
-
63
-
64
-
65
-
66
-
67
-
68
 |
 |
