Celestron Laboratory Biological Microscope Microscope Manual (44100, 44102, 44 - Page 14
Using the Illuminator Mirror, Rotating the Head
 |
View all Celestron Laboratory Biological Microscope manuals
Add to My Manuals
Save this manual to your list of manuals |
Page 14 highlights
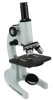
Setting Up Your Microscope 1. Take the Styrofoam container out of the cardboard carton. 2. Remove the tape from the Styrofoam container holding the two sections together. 3. Carefully remove the microscope and other parts from the container and set them on a table, desk, or other flat surface. 4. Remove the plastic bag covering the microscope. 5. Remove the protective paper from the stage (5). 6. Remove the four objective lenses (4) from their containers. Unscrew the container lids from the threaded portion of the objective lenses. 7. Thread the end of the 4mm objective lens into one of the holes on the nosepiece (12) until finger tight. It may be necessary to lower the stage (5) by turning the coarse focus knob (3). 8. Now turn the nosepiece to the next opening and thread each of the remaining objective lenses into the remaining holes. You are now ready to use your microscope! Microscope Operation Using the Illuminator Mirror Your microscope has a built-in plano-concave illumination mirror which allows you to illuminate the specimen from the bottom by reflecting an external light source (indirect sunlight, room light, lamp, etc.) to the stage. The mirror has a flat side (you can easily see your reflection on the flat surface) and a concave side. The concave side will concentrate more light onto the specimen than the flat side. To illuminate a specimen: 1. If it is daylight, tilt the mirror (6) and reflect indirect sunlight through the bottom of the stage (5). Warning: Never use the mirror to focus direct sunlight through the microscope as this can be very harmful and may damage your eyes. 2. If viewing at night or indoors, away from sunlight, you can use a nearby desk lamp, table lamp, or other light source to reflect light onto a specimen. To control the amount of light reflecting onto the specimen: 1. Use the concave side of the mirror to focus more light on the slide. The concave side will concentrate more light onto your specimen but will focus a smaller beam of light, making it more sensitive to adjust. 2. You can also control light adjustment with the condenser and diaphragm -- see the section under "Adjusting the Lighting". Rotating the Head The head of your microscope can be rotated 360°. Therefore, you can view from any position by just moving the head to the desired location. 14
-
 1
1 -
2
-
3
-
4
-
5
-
6
-
7
-
8
-
 9
9 -
 10
10 -
 11
11 -
 12
12 -
 13
13 -
 14
14 -
 15
15 -
 16
16 -
 17
17 -
 18
18 -
 19
19 -
20
-
21
-
22
-
23
-
24
-
25
-
26
-
27
-
28
-
29
-
30
-
31
-
32
-
33
-
34
-
35
-
36
-
37
-
38
-
39
-
40
-
41
-
42
-
43
-
44
-
45
-
46
-
47
-
48
-
49
-
50
-
51
-
52
-
53
-
54
-
55
-
56
-
57
-
58
-
59
-
60
-
61
-
62
-
63
-
64
-
65
-
66
-
67
-
68
-
69
-
70
-
71
-
72
-
73
-
74
-
75
-
76
-
77
-
78
 |
 |
