Cisco 1841 Hardware Installation Guide - Page 48
Brackets for Rack-Mounting Power Supply, Assembling Rack-Mount Kit for the Power Supply
 |
UPC - 882658218231
View all Cisco 1841 manuals
Add to My Manuals
Save this manual to your list of manuals |
Page 48 highlights
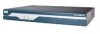
Setting Up the Chassis Chapter 4 Chassis Installation Procedures for Cisco 1800 Series Routers (Modular) Figure 4-9 shows the brackets in the rack-mount kit for the power supply. Figure 4-9 Brackets for Rack-Mounting Power Supply 2 242659 1 1 Wall-mount bracket 2 Rack-mount bracket Step 2 Step 3 Position the power supply in the wall-mount bracket. a. Orient the front and back of the power supply vertically. b. Position the end nearest the power cable at the top. Assemble the brackets for rack-mounting the power supply as shown in Figure 4-10, using the four screws provided. Use a number 2 Phillips screwdriver to install the bracket screws. Figure 4-10 Assembling Rack-Mount Kit for the Power Supply 242661 To mount the chassis and power supply, use two screws for each side (supplied with the rack) to attach the Cisco 1861 ISR with rack-mount brackets, then attach the power supply with rack-mount bracket to a 19-in. rack. Start the lower pair of screws first, resting the brackets on the lower screws while you insert the upper pair of screws. 4-10 Cisco 1800 Series Routers (Modular) Hardware Installation Guide OL-5876-03
-
 1
1 -
2
-
3
-
4
-
5
-
6
-
7
-
8
-
9
-
10
-
11
-
12
-
13
-
14
-
15
-
16
-
17
-
18
-
19
-
20
-
21
-
22
-
23
-
24
-
25
-
26
-
27
-
28
-
29
-
30
-
31
-
32
-
33
-
34
-
35
-
36
-
37
-
38
-
39
-
40
-
41
-
42
-
 43
43 -
 44
44 -
 45
45 -
 46
46 -
 47
47 -
 48
48 -
 49
49 -
 50
50 -
 51
51 -
 52
52 -
 53
53 -
54
-
55
-
56
-
57
-
58
-
59
-
60
-
61
-
62
-
63
-
64
-
65
-
66
-
67
-
68
-
69
-
70
-
71
-
72
-
73
-
74
-
75
-
76
-
77
-
78
-
79
-
80
-
81
-
82
-
83
-
84
-
85
-
86
-
87
-
88
-
89
-
90
-
91
-
92
-
93
-
94
-
95
-
96
-
97
-
98
-
99
-
100
 |
 |
