Cisco 3750G-24T Hardware Installation Guide - Page 4
Attaching Brackets to the Catalyst 3750G Integrated Wireless LAN Controller Switches 17 - 24
 |
UPC - 746320805146
View all Cisco 3750G-24T manuals
Add to My Manuals
Save this manual to your list of manuals |
Page 4 highlights
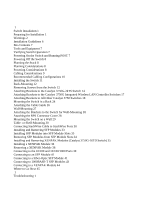
1 Switch Installation 1 Preparing for Installation 1 Warnings 2 Installation Guidelines 6 Box Contents 7 Tools and Equipment 7 Verifying Switch Operation 7 Powering On the Switch and Running POST 7 Powering Off the Switch 8 Planning the Stack 8 Planning Considerations 8 Powering Considerations 8 Cabling Considerations 9 Recommended Cabling Configurations 10 Installing the Switch 11 Rack-Mounting 12 Removing Screws from the Switch 12 Attaching Brackets to the Catalyst 3750G-24TS Switch 14 Attaching Brackets to the Catalyst 3750G Integrated Wireless LAN Controller Switches 17 Attaching Brackets to All Other Catalyst 3750 Switches 18 Mounting the Switch in a Rack 24 Attaching the Cable Guide 26 Wall-Mounting 27 Attaching the Brackets to the Switch for Wall-Mounting 28 Attaching the RPS Connector Cover 28 Mounting the Switch on a Wall 29 Table- or Shelf-Mounting 30 Connecting StackWise Cable to StackWise Ports 30 Installing and Removing SFP Modules 33 Installing SFP Modules into SFP Module Slots 33 Removing SFP Modules from SFP Module Slots 34 Installing and Removing XENPAK Modules (Catalyst 3750G-16TD Switch) 35 Installing a XENPAK Module 36 Removing a XENPAK Module 38 Connecting to the 10/100 and 10/100/1000 Ports 39 Connecting to an SFP Module 41 Connecting to a Fiber-Optic SFP Module 41 Connecting to 1000BASE-T SFP Modules 43 Connecting to a XENPAK Module 44 Where to Go Next 45 1 Troubleshooting 1
-
 1
1 -
 2
2 -
 3
3 -
 4
4 -
 5
5 -
 6
6 -
 7
7 -
 8
8 -
 9
9 -
 10
10 -
11
-
12
-
13
-
14
-
15
-
16
-
17
-
18
-
19
-
20
-
21
-
22
-
23
-
24
-
25
-
26
-
27
-
28
-
29
-
30
-
31
-
32
-
33
-
34
-
35
-
36
-
37
-
38
-
39
-
40
-
41
-
42
-
43
-
44
-
45
-
46
-
47
-
48
-
49
-
50
-
51
-
52
-
53
-
54
-
55
-
56
-
57
-
58
-
59
-
60
-
61
-
62
-
63
-
64
-
65
-
66
-
67
-
68
-
69
-
70
-
71
-
72
-
73
-
74
-
75
-
76
-
77
-
78
-
79
-
80
-
81
-
82
-
83
-
84
-
85
-
86
-
87
-
88
-
89
-
90
-
91
-
92
-
93
-
94
-
95
-
96
-
97
-
98
-
99
-
100
-
101
-
102
-
103
-
104
-
105
-
106
-
107
-
108
-
109
-
110
-
111
-
112
-
113
-
114
-
115
-
116
-
117
-
118
-
119
-
120
-
121
-
122
-
123
-
124
-
125
-
126
-
127
-
128
-
129
-
130
-
131
-
132
-
133
-
134
-
135
-
136
-
137
-
138
-
139
-
140
-
141
-
142
-
143
-
144
-
145
-
146
 |
 |
