Cisco RV016 Quick Start Guide - Page 10
Troubleshooting Tips - default password
 |
UPC - 745883556717
View all Cisco RV016 manuals
Add to My Manuals
Save this manual to your list of manuals |
Page 10 highlights
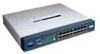
STEP 3 In the address bar, enter the default IP address of the router: 192.168.1.1 STEP 4 When the login page appears, enter the default user name admin and the default password admin (lowercase). STEP 5 Click Login. The System Summary page appears. The router's default settings are sufficient for many small businesses. Your Internet Service Provider may require additional settings. On the System Summary page, check the WAN Status to see if the router was able to receive an IP Address. If not, continue to the next step. STEP 6 To use the setup wizard to configure your Internet connection, click Setup Wizard on the System Summary page, or click Wizard in the navigation tree. In the Basic Setup section, click Launch Now. Follow the on-screen instructions. If your web browser displays a warning message about the popup window, allow the blocked content. STEP 7 To configure other settings, use the links in the navigation tree. Cisco strongly recommends setting a strong administrator password to prevent unauthorized access to your router. For more information about all settings, refer to the online Help and the Cisco Small Business RV0xx Series VPN Router Administration Guide. Troubleshooting Tips If you have trouble connecting to the Internet or the web-based configuration utility: • Verify that your web browser is not set to Work Offline. • Check the Local Area Connection settings for your Ethernet adapter. The PC needs to obtain an IP address through DHCP. Alternatively, it can have a static IP address in the 192.168.1.x range with the default gateway set to 192.168.1.1 (the router's default IP address). • Verify that you entered the correct settings in the Wizard to set up your Internet connection, including the username and password if required. • Try resetting the modem and the router by powering off both devices. Next, power on the modem and let it sit idle for about 2 minutes. Then power on the router. You should now receive a WAN IP address. • Check the DHCP IP address range of your modem. If the modem uses the 192.168.1.x range, disconnect the cable from the modem to the router, and then launch the router configuration utility. In the navigation tree, choose Setup > Network. Enter a new Device IP Address, such as 10 RV0xx Series Routers Quick Start Guide
-
 1
1 -
2
-
3
-
4
-
 5
5 -
 6
6 -
 7
7 -
 8
8 -
 9
9 -
 10
10 -
 11
11 -
 12
12
 |
 |
