Cisco SPA2102-R1 Administration Guide - Page 42
Registering to the Service Provider, Voice tab > Line, Submit All Changes - default admin password
 |
View all Cisco SPA2102-R1 manuals
Add to My Manuals
Save this manual to your list of manuals |
Page 42 highlights
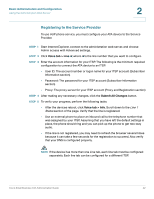
Basic Administration and Configuration Using the Administration Web Server 2 Registering to the Service Provider To use VoIP phone service, you must configure your ATA device to the Service Provider. STEP 1 Start Internet Explorer, connect to the administration web server, and choose Admin access with Advanced settings. STEP 2 Click Voice tab > Line N, where N is the line number that you want to configure. STEP 3 Enter the account information for your ITSP. The following is the minimum required configuration to connect the ATA device to an ITSP: • User ID: The account number or logon name for your ITSP account (Subscriber Information section) • Password: The password for your ITSP account (Subscriber Information section) • Proxy: The proxy server for your ITSP account (Proxy and Registration section) STEP 4 After making any necessary changes, click the Submit All Changes button. STEP 5 To verify your progress, perform the following tasks: • After the devices reboot, click Voice tab > Info. Scroll down to the Line 1 Status section of the page. Verify that the line is registered. • Use an external phone to place an inbound call to the telephone number that was assigned by your ITSP. Assuming that you have left the default settings in place, the phone should ring and you can pick up the phone to get two-way audio. • If the line is not registered, you may need to refresh the browser several times because it can take a few seconds for the registration to succeed. Also verify that your DNS is configured properly. NOTE If the device has more than one Line tab, each line tab must be configured separately. Each line tab can be configured for a different ITSP. Cisco Small Business ATA Administration Guide 42
-
 1
1 -
2
-
3
-
4
-
5
-
6
-
7
-
8
-
9
-
10
-
11
-
12
-
13
-
14
-
15
-
16
-
17
-
18
-
19
-
20
-
21
-
22
-
23
-
24
-
25
-
26
-
27
-
28
-
29
-
30
-
31
-
32
-
33
-
34
-
35
-
36
-
 37
37 -
 38
38 -
 39
39 -
 40
40 -
 41
41 -
 42
42 -
 43
43 -
 44
44 -
 45
45 -
 46
46 -
 47
47 -
48
-
49
-
50
-
51
-
52
-
53
-
54
-
55
-
56
-
57
-
58
-
59
-
60
-
61
-
62
-
63
-
64
-
65
-
66
-
67
-
68
-
69
-
70
-
71
-
72
-
73
-
74
-
75
-
76
-
77
-
78
-
79
-
80
-
81
-
82
-
83
-
84
-
85
-
86
-
87
-
88
-
89
-
90
-
91
-
92
-
93
-
94
-
95
-
96
-
97
-
98
-
99
-
100
-
101
-
102
-
103
-
104
-
105
-
106
-
107
-
108
-
109
-
110
-
111
-
112
-
113
-
114
-
115
-
116
-
117
-
118
-
119
-
120
-
121
-
122
-
123
-
124
-
125
-
126
-
127
-
128
-
129
-
130
-
131
-
132
-
133
-
134
-
135
-
136
-
137
-
138
-
139
-
140
-
141
-
142
-
143
-
144
-
145
-
146
-
147
-
148
-
149
-
150
-
151
-
152
-
153
-
154
-
155
-
156
-
157
-
158
-
159
-
160
-
161
-
162
-
163
-
164
-
165
-
166
-
167
-
168
-
169
-
170
-
171
-
172
-
173
-
174
-
175
-
176
-
177
-
178
-
179
-
180
-
181
-
182
-
183
-
184
-
185
-
186
-
187
-
188
-
189
-
190
-
191
-
192
-
193
-
194
-
195
-
196
-
197
-
198
-
199
-
200
-
201
-
202
-
203
-
204
-
205
-
206
-
207
-
208
-
209
-
210
-
211
-
212
-
213
-
214
-
215
-
216
-
217
-
218
-
219
-
220
-
221
-
222
-
223
-
224
-
225
-
226
-
227
-
228
-
229
-
230
-
231
-
232
-
233
-
234
-
235
-
236
-
237
-
238
-
239
 |
 |