Cisco SR2016 User Guide - Page 5
Connecting the 10/100/1000 Gigabit Switch - 16 port 10 100 1000
 |
View all Cisco SR2016 manuals
Add to My Manuals
Save this manual to your list of manuals |
Page 5 highlights
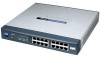
Chapter 3: Connecting the 10/100/1000 Gigabit Switch Your Network OLavyeorvuitew This chapter will explain how to connect network devices to the Switch. For an example of a typical network configuration, see the application diagram shown in Figure 3-1. Figure 3-1 When you connect your network devices, make sure you don't exceed the maximum cabling distances, which are listed in the following table: Maximum Cabling Distances From To Switch Switch or Hub* Hub Hub Switch or Hub Computer Maximum Distance 100 meters (328 feet) 1 5 meters (16.4 feet) 1 100 meters (328 feet) 1 *A hub refers to any type of 100Mbps hub, including regular hubs and stackable hubs. A 10Mbps hub connected to another 10Mbps hub can span up to 100 meters (328 feet). 4 Connecting Network Devices To connect network devices to the Switch, follow these instructions: 1. Make sure all the devices you will connect to the Switch are powered off. 2. Connect a Category 5 Ethernet network cable to one of the numbered ports on the Switch. Figure 3-2 Note: Use Category 5e Ethernet network cables for your Gigabit connections. 3. Connect the other end to a PC or other network device. 4. Repeat steps 2 and 3 to connect additional devices. Note for users of the 24-Port Switch: The mini-GBIC ports are shared. Do not use port 12 if you are using the Mini GBIC1 port, and do not use port 24 if you are using the Mini GBIC2 port. For instructions on how to connect mini-GBIC modules to the 24-Port Switch's mini-GBIC ports, refer to the module's documentation. 5. Connect the supplied power cord to the Switch's power port, and plug the other end into an electrical outlet. 6. Power on the devices connected to the Switch. Each active port's corresponding LED will light up on the Switch. If you are installing the 16-Port Switch, proceed to the following section, "Placement Options for the 16-Port Switch." If you are installing the 24-Port Switch, proceed to the following section, "Placement Options for the 24-Port Switch." 5
-
 1
1 -
 2
2 -
 3
3 -
 4
4 -
 5
5 -
 6
6 -
 7
7 -
 8
8 -
 9
9
 |
 |
