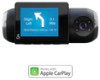
Cobra SC 201 DriveSmarter CarPlay Update main product image SC 201 Manual - Page 10
Watermark Date/Time, Speed, GPS, Driver ID Video Stamp
 |
View all Cobra SC 201 DriveSmarter CarPlay Update main product image manuals
Add to My Manuals
Save this manual to your list of manuals |
Page 10 highlights
Operation Motion Detection: Enabling Motion Detection allows your camera to monitor movement around the camera (changes in light) which can be used to record any suspicious activity around the vehicle when parked. This setting screen allows you to choose which of the available cameras should be used to monitor for activity. If leaving your vehicle off for more than 48 hours (or less if your battery is old) please use the "Auto Surveillance Shutoff" setting to set a time-limit on Motion Detection and prevent your battery from being drained. Note: For Motion Detection to work the camera needs to be connected via hardwire kit (part: CAMICROUSB-003) or be plugged into an 'always on' Cigarette Lighter Socket. You can check if your vehicle has an 'always on' CLA adapter online or in the vehicle's owner's manual. Parking Mode: Enabling Parking Mode allows your camera to monitor for changes in its internal G-Sensor/ accelerometer. Bumps, Collisions, and break-ins can trigger the G-Sensor to save valuable footage from the moment of impact. If leaving your vehicle off for more than 48 hours (or less if your battery is old) please use the "Auto Surveillance Shutoff" setting to set a time-limit on Motion Detection and prevent your battery from being drained. Note: For Parking Mode to work the camera needs to be connected via hardwire kit (part: CAMICROUSB-003) or be plugged into an 'always on' Cigarette Lighter Socket. You can check if your vehicle has an 'always on' CLA adapter online or in the vehicle's owner's manual. Surveillance Auto Shutoff: If leaving your vehicle off for more than 48 hours (or less if your battery is old) please use the "Auto Surveillance Shutoff" setting to set a time-limit on Motion Detection and Parking Mode to prevent your battery from being drained. G-Sensor: You can use this setting to set the sensitivity of the G-Sensor from 1-3 or turn it off. Level 1 is the easiest to activate the G-sensor. Level 3 is the setting which will only lock videos when the most severe impacts are detected. Level 1 is recommended for most users. Watermark (Date/Time, Speed, GPS, Driver ID Video Stamp The watermark settings allow you to toggle having the date/time, speed, GPS coordinates, the Cobra logo and a custom Driver ID be stamped into the bottom of all recorded video. Driver ID Watermark: This setting allows you to associate a Driver ID with the camera (for example: John, Employee 12, etc). This allows you to set the name of the driver which will be stamped on the footage as part of the watermark. Exposure: Allows you to adjust how light or dark videos and images will appear on the camera. 17 Operation Button Beep: Turns the sound on or off for button presses. Note: this only affects normal button presses. Error messages or Voice Announcements are not affected by this setting. Screen Saver: Allows you to set a duration after which the device's display turn off with the camera still recording. This setting is useful to avoid distracted driving and having a bright LED screen when driving at night. Interior Night Vision: The interior camera's infrared LEDs allow for clear recording at night. You can set this to be always on, off, or select Auto to allow the camera to detect low-light conditions and automatically enable Interior Night Vision recording. Language: This setting allows you to pick the on-screen language for the camera unit. Driver Assistance (ADAS): ADAS features allow you to receive warnings when you are in danger of colliding with an object in front of you (Forward Collision Warning), drifting out of your lane (Lane Departure Warning), and Speeding beyond a limit you can pre-set for yourself (Speed Alert). You can toggle each of these alerts on/off within this menu. To use ADAS features, please ensure that the camera's vision system is properly calibrated, and that the dash camera is properly oriented relative to the road ahead. To Calibrate: Cursor over the "Calibration" item and press "OK" to select. For a properly mounted dash camera, • The vertical line would appear to divide the windshield into equal parts. • The horizontal line would align with the front edge of your vehicle's hood if your hood is visible. Real-Time Driver Alerts: This setting allows the user to program real-time driver alerts acquired from the Drive Smarter network. Here you can choose to have the camera make a voice announcement when there is a red-light camera or speed-camera ahead, or to simply display the warning on the LCD display. You can also choose to turn notifications from the unit off completely and simply follow along using the Drive Smarter App. Drive Smarter Services: These settings allow you to select which videos you would like auto-uploaded to the Drive Smarter App for sharing/review. You can also choose to have Incident Reports sent to your insurance provider, as well as Mayday alerts sent to your Emergency Contact if a severe G-Sensor event is detected. Certain devices which support Heads-Up Navigation also allow you to turn this feature on and off here. Speed Units Choose between miles/hour or kilometers/hour as the speed unit stamped in the watermark. 18
-
 1
1 -
2
-
3
-
4
-
 5
5 -
 6
6 -
 7
7 -
 8
8 -
 9
9 -
 10
10 -
 11
11 -
 12
12 -
 13
13
 |
 |