Coby C896 Instruction Manual - Page 13
Connecting Headphones, Connecting Power, Loading a Battery, Remove the USB Cap.
 |
UPC - 716829988961
View all Coby C896 manuals
Add to My Manuals
Save this manual to your list of manuals |
Page 13 highlights
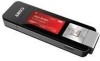
GETTING STARTED Connecting Headphones Connect headphones/earphones to the Headphone Out jack for private listening. Lower the volume level before connecting headphones, then gradually increase the volume for comfortable listening. Hearing experts advise against the constant use of personal stereos played at high volume. Constant high-volume use can lead to hearing loss. If you experience ringing in your ears or hearing loss, discontinue use immediately and seek medical advice. Connecting Power The MP-C896 operates on 1 x "AAA" battery for music playback. Loading a Battery 1. Remove the USB Cap. 2. Remove the Battery Compartment Cover. 3. Insert 1 x "AAA" battery, taking care to match the "+" and "-" polarities of the battery with the markings inside the battery compartment. 4. Replace the Battery Cover. www.cobyusa.com Page 13
-
 1
1 -
2
-
3
-
4
-
5
-
6
-
7
-
 8
8 -
 9
9 -
 10
10 -
 11
11 -
 12
12 -
 13
13 -
 14
14 -
 15
15 -
 16
16 -
 17
17 -
 18
18 -
19
-
20
-
21
-
22
-
23
-
24
-
25
-
26
-
27
-
28
-
29
-
30
-
31
-
32
-
33
-
34
-
35
-
36
-
37
-
38
-
39
-
40
-
41
-
42
-
43
-
44
 |
 |
