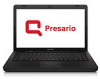
Compaq Presario CQ56-100 HP Notebook Reference Guide - Windows 7
Compaq Presario CQ56-100 - Notebook PC Manual
 |
View all Compaq Presario CQ56-100 manuals
Add to My Manuals
Save this manual to your list of manuals |
Compaq Presario CQ56-100 manual content summary:
- Compaq Presario CQ56-100 | HP Notebook Reference Guide - Windows 7 - Page 1
HP Notebook Reference Guide - Compaq Presario CQ56-100 | HP Notebook Reference Guide - Windows 7 - Page 2
Company under license. Microsoft and Windows are U.S. registered trademarks of Microsoft Corporation. Java is a U.S. trademark of Sun Microsystems, Inc. The information contained herein is subject to change without notice. The only warranties for HP products and services are set forth in the - Compaq Presario CQ56-100 | HP Notebook Reference Guide - Windows 7 - Page 3
surface. Do not allow another hard surface, such as an adjoining optional printer, or a soft surface, such as pillows or rugs or clothing, to block airflow. Also, do not allow the AC adapter to come into contact with the skin or a soft surface, such as pillows or rugs or clothing, during operation - Compaq Presario CQ56-100 | HP Notebook Reference Guide - Windows 7 - Page 4
iv Safety warning notice - Compaq Presario CQ56-100 | HP Notebook Reference Guide - Windows 7 - Page 5
...5 Connecting to an existing WLAN 5 Setting up a new WLAN ...6 Protecting your WLAN ...6 Roaming to another network 7 Using HP Mobile Broadband (select models only 7 Inserting a SIM ...7 Removing a SIM ...8 Using Bluetooth wireless devices ...8 Bluetooth and Internet Connection Sharing (ICS - Compaq Presario CQ56-100 | HP Notebook Reference Guide - Windows 7 - Page 6
HDMI 18 Using HP MediaSmart (select battery power ...23 Finding battery information in Help and Support in Windows 7 24 Using Battery Check in Windows 7 24 Displaying the remaining battery charge 24 Maximizing battery discharge time 24 Managing low battery levels 25 Identifying low battery - Compaq Presario CQ56-100 | HP Notebook Reference Guide - Windows 7 - Page 7
Disk Cleanup 42 Using HP ProtectSmart Hard Drive Protection in Windows 7 (select models only 42 Identifying HP ProtectSmart Hard Drive Protection status 43 Managing power with a parked hard drive 43 Using HP ProtectSmart Hard Drive Protection software 43 Using optical drives (select models only - Compaq Presario CQ56-100 | HP Notebook Reference Guide - Windows 7 - Page 8
and selecting in Setup Utility 55 Displaying system information 56 Restoring factory default settings in Setup Utility 56 Exiting Setup Utility ...56 Updating the BIOS ...57 Determining the BIOS version 57 Downloading a BIOS update 57 Appendix A Traveling with the computer ...59 Appendix - Compaq Presario CQ56-100 | HP Notebook Reference Guide - Windows 7 - Page 9
Index ...62 ix - Compaq Presario CQ56-100 | HP Notebook Reference Guide - Windows 7 - Page 10
x - Compaq Presario CQ56-100 | HP Notebook Reference Guide - Windows 7 - Page 11
, drivers, troubleshooting tools, and technical support. To access Help and Support, select Start > Help and Support. For country- or region-specific support, go to http://www.hp.com/support, select your country or region, and follow the on-screen instructions. ● Safety & Comfort Guide-Describes - Compaq Presario CQ56-100 | HP Notebook Reference Guide - Windows 7 - Page 12
area network (WLAN) device ● HP Mobile Broadband Module (wireless wide area network (WWAN)) ● Bluetooth® device For more information on wireless technology, refer to the information and Web site links provided in Help and Support. Identifying wireless and network status icons Windows 7 Icon Name - Compaq Presario CQ56-100 | HP Notebook Reference Guide - Windows 7 - Page 13
may have a wireless button, a wireless switch, or a wireless action key on the keyboard. The term wireless button is used throughout this guide to refer to all types of wireless controls. Refer to the Getting Started guide for information on identifying the location of the wireless button on your - Compaq Presario CQ56-100 | HP Notebook Reference Guide - Windows 7 - Page 14
connect the computer to a network or a Bluetooth-enabled device. To view the state of the Help: 1. Open Wireless Assistant by clicking the wireless icon in Windows Mobility Center. 2. Click the Help button. Windows XP 1. Select Start > Control Panel > Network and Internet Connections > HP - Compaq Presario CQ56-100 | HP Notebook Reference Guide - Windows 7 - Page 15
problems. Windows 7 ▲ Select Start > Control Panel > Network and Internet > Network and Sharing Center. Windows XP ▲ Select Start > Control Panel > Network and Internet Connections > Network Connections. For more information, select Start > Help and Support. Using a WLAN choose to manually search for - Compaq Presario CQ56-100 | HP Notebook Reference Guide - Windows 7 - Page 16
or structural barriers such as walls and floors. Setting up a new WLAN Required equipment: ● A broadband modem (either DSL or cable) (1) and high-speed Internet service purchased from an Internet service provider (ISP) ● A wireless router (purchased separately) (2) ● The wireless computer (3) NOTE - Compaq Presario CQ56-100 | HP Notebook Reference Guide - Windows 7 - Page 17
WLAN, Windows attempts to connect to that network. If the attempt is successful, your computer is automatically connected to the new network. If Windows using WLANs. Using HP Mobile Broadband requires a network service provider from the AC outlet. 5. Remove the battery. 6. Insert the SIM into the SIM - Compaq Presario CQ56-100 | HP Notebook Reference Guide - Windows 7 - Page 18
your computer and wireless devices including cellular phones, printers, cameras, and PDAs. The inability to consistently connect two or more computers to share the Internet through Bluetooth is a limitation of Bluetooth and the Windows operating system. 8 Chapter 2 Networking (select models only - Compaq Presario CQ56-100 | HP Notebook Reference Guide - Windows 7 - Page 19
satellites deliver location, speed, and direction information to GPS-equipped systems. For more information, refer to the HP Connection Manager or HP Wireless Assistant software Help. Connecting to a wired network Using a modem (select models only) A modem must be connected to an analog telephone - Compaq Presario CQ56-100 | HP Notebook Reference Guide - Windows 7 - Page 20
Start > Control Panel. 2. Click Clock, Language, and Region. 3. Click Region and Language. 4. Click the Location tab to display your location. Windows XP 1. Select Start > Control Panel. 2. Click Date, Time, Language, and Regional Options. 3. Click Regional and Language Options. Your location is - Compaq Presario CQ56-100 | HP Notebook Reference Guide - Windows 7 - Page 21
the Country/region list. (If you select a country or region that is not supported by the modem, the country/region selection for USA or UK is displayed.) 9. Click OK to save your new location setting. The Phone and Modem Options window opens. 10. Do one of the following: ● To set your new location - Compaq Presario CQ56-100 | HP Notebook Reference Guide - Windows 7 - Page 22
region list. (If you select a country or region that is not supported by the modem, the country/region selection for USA or UK is Pulse. 10. Click OK to save your new location setting. The Phone and Modem Options window opens. 11. Do one of the following: ● To set your new location setting as - Compaq Presario CQ56-100 | HP Notebook Reference Guide - Windows 7 - Page 23
WARNING! To reduce the risk of electric shock, fire, or damage to the equipment, do not plug a modem cable or telephone cable into an RJ-45 (network) jack. Connecting to a wired network 13 - Compaq Presario CQ56-100 | HP Notebook Reference Guide - Windows 7 - Page 24
Media action keys Refer to the Getting Started guide for information about your computer's media activity controls. Play music. ● Record sound. ● Download music from the Internet. ● Create installed optical drive (select models only) or on an optional external optical drive (purchased separately - Compaq Presario CQ56-100 | HP Notebook Reference Guide - Windows 7 - Page 25
controlled through the operating system and some programs. NOTE: Refer to the Getting Started guide for information on what type of volume controls your computer has. Checking audio functions on the computer Windows 7 To check the audio functions on your computer, follow these steps: 1. Select Start - Compaq Presario CQ56-100 | HP Notebook Reference Guide - Windows 7 - Page 26
the Getting Started guide. For information on using the webcam, select Start > Help and Support. Using SkyRoom (select models only) HP SkyRoom is a can create your own list and add contacts manually. For more information, refer to the SkyRoom software Help. Video Your computer may have one or more - Compaq Presario CQ56-100 | HP Notebook Reference Guide - Windows 7 - Page 27
To connect a digital display device, connect the device cable to the DisplayPort. NOTE: For product-specific instructions on switching the screen image, refer to your Getting Started guide. HDMI The HDMI (High Definition Multimedia Interface) port connects the computer to an optional video or audio - Compaq Presario CQ56-100 | HP Notebook Reference Guide - Windows 7 - Page 28
the cable to the video device, and then refer to the device manufacturer's instructions for additional information. NOTE: For product-specific instructions on switching the screen image, refer to your Getting Started guide. Configuring audio for HDMI To configure HDMI audio, first connect an audio - Compaq Presario CQ56-100 | HP Notebook Reference Guide - Windows 7 - Page 29
Internet radio (North America only)-Listen to music selected just for you, streamed from the Internet. ▲ To start MediaSmart, select Start > All Programs > HP > HP MediaSmart. For more information on using MediaSmart, select Start > Help and Support. Using HP MediaSmart (select models only) 19 - Compaq Presario CQ56-100 | HP Notebook Reference Guide - Windows 7 - Page 30
guide to refer to both types of power controls. NOTE: Windows 7 uses Sleep and Windows XP uses Standby. The term Sleep is used throughout this guide remove the battery. Setting power options Using power-saving states The computer has two power-saving states that are enabled at the factory: Sleep - Compaq Presario CQ56-100 | HP Notebook Reference Guide - Windows 7 - Page 31
in the Sleep state for an extended period or if the battery reaches a critical battery level while in the Sleep state, the computer initiates Hibernation. When Hibernation is initiated, your work is saved to a hibernation file on the hard drive and the computer turns off. CAUTION: To reduce the risk - Compaq Presario CQ56-100 | HP Notebook Reference Guide - Windows 7 - Page 32
. The icon also displays a message if the battery has reached a low or critical battery level. Using power plans A power plan (or power scheme in Windows XP) is a collection of system settings that manages how the computer uses power. Power plans can help you conserve power or maximize performance - Compaq Presario CQ56-100 | HP Notebook Reference Guide - Windows 7 - Page 33
follow the on-screen instructions. If you do not need to create or change a user account password, go to step 5. 5. Click Save changes. Windows XP 1. Right-click to save battery life. For information on increasing or decreasing display brightness, refer to the Getting Started guide. Select computer - Compaq Presario CQ56-100 | HP Notebook Reference Guide - Windows 7 - Page 34
HP, or a compatible battery purchased from HP. Computer battery life varies, depending on power management settings, programs running on the computer, display brightness, external devices connected to the computer, and other factors. Finding battery information in Help and Support in Windows 7 Help - Compaq Presario CQ56-100 | HP Notebook Reference Guide - Windows 7 - Page 35
the alerts and system responses set at the factory. Some lowbattery alerts and system responses can be changed using Power Options in Windows Control Panel. Preferences set using Power Options do not affect lights. Identifying low battery levels When a battery that is the sole power source for the - Compaq Presario CQ56-100 | HP Notebook Reference Guide - Windows 7 - Page 36
. Replacing the battery In Windows 7, Battery Check in Help and Support notifies you to replace the battery when an internal cell is not charging properly or when the battery storage capacity has reached a weak condition. If the battery is possibly covered by an HP warranty, instructions include - Compaq Presario CQ56-100 | HP Notebook Reference Guide - Windows 7 - Page 37
computer, a replacement AC adapter provided by HP, or a compatible AC adapter purchased from HP. Connect the computer to external AC power ● When performing a backup or recovery When you connect the computer to external AC power, the following events occur: ● The battery begins to charge. ● If the - Compaq Presario CQ56-100 | HP Notebook Reference Guide - Windows 7 - Page 38
the AC adapter: 1. Shut down the computer. 2. Remove the battery from the computer. 3. Connect the AC adapter to the computer, and should be replaced. Contact technical support for information on obtaining a in slate mode, the screen orientation is reset when you switch between graphics modes. To - Compaq Presario CQ56-100 | HP Notebook Reference Guide - Windows 7 - Page 39
media-equipped cameras and PDAs as well as with other computers. To determine the digital card formats that are supported on your computer, refer to the Getting Started guide. Inserting a the taskbar. Then follow the on-screen instructions. Using Digital Media Slot cards (select models only) 29 - Compaq Presario CQ56-100 | HP Notebook Reference Guide - Windows 7 - Page 40
loss of support for other PC Cards during configuration, install only the software required for the device. If you are instructed by the PC Card manufacturer to install device drivers: ● Install only the device drivers for your operating system. ● Do not install other software, such as card services - Compaq Presario CQ56-100 | HP Notebook Reference Guide - Windows 7 - Page 41
CAUTION: To reduce the risk of damage to the connectors: Use minimal force when inserting a PC Card. Do not move or transport the computer when a PC Card is in use. The PC Card slot may contain a protective insert. The insert must be removed before you can insert a PC Card: 1. Press the PC Card - Compaq Presario CQ56-100 | HP Notebook Reference Guide - Windows 7 - Page 42
required for the card. If you are instructed by the ExpressCard manufacturer to install device drivers: ● Install only the device drivers for your operating system. ● Do not install additional software, such as card services, socket services, or enablers, that are supplied by the ExpressCard - Compaq Presario CQ56-100 | HP Notebook Reference Guide - Windows 7 - Page 43
Inserting an ExpressCard CAUTION: To prevent damage to the computer and external media cards, do not insert a PC Card into an ExpressCard slot. CAUTION: To reduce the risk of damage to the connectors: Use minimal force when inserting an ExpressCard. Do not move or transport the computer when an - Compaq Presario CQ56-100 | HP Notebook Reference Guide - Windows 7 - Page 44
right of the taskbar, and then follow the on-screen instructions. 3. Release and remove the ExpressCard: a. Gently press in card-sized accessory that carries a microchip containing memory and a microprocessor. Like personal computers, smart Help and Support. 34 Chapter 5 External cards and devices - Compaq Presario CQ56-100 | HP Notebook Reference Guide - Windows 7 - Page 45
such as a USB keyboard, mouse, drive, printer, scanner, or hub. Some USB devices may require additional support software, which is usually included with the device. For more information about device-specific software, refer to the manufacturer's instructions. These instructions may be provided with - Compaq Presario CQ56-100 | HP Notebook Reference Guide - Windows 7 - Page 46
. Scanners, digital cameras, and digital camcorders often require a 1394 connection. Some 1394 devices may require additional support software, which is usually included with the device. For more information about device-specific software, refer to the manufacturer's instructions. The 1394 port - Compaq Presario CQ56-100 | HP Notebook Reference Guide - Windows 7 - Page 47
, such as an eSATA external hard drive. Some eSATA devices may require additional support software, which is usually included with the device. For more information about device-specific software, refer to the manufacturer's instructions. NOTE: The eSATA port also supports an optional USB device - Compaq Presario CQ56-100 | HP Notebook Reference Guide - Windows 7 - Page 48
with the device. 2. Click the remove hardware icon in the notification area, at the far right of the taskbar, and then follow the on-screen instructions. 3. Remove the device. 38 Chapter 5 External cards and devices - Compaq Presario CQ56-100 | HP Notebook Reference Guide - Windows 7 - Page 49
about required software and drivers, or to learn which computer port to use, refer to the manufacturer's instructions. To connect an external USB drives include the following types: ● 1.44-megabyte diskette drive ● Hard drive module (a hard drive with an adapter attached) ● External optical drive (CD - Compaq Presario CQ56-100 | HP Notebook Reference Guide - Windows 7 - Page 50
Using the docking connector (select models only) The docking connector connects the computer to an optional docking device. An optional docking device provides additional ports and connectors that can be used with the computer. NOTE: The following image may look slightly different than your computer - Compaq Presario CQ56-100 | HP Notebook Reference Guide - Windows 7 - Page 51
the operating system. ● Do not use excessive force when inserting a drive into a drive bay. ● Do not type on the keyboard or move the computer while an optical drive is writing to a disc. The write process is sensitive to vibration. ● When the battery is the only source of power, be sure that the - Compaq Presario CQ56-100 | HP Notebook Reference Guide - Windows 7 - Page 52
and help the computer to run more efficiently. To run Disk Cleanup: 1. Select Start > All Programs > Accessories > System Tools > Disk Cleanup. 2. Follow the on-screen instructions. Using HP ProtectSmart Hard Drive Protection in Windows 7 (select models only) HP ProtectSmart Hard Drive Protection - Compaq Presario CQ56-100 | HP Notebook Reference Guide - Windows 7 - Page 53
and Sound > Windows Mobility Center: ● If HP ProtectSmart Hard Drive Protection is enabled, a green check mark is superimposed over the hard drive icon. ● If HP ProtectSmart Hard Drive Protection is disabled, a red X is superimposed over the hard drive icon. ● If the drives are parked, a yellow - Compaq Presario CQ56-100 | HP Notebook Reference Guide - Windows 7 - Page 54
and change settings, follow these steps: 1. In Mobility Center, click the hard drive icon to open the HP ProtectSmart Hard Drive Protection window. - or - Select Start > Control Panel > Hardware and Sound > HP ProtectSmart Hard Drive Protection. NOTE: If prompted by User Account Control, click Yes - Compaq Presario CQ56-100 | HP Notebook Reference Guide - Windows 7 - Page 55
1. Turn on the computer. 2. Press the release button (1) on the drive bezel to release the disc tray. 3. Pull out the tray (2). CAUTION: Do not insert 8-cm optical discs into a slot load optical drive. It may cause damage to the optical drive. 1. Turn on the computer. 2. Hold the disc by the edges - Compaq Presario CQ56-100 | HP Notebook Reference Guide - Windows 7 - Page 56
to remove a disc, depending on whether the disc tray opens normally or not. When the disc tray opens normally 1. Press the release button (1) on the drive bezel to release the disc tray, and then gently pull out the tray (2) until it stops. 2. Remove the disc (3) from the tray by gently pressing - Compaq Presario CQ56-100 | HP Notebook Reference Guide - Windows 7 - Page 57
carefully as you remove it. 4. Close the disc tray and place the disc in a protective case. Slot load 1. Press the release button (1) next to the drive. 2. Remove the disc (2) by holding it by the edges and avoid touching the flat surfaces. 3. Place the disc in a protective case. Using optical - Compaq Presario CQ56-100 | HP Notebook Reference Guide - Windows 7 - Page 58
drives as one contiguous drive, either through hardware or software settings. If multiple disks are set up to work together in this fashion, they are referred to as a RAID array. For additional information about RAID, refer to the HP Web site at http://www.hp.com/support. 48 Chapter 6 Drives - Compaq Presario CQ56-100 | HP Notebook Reference Guide - Windows 7 - Page 59
Windows updates ● File encryption Unauthorized access to Setup Utility, BIOS Windows security feature. You can also use the same password for more than one Setup Utility feature. For additional information about Windows passwords, such as screen-saver passwords, select Start > Help and Support - Compaq Presario CQ56-100 | HP Notebook Reference Guide - Windows 7 - Page 60
administrator password can be used in place of the power-on password. NOTE: Your administrator password is not interchangeable with an administrator password set in Windows, nor is it displayed as it is set, entered, changed, or deleted. NOTE: If you enter the power-on password at the first password - Compaq Presario CQ56-100 | HP Notebook Reference Guide - Windows 7 - Page 61
Managing an administrator password To set, change, or delete this password, follow these steps: 1. Open Setup Utility by turning on or restarting the computer. While the "Press the ESC key for Startup Menu" message is displayed in the lower-left corner of the screen, press esc. When the Startup Menu - Compaq Presario CQ56-100 | HP Notebook Reference Guide - Windows 7 - Page 62
recommended that you upgrade the trial offer or update link at Start > All Programs > Windows Update. ● Run Windows Update monthly thereafter. ● Obtain updates to Windows and other Microsoft® programs, as they are released, from the Microsoft Web site and through the updates link in Help and Support - Compaq Presario CQ56-100 | HP Notebook Reference Guide - Windows 7 - Page 63
from the illustration in this section. Refer to the Getting Started guide for the location of the security cable slot on your computer Help for instructions. After you create your fingerprint identity, you can set up a Single Sign On service that keyboard Installing an optional security cable 53 - Compaq Presario CQ56-100 | HP Notebook Reference Guide - Windows 7 - Page 64
reader may be oriented horizontally or vertically. Both orientations require that you swipe your finger perpendicular to the metallic sensor. Refer to the Getting Started guide for the location of the fingerprint reader on your computer. 54 Chapter 7 Security - Compaq Presario CQ56-100 | HP Notebook Reference Guide - Windows 7 - Page 65
(BIOS), controls communication between all the input and output devices on the system (such as disk drives, display, keyboard, mouse Navigating and selecting in Setup Utility Because Setup Utility is not Windows based, it does not support the TouchPad. Navigation and selection are by keystroke. ● To - Compaq Presario CQ56-100 | HP Notebook Reference Guide - Windows 7 - Page 66
any settings, use the arrow keys to select Exit > Exit Discarding Changes, and then press enter. Restoring factory default settings in Setup Utility 1. Start Setup Utility. 2. Use the arrow keys to select Exit > Load > Exit Discarding Changes, and then press enter. 56 Chapter 8 Setup Utility (BIOS) - Compaq Presario CQ56-100 | HP Notebook Reference Guide - Windows 7 - Page 67
your computer: Windows 7-Select Start > Help and Support > Maintain. Windows XP-Select Start > Help and Support, and then select the software and drivers update. 2. Follow the on-screen instructions to identify your computer and access the BIOS update you want to download. 3. At the download area - Compaq Presario CQ56-100 | HP Notebook Reference Guide - Windows 7 - Page 68
you recorded earlier, open the folder on your hard drive that contains the update. 4. Double-click the file that has an .exe extension (for example, filename.exe). The BIOS installation begins. 5. Complete the installation by following the on-screen instructions. NOTE: After a message on the screen - Compaq Presario CQ56-100 | HP Notebook Reference Guide - Windows 7 - Page 69
than 2 weeks, remove the battery and store it separately. ● If you are shipping the computer or a drive, use suitable protective packaging and HP Mobile Broadband Module installed, such as an 802.11b/g device, a Global System for Mobile Communications (GSM) device, or a General Packet Radio Service - Compaq Presario CQ56-100 | HP Notebook Reference Guide - Windows 7 - Page 70
types of support: ◦ Chat online with an HP technician. NOTE: When chat is not available in a particular language, it is available in English. ◦ E-mail HP Customer Support. ◦ Find HP Customer Support worldwide telephone numbers. ◦ Locate an HP service center. 60 Appendix B Troubleshooting resources - Compaq Presario CQ56-100 | HP Notebook Reference Guide - Windows 7 - Page 71
prevent damage to the computer, damage to a drive, or loss of information, observe these precautions: ● If removal or installation instructions direct you to unplug the computer, unplug it about static electricity or assistance with component removal or installation, contact Customer Support. 61 - Compaq Presario CQ56-100 | HP Notebook Reference Guide - Windows 7 - Page 72
displaying remaining charge 24 disposing 26 low battery levels 25 replacing 26 storing 26 Battery Check 24 battery information, finding 24 battery power 23 battery temperature 26 BIOS determining version 57 downloading an update 57 updating 57 Bluetooth device 2, 8 buttons media 14 power 20 volume - Compaq Presario CQ56-100 | HP Notebook Reference Guide - Windows 7 - Page 73
set in Setup Utility 50 set in Windows 50 PC Cards configuring 30 description 30 inserting 30 removing 32 removing insert 31 software and drivers 30 supported types 30 ports DisplayPort 17 expansion 39 external monitor 16 HDMI 17 VGA 16 power battery 23 conserving 26 options 20 power button - Compaq Presario CQ56-100 | HP Notebook Reference Guide - Windows 7 - Page 74
Hard Drive Protection 43 HP SkyRoom 16 HP Wireless Assistant 4 Standby 20 storing a battery 26 switch, power 20 switchable graphics 28 system information, displaying 56 T temperature 26 testing an AC adapter 28 traveling with the computer 26, 59 tray-load optical drive 45 troubleshooting - Compaq Presario CQ56-100 | HP Notebook Reference Guide - Windows 7 - Page 75
-
 1
1 -
 2
2 -
 3
3 -
 4
4 -
 5
5 -
 6
6 -
 7
7 -
8
-
9
-
10
-
11
-
12
-
13
-
14
-
15
-
16
-
17
-
18
-
19
-
20
-
21
-
22
-
23
-
24
-
25
-
26
-
27
-
28
-
29
-
30
-
31
-
32
-
33
-
34
-
35
-
36
-
37
-
38
-
39
-
40
-
41
-
42
-
43
-
44
-
45
-
46
-
47
-
48
-
49
-
50
-
51
-
52
-
53
-
54
-
55
-
56
-
57
-
58
-
59
-
60
-
61
-
62
-
63
-
64
-
65
-
66
-
67
-
68
-
69
-
70
-
71
-
72
-
73
-
74
-
75
 |
 |

HP Notebook
Reference Guide