Craftsman 11726 Operation Manual - Page 12
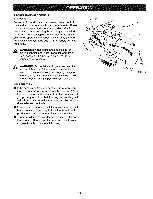
USINGTHEDUSTCOLLECTIONBAG, systemforthesander., coulddamage, thetoolandleadtoseriouspersonal, injury
 |
View all Craftsman 11726 manuals
Add to My Manuals
Save this manual to your list of manuals |
Page 12 highlights
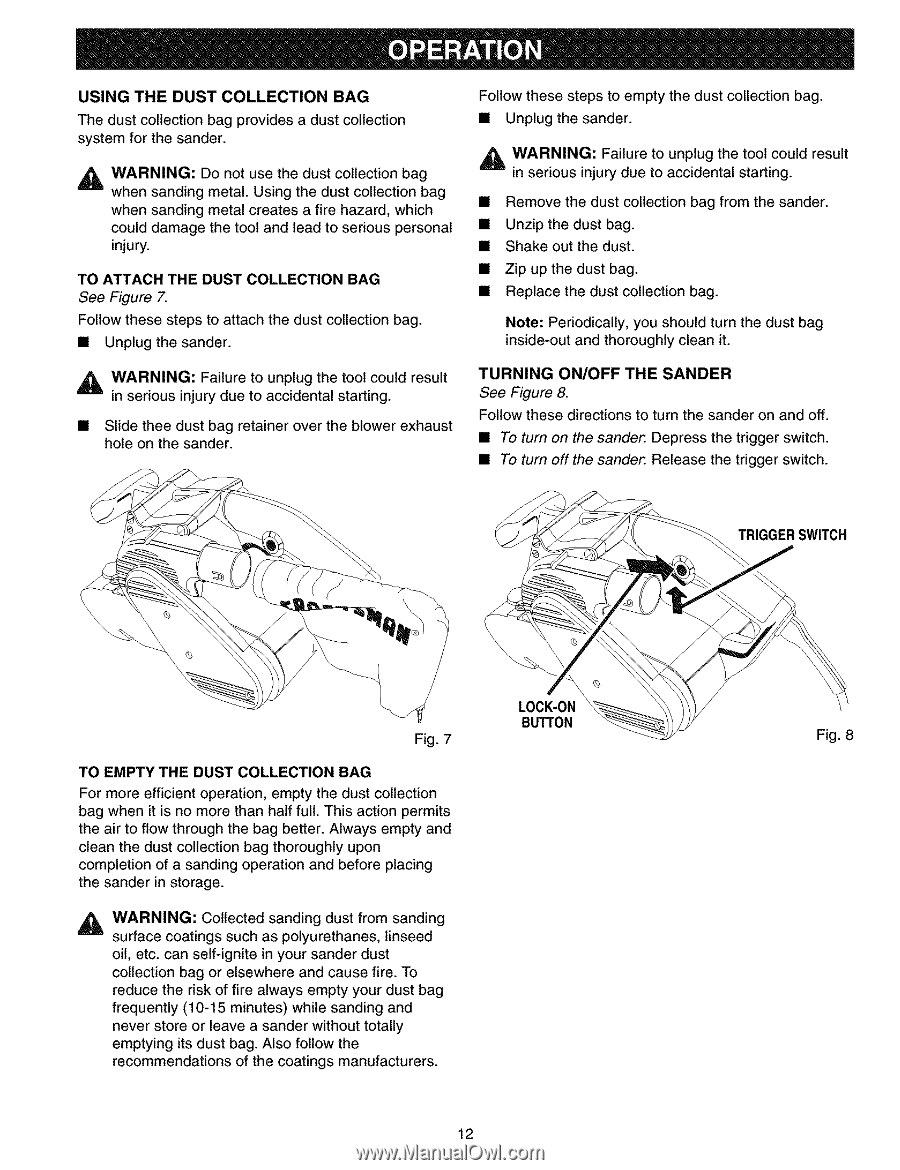
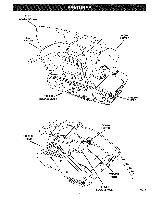
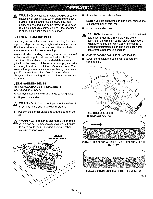
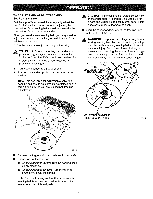
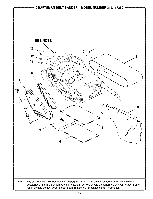
USINGTHE DUSTCOLLECTIONBAG Thedustcollectionbagprovidesa dustcollection systemforthesander. Follow these steps to empty the dust collection bag. • Unplug the sander. _k WARNING: Failure to unplug the tool could result _lt WwhAeRnsNaInNdGin"Dgmoentoatlu.Usseitnhgethdeudstucsotclleoclletioctnbioanbgag whensandingmetalcreatesa firehazard,which in serious injury due to accidental starting. • Remove the dust collection bag from the sander. coulddamagethetoolandleadto seriouspersonal • Unzip the dust bag. injury. • Shake out the dust. TO ATTACH THE DUST COLLECTION BAG See Figure 7. • Zip up the dust bag. • Replace the dust collection bag. Follow these steps to attach the dust collection bag. • Unplug the sander. Note: Periodically, you should turn the dust bag inside-out and thoroughly clean it. _ WARNING: Failure to unplug the tool could result in serious injury due to accidental starting. • Slide thee dust bag retainer over the blower exhaust hole on the sander. TURNING ON/OFF THE SANDER See Figure 8. Follow these directions to turn the sander on and off. • To turn on the sander. Depress the trigger switch. • To turn off the sander. Release the trigger switch. \ \ \ \ TO EMPTY THE DUST COLLECTION BAG For more efficient operation, empty the dust collection bag when it is no more than half full. This action permits the air to flow through the bag better. Always empty and clean the dust collection bag thoroughly upon completion of a sanding operation and before placing the sander in storage. _1 WARNING: Collected sanding dust from sanding surface coatings such as polyurethanes, linseed oil, etc. can self-ignite in your sander dust collection bag or elsewhere and cause fire. To reduce the risk of fire always empty your dust bag frequently (10-15 minutes) while sanding and never store or leave a sander without totally emptying its dust bag. Also follow the recommendations of the coatings manufacturers. LOCK-ON BUTTON 12 TRIGGERSWITCH
-
 1
1 -
2
-
3
-
4
-
5
-
6
-
 7
7 -
 8
8 -
 9
9 -
 10
10 -
 11
11 -
 12
12 -
 13
13 -
 14
14 -
 15
15 -
 16
16 -
 17
17 -
18
 |
 |