Craftsman 17550 Operation Manual - Page 22
theblade.Tighten
 |
View all Craftsman 17550 manuals
Add to My Manuals
Save this manual to your list of manuals |
Page 22 highlights
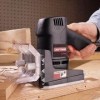
• Lifttheadjustmenrtodawayfromthe bearingplate andremovetherearbase. • Withfrontandrearbaseassembliersemovedp, lace thetoolupsidedownona workbenchandcleanwood particlesandresinfrombearingplateandsurrounding areas. NOTEA: lsocleanthe blade,bladewasherse, tc. • Replacethe rearbase.Positionthe adjustmenrtodin its properplaceasshowninfigure25. • Securethe rearbaseinplacewiththetwo springs. Hookoneendof eachspringinthenotchoneachside of therearbase.Usingneedlenosepliers,stretcheach springandhookit overthetabsonthebearingplate. • Reassembtlehefrontbase.Replacethescrewsand tightensecurely. • Reinstatlhl eblade.Tightenthe bladescrewsecurely. • Reassembtlehebottomshoe.Tightenthefourscrews securely. (ES) TAB(S) REARBASE BEARINGPLATE SPRING(S) Fig. 28 A CAUTION: Blade tips are sharp. Be careful not to cut yourself when cleaning. Clean wood particles and resin from slots and surrounding areas on front and rear base. Apply a thin coat of general purpose grease in slots or on bearing plate where the base slides. REAR BASESLOT ADJUSTMENT ROD REAR BASESLOT FRONTBASESLOTS Fig. 29 22
-
 1
1 -
2
-
3
-
4
-
5
-
6
-
7
-
8
-
9
-
10
-
11
-
12
-
13
-
14
-
15
-
16
-
 17
17 -
 18
18 -
 19
19 -
 20
20 -
 21
21 -
 22
22 -
 23
23 -
 24
24 -
 25
25 -
 26
26
 |
 |
