Craftsman 28790 Operation Manual - Page 9
Drive the Unit
 |
View all Craftsman 28790 manuals
Add to My Manuals
Save this manual to your list of manuals |
Page 9 highlights
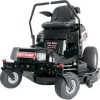
Remove the Packaging Materials Remove the cardboard from the crate. Remove any steel branding securing the unit to the crate. Locate the manual packet. Read the Operator's Manual Locate the operator's manual in the manual packet. You should always read and follow the instructions in the operator's manual. Proper care, performance tips, and safety information are located in this important document. Check the Tire Pressure Reduce the tire pressures to the pressures shown below. Tires are overinflated for shipping purposes and must be set to the correct pressures for optimum traction. RearTire Pressure: 10-12 PSI Front Tire Pressure: 18-20 PSI Check Engine Oil Level Fill-Up with FRESH Gasoline Lift the seat deck to access the Remove the fuel tank cap and fill ftuheel tcaanpk awnitdh tfarenskh. fuel. After fueling, securely install the cap and wipe up any fuel that may have spilled. See the Operator's Manual for fuel recommendations. The single most common service issue is stale or contaminated fuel! Fuel should not be more than 30 days old. Use fuel stabilizer to extend the life of your fuel, and always store fuel in an approved, sealed, plastic gas can. Stale fuel clean-out is not covered under your warranty. Fuel Tank Capacity: 3 Gallons (11.36L) Start the Engine and Drive the Unit Off the Crate Refer to the STARTING THE ENGINE and DRIVING PRACTICE sections of this manual for information on starting the unit and driving it off the crate. 10W-30 premium engine oil if oil level is _ Nloowt.e:SEenegiMneAINisTsEhNipApNeCd Ewitfhorocilo. mApdledte engine oil specifications and maintenance requirements. Lift the seat deck (Figure 12) to access the engine compartment. Clean the area around the dip stick/oil fill tube. Remove the dip stick from the oil fill tube and wipe the dip stick with a clean rag. Insert the dip stick into the oil fill tube (thread in or push down completely). Remove and check the engine oil level. Oil level should be between Full and Add marks. If necessary, add oil to the oil fill tube. Replace and fully secure the dip stick. Charge the Battery Lift the seat deck to access the battery. If the unit is being put into service after the month and year indicated on the battery date tag (located on top of battery) charge the battery for one hour at 6-10 amps. Refer to the SERVICE & ADJUSTMENTS section of this manual for battery charging information.
-
 1
1 -
2
-
3
-
 4
4 -
 5
5 -
 6
6 -
 7
7 -
 8
8 -
 9
9 -
 10
10 -
 11
11 -
 12
12 -
 13
13 -
 14
14 -
15
-
16
-
17
-
18
-
19
-
20
-
21
-
22
-
23
-
24
-
25
-
26
-
27
-
28
-
29
-
30
-
31
-
32
-
33
-
34
-
35
-
36
-
37
-
38
-
39
-
40
-
41
-
42
-
43
-
44
-
45
-
46
-
47
-
48
-
49
-
50
-
51
-
52
-
53
-
54
-
55
-
56
-
57
-
58
-
59
-
60
-
61
-
62
-
63
-
64
-
65
-
66
-
67
-
68
-
69
-
70
-
71
-
72
-
73
-
74
-
75
-
76
-
77
-
78
-
79
-
80
-
81
-
82
-
83
-
84
-
85
-
86
-
87
-
88
-
89
-
90
-
91
-
92
-
93
-
94
-
95
-
96
-
97
-
98
-
99
-
100
-
101
-
102
-
103
-
104
-
105
 |
 |