Craftsman 79481 Operation Manual - Page 6
CARTON, CONTENTS, Check, carton, contents, against, thefol, lowing, list.
 |
View all Craftsman 79481 manuals
Add to My Manuals
Save this manual to your list of manuals |
Page 6 highlights
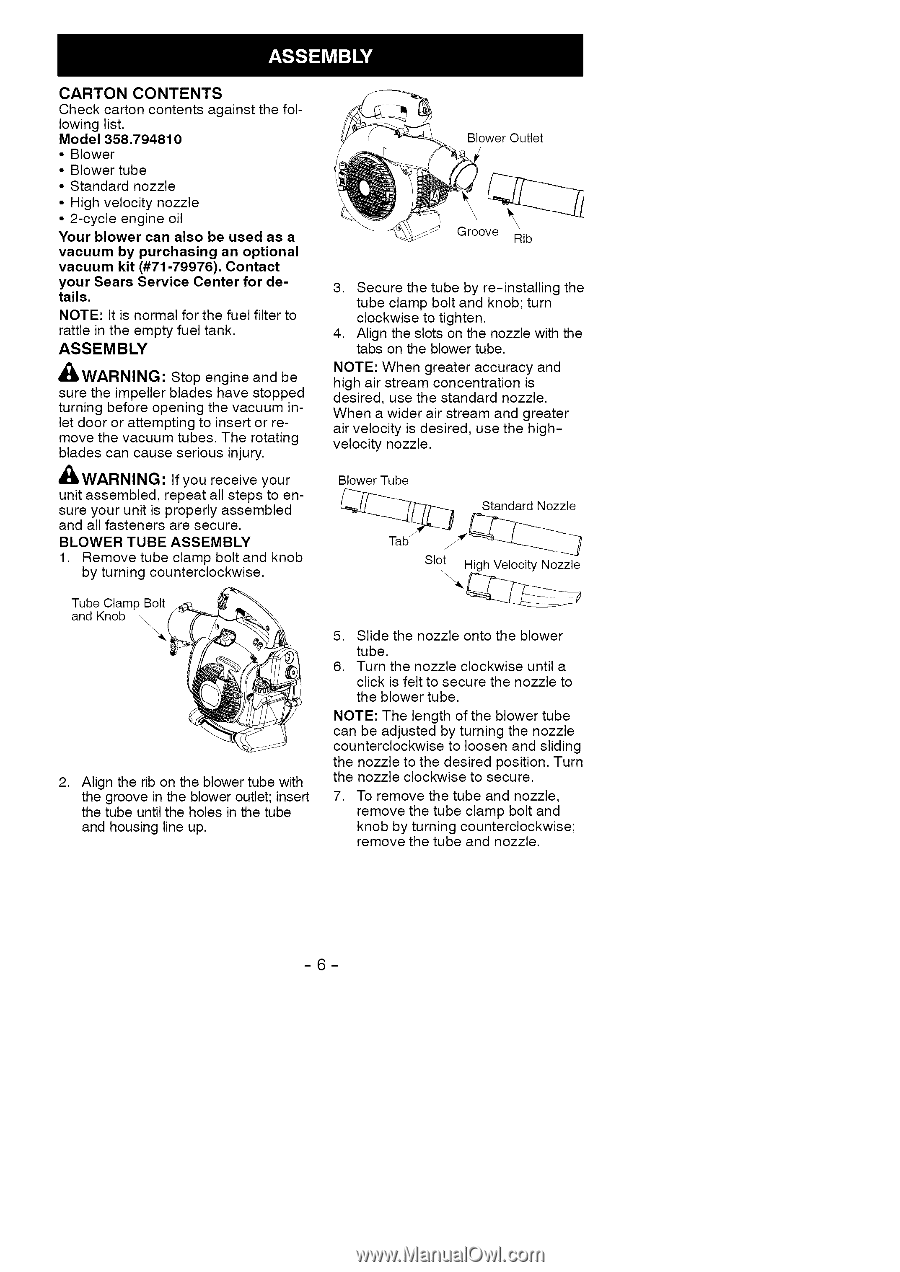
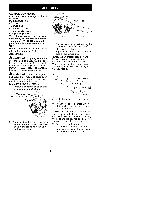
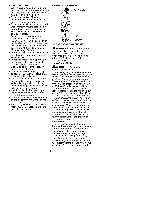
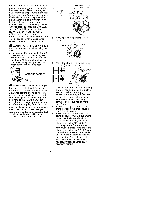
CARTONCONTENTS Checckartocnontenatsgaintshtefollowinlgist. Model 358,794810 • Blower • Blower tube • Standard nozzle • High velocity nozzle • 2-cycle engine oil Your blower can also be used as a vacuum by purchasing an optional vacuum kit (#71-79976), Contact your Sears Service Center for details. NOTE: It is normal for the fuel filter to rattle in the empty fuel tank. ASSEMBLY _WARNING: Stop engine and be sure the impeller blades have stopped turning before opening the vacuum inlet door or attempting to insert or re- move the vacuum tubes. The rotating blades can cause serious injury. ,l_ WARNING: If you receive your unit assembled, repeat all steps to ensure your unit is properly assembled and all fasteners are secure. BLOWER TUBE ASSEMBLY 1. Remove tube clamp bolt and knob by turning counterclockwise. Blower Outlet Groove Rib 3. Secure the tube by re-installing the tube clamp bolt and knob; turn clockwise to tighten. 4. Align the slots on the nozzle with the tabs on the blower tube. NOTE: When greater accuracy and high air stream concentration is desired, use the standard nozzle. When a wider air stream and greater air velocity is desired, use the highvelocity nozzle. Blower Tube _--_- -"_ f_, Standard Nozzle Slot. High Velocity Nozzle Tube Clamp Bolt and Knob \ / _ %_ 2, Align the rib on the blower tube with the groove in the blower outlet; insert the tube until the holes in the tube and housing line up. 5. Slide the nozzle onto the blower tube. 6. Turn the nozzle clockwise until a click is felt to secure the nozzle to the blower tube. NOTE: The length of the blower tube can be adjusted by turning the nozzle counterclockwise to loosen and sliding the nozzle to the desired position. Turn the nozzle clockwise to secure. 7. To remove the tube and nozzle, remove the tube clamp bolt and knob by turning counterclockwise; remove the tube and nozzle. -6-
-
 1
1 -
 2
2 -
 3
3 -
 4
4 -
 5
5 -
 6
6 -
 7
7 -
 8
8 -
 9
9 -
 10
10 -
 11
11 -
 12
12 -
13
-
14
-
15
-
16
-
17
-
18
-
19
-
20
-
21
-
22
-
23
-
24
-
25
-
26
-
27
-
28
-
29
-
30
-
31
-
32
-
33
-
34
-
35
 |
 |