Cub Cadet SC300B Operation Manual - Page 11
Attaching Side Discharge Chute or Side
 |
View all Cub Cadet SC300B manuals
Add to My Manuals
Save this manual to your list of manuals |
Page 11 highlights
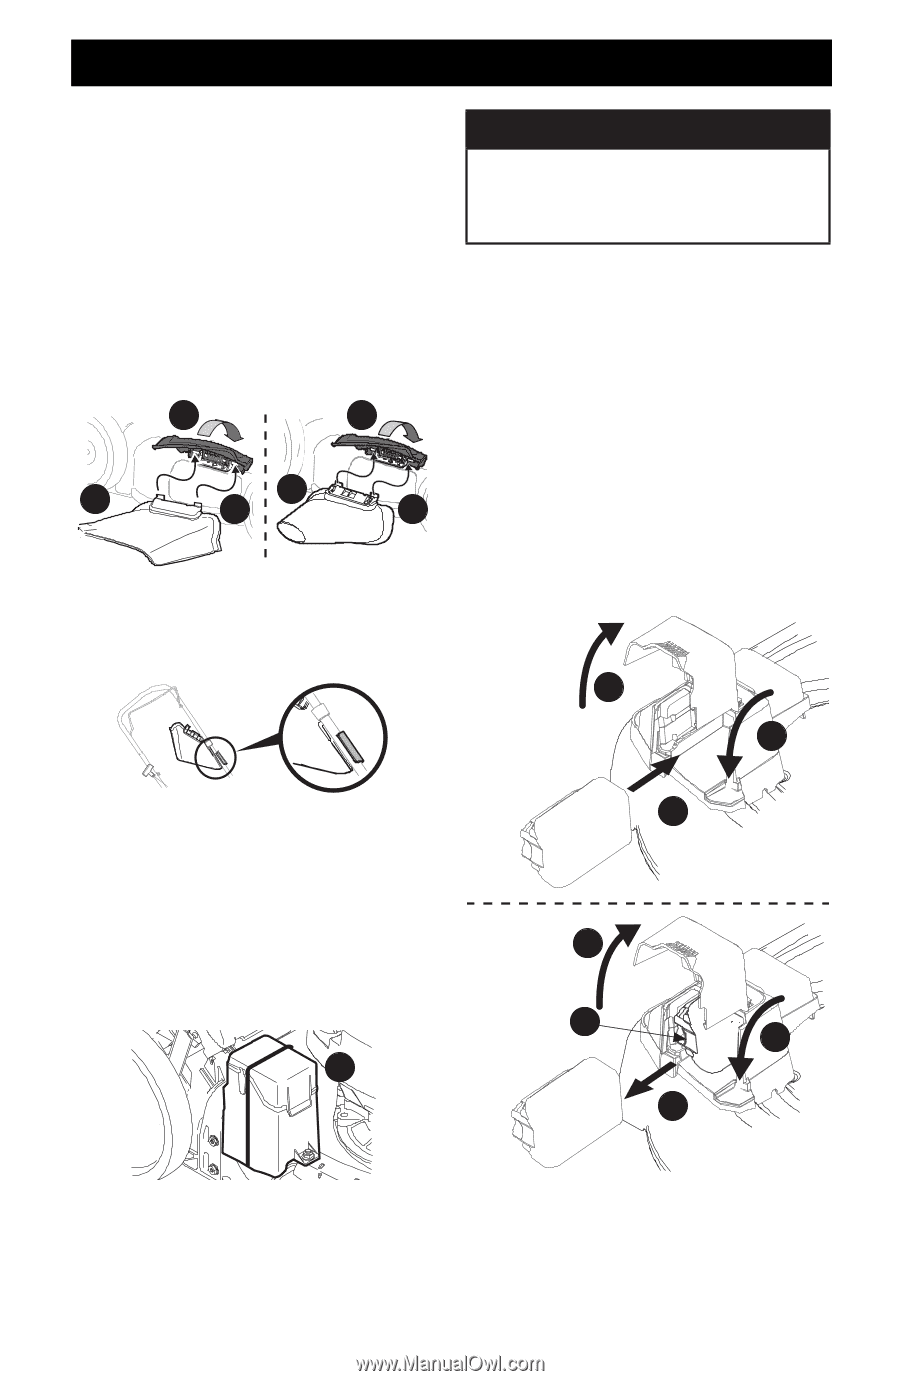
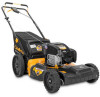
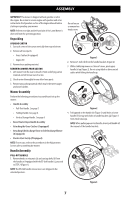
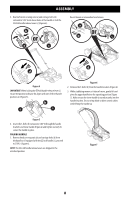
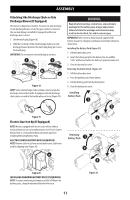
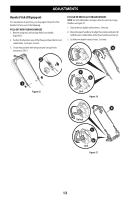
ASSEMBLY Attaching Side Discharge Chute or Side Discharge Blower (If Equipped) The mower is shipped as a mulcher. To convert to side discharge or side discharge blower, ensure the grass catcher is removed, the rear mulch plug is installed (if equipped) and the rear discharge door is closed. 1. Lift the mulch plug (Figure 18). 2. Slide the two hooks of the side discharge chute (a) or side discharge blower (b) under the mulch plug hinge pin. Lower the mulch plug. IMPORTANT: Do not remove side mulch plug at any time. 1 1 a b 2 2 Figure 18 NOTE: Some side discharge chutes include a clip to secure the discharge chute to the handle. If equipped, the side discharge chute can be secured to the handle when not in use (Figure 19). WARNING Read all safety warnings, instructions, and cautionary markings for the battery pack, charger and product. Failure to follow the warnings and instructions may result in electric shock, fire and/or serious injury. IMPORTANT: Refer to instructional manual supplied with battery charger for charging, maintenance and battery disposal instructions. Installing The Battery Pack (Figure 21): 1. Lift the battery box cover. 2. Insert the battery pack into the battery box. An audible "click" will be heard when the battery is properly connected. 3. Close the battery box cover. Removing The Battery Pack (Figure 21): 1. Lift the battery box cover. 2. Press the battery pack release button. 3. Pull the battery pack from the battery box. 4. Close the battery box cover. Installing Battery Pack 1 3 Figure 19 2 Electric Start Set-Up (If Equipped) NOTE: Mowers equipped with electric start will use either a lead acid battery in an enclosed battery box (see Electric Starter Battery Box) or a removable lithium ion battery pack (See Installing/Removing Battery Pack). ELECTRIC STARTER BATTERY BOX (IF EQUIPPED) Removing Battery Pack 1 NOTE: Remove cable tie (a) from around battery box. Cable tie is used for shipping only (Figure 20). 2 4 a 3 Figure 20 INSTALLING/REMOVING BATTERY PACK (IF EQUIPPED) NOTE: To ensure maximum performance and life of lithium-ion battery packs, charge the battery fully before first use. 11 Figure 21
-
 1
1 -
2
-
3
-
4
-
5
-
 6
6 -
 7
7 -
 8
8 -
 9
9 -
 10
10 -
 11
11 -
 12
12 -
 13
13 -
 14
14 -
 15
15 -
 16
16 -
17
-
18
-
19
-
20
-
21
-
22
-
23
-
24
-
25
-
26
-
27
-
28
-
29
-
30
-
31
-
32
-
33
-
34
-
35
-
36
-
37
-
38
-
39
-
40
-
41
-
42
-
43
-
44
-
45
-
46
-
47
-
48
-
49
-
50
-
51
-
52
-
53
-
54
-
55
-
56
-
57
-
58
-
59
-
60
-
61
-
62
-
63
-
64
-
65
-
66
-
67
-
68
-
69
-
70
-
71
-
72
 |
 |