Cub Cadet XT1 LT42e Operation Manual - Page 7
Assembly
 |
View all Cub Cadet XT1 LT42e manuals
Add to My Manuals
Save this manual to your list of manuals |
Page 7 highlights
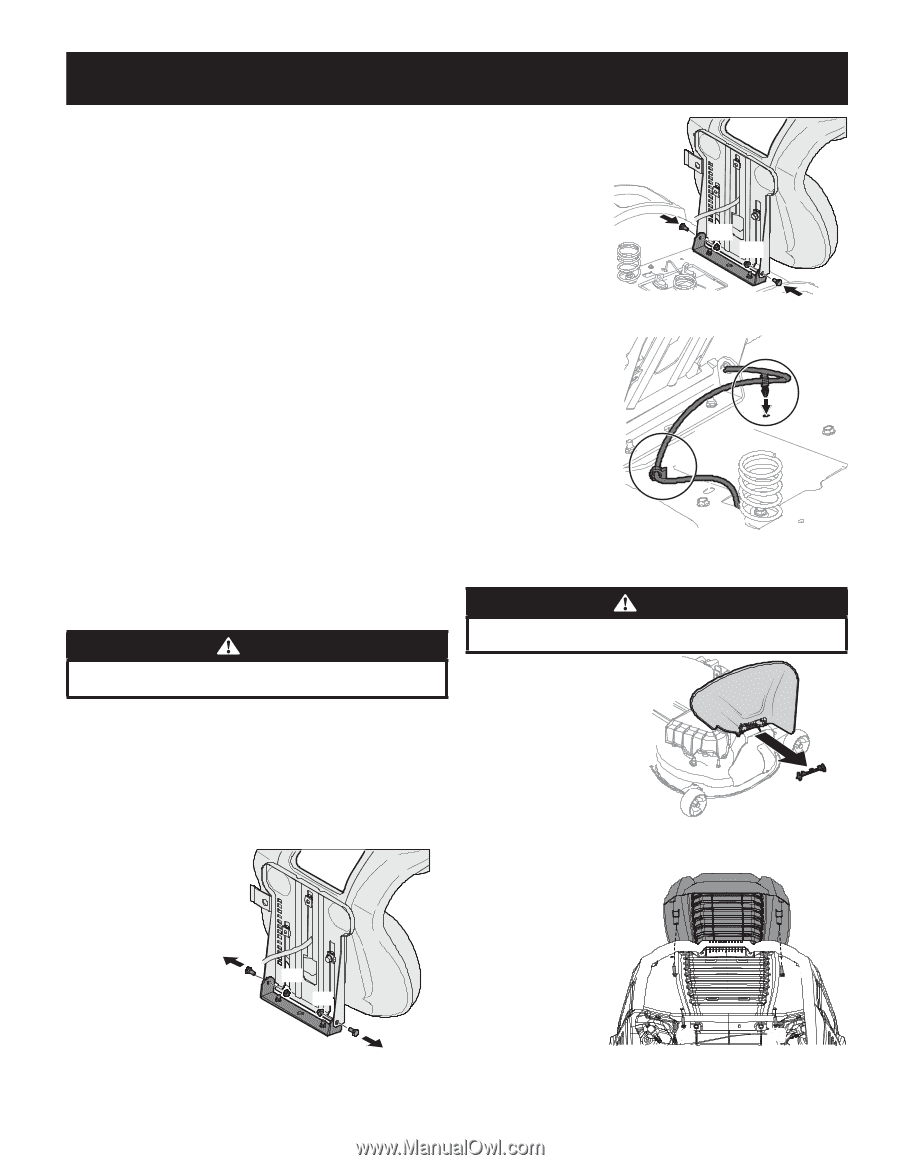
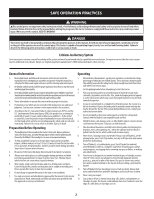
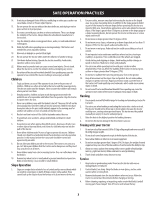
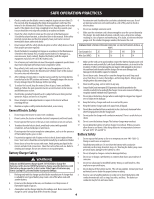
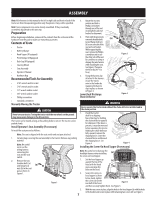
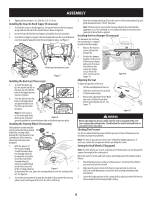
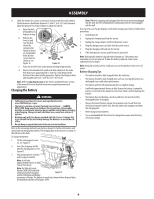
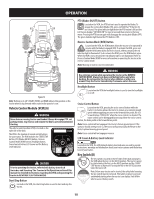
ASSEMBLY Note: All references in this manual to the left or right side and front or back of the tractor are from the operating position only. Exceptions, if any, will be specified. Note: Some components may come already assembled. If they are already assembled, skip ahead to the next step. Preparation 3. Rotate the seat into position and slide a Phillips screwdriver through one of the seatsecuring holes and seat bracket for alignment. Before beginning installation, remove all the contents from the crate and all the hardware from the pack to make sure everything is present. Contents of Crate • Tractor • Battery Charger • Hood Topper (If Equipped) • Front Bumper (If Equipped) • Dash Cap (If Equipped) • Steering Wheel • Seat Assembly • Operator's Manual 4. Then with the previously removed shoulder bolts (a) (a) and flange lock nuts (b) secure one side of the seat and seat bracket. While supporting the seat, remove the Phillips screwdriver and secure the other side of the seat. Be careful not to crimp or damage the wire harness while installing the seat. See Figure 2. Torque to 84-103 in-lbs (9.5-11.6 N-m). (b) (b) (a) Figure 2 • Hardware Bag Recommended Tools for Assembly • 5/16" wrench and/or socket • 7/16" wrench and/or socket • 1/2" wrench and/or socket • 5/8" wrench and/or socket • Phillips screwdriver 5. Using the harness clip attached to the harness, secure the excess wire to the fender by snapping the harness clips in place as shown in Figure 3. Lower Deck Discharge Chute Deflector Figure 3 • Standard screwdriver Manually Moving the Tractor CAUTION Never tow your tractor. Towing the tractor with the rear wheels on the ground may cause severe damage to the drive motors. The tractor can be moved as long as the parking brake is not set. The tractor can be pushed slowly. Install Operator's Seat Assembly (If necessary) To install the seat proceed as follows: Note: The seat is shipped with the seat switch and seat pan attached. 1. Cut any straps securing the seat assembly to the tractor. Remove any packing material. Note: Be careful not to cut the wiring harness connecting the seat and the seat switch. 2. Remove the two shoulder bolts (a) and flange lock (a) nuts (b) in the seat pan as shown in Figure 1. (b) (b) (a) Figure 1 WARNING Never operate the tractor deck without the chute deflector installed and in the down position. 1. Check the tractor deck for a shipping brace that may be holding the chute deflector upward for shipment. If the brace is present, it must be removed before operating the tractor. Holding the chute deflector fully upward, remove the shipping brace. Lower the chute deflector and discard the shipping brace. See Figure 4. Figure 4 Installing the Screw-On Hood Topper (If necessary) Note: Be careful not to damage the headlight harness when installing (a) the screw-on hood topper. 1. Set the hood topper up (c) against the top of the hood with the hood open, and align the (b) holes on the hood. 2. Secure the screw-on hood topper (a) from below, hand-tighten (d) the screws (b) on the rear half of the hood Figure 5 and then securely tighten them. See Figure 5. (b) (d) 3. With the rear screws in place, align the holes in the hood topper (a) with the holes in the hood (c) and secure in place with remaining two screws (d). See Figure 5. 7
-
 1
1 -
 2
2 -
 3
3 -
 4
4 -
 5
5 -
 6
6 -
 7
7 -
 8
8 -
 9
9 -
 10
10 -
 11
11 -
 12
12 -
13
-
14
-
15
-
16
-
17
-
18
-
19
-
20
-
21
-
22
-
23
-
24
-
25
-
26
-
27
-
28
-
29
-
30
-
31
-
32
-
33
-
34
-
35
-
36
 |
 |