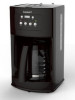
Cuisinart DCC-500 Instruction Manual - Page 7
Programming Your, Coffeemaker
 |
View all Cuisinart DCC-500 manuals
Add to My Manuals
Save this manual to your list of manuals |
Page 7 highlights
BEFORE BREWING YOUR FIRST POT OF COFFEE We recommend flushing out the system before brewing your first pot of coffee. Simply fill the reservoir and power on the unit, following steps #2, #4 and #6 in BREWING COFFEE instructions on the next page. DO NOT ADD COFFEE! Once you've done that, brew a pot of real coffee and get ready to enjoy Cuisinart at its best! PROGRAMMING YOUR COFFEEmAKER To Set the Time Press and hold the Hour or Minute button. The clock will begin flashing. 1. Set Hour: Press and hold the Hour button to scroll through numbers quickly. When desired number approaches, press and release the button to advance one digit at a time. NOTE: When the number count passes 12, PM will be displayed on the LCD. Be sure the PM indicator is on if a PM time is desired. 2. Set Minutes: Press and hold the Minute button to scroll through numbers quickly. When desired number approaches, press and release the button to advance one digit at a time. To finish setting time, simply wait until the numbers stop flashing. To Program the Auto On TIME (brew start time) 1. Press and hold the PROG button until clock begins to flash. 2. Set the time you want coffee to begin brewing by using the Minute and Hour buttons. Follow the same instructions you used to set the time of day, in the To Set the Time section. 3. Once desired Auto On time is set, Auto On setting mode will be exited automatically. 4. To activate Auto On mode press the PROG button and release. The green indicator light will come on to remind you that the programming function is in use. At the programmed time, the green indicator light will trun off and the red indicating light will turn on, indicating that the brew cycle is starting. The red light will go off when keep Warm cycle ends. NOTE: To reactivate the Auto On feature to start brew cycle at the same time another day, simply press the PROG button and release. The green Auto On light will illuminate. To Program the Variable Auto Off TIME 1. Press and hold the Auto Off button until clock begins to flash. 2. Program the coffeemaker to shut off from zero to four hours after brew cycle is finished by using the Hour and Minute buttons (see To Set the Time). 3. Once Auto Off time is set, Auto Off mode will be exited automatically. 1-4 Cup Setting The 1-4 cup setting button is used when you make small amounts of coffee. The 1-4 cup setting double-heats the water, making your smaller amount piping hot. 1. When making a smaller amount, press the 1-4 button on the control panel after turning on the unit. The indicator will light when selected. Power Loss Back-up System One-minute protection in case a breaker trips, the unit is unplugged, or the power fails. It holds all programmed information, including time of day, auto on time and auto off time. 7
-
 1
1 -
 2
2 -
 3
3 -
 4
4 -
 5
5 -
 6
6 -
 7
7 -
 8
8 -
 9
9 -
 10
10 -
 11
11 -
 12
12 -
13
 |
 |
